If you’re anything like me, you’d rather go without fruit all winter than eat the bland versions in grocery stores. There is nothing like fresh, local, warm-from-the-sun fruits. Raspberries have become a treasured part of my garden. If you’re like me, you’ll want to ensure they return each year by getting them ready for the winter.
Raspberries are one of my all-time favorite fruits to eat. Whether making homemade jams or adding them to my morning yogurt and granola, I always want raspberries around! That’s why this past year, we added 30 bare-root raspberry canes to our small-scale vegetable farm.
Winter is knocking at the door, so it’s time to prepare your raspberry bushes for the off-season. Prep your beloved raspberries for winter following these seven easy steps.
Step 1: Weed the Area Thoroughly
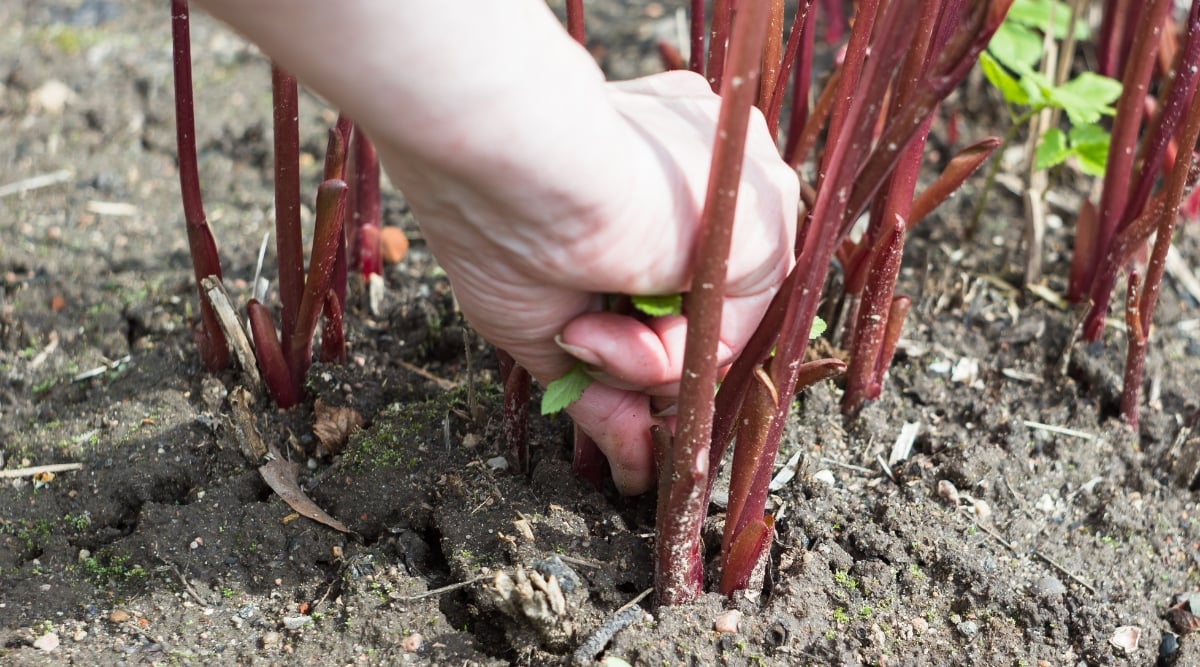 Controlling weeds in raspberry beds is crucial for plant health and pest prevention.
Weeds will viciously compete with raspberries, especially if they’re deep-rooted, perennial weeds, so clear the bed often and fully of any sign of weeds.
If the land was a grassy area before you planted your raspberries, you’ll likely have to weed several times a year to keep them under control. Consider using landscape fabric or tarping the area if weed pressure is high. Remember that new canes will pop through at their leisure, so this shouldn’t be used as a permanent solution to weeds.
Keeping weeds down should also decrease pest and disease pressure the following year, as pests, bacteria, and fungi may overwinter in the debris. Clear all weed debris from the area before winter.
Step 2: Water Consistently Up Until Frost
 Water raspberries regularly and deeply, especially during establishment and fruiting.
Water raspberries with at least two inches of water per week when they’re becoming established and around four inches during fruit development. Their shallow roots can dry out easily in hot and dry spells, and the plants need lots of water to produce juicy fruits.
Don’t stop the watering when fruiting has stopped. Provide deep and consistent watering until the ground freezes. Adding drip irrigation lines to your raspberry patch makes watering a breeze. Put a water gauge nearby to identify if your plants need irrigation. This will prevent overwatering and underwatering.
It’s important to stop watering in the late fall just before a frost and during the winter because the plants go dormant. Wet conditions can lead to rotting. Your plants will receive enough water from rain and snow.
Step 3: Thin
 Prune raspberry bushes at the end of the season to maintain 3-4 healthy canes.
When you first planted your raspberry bushes, you likely followed a spacing guide. At the end of each season, you’ll notice that your raspberries have not stayed within the constraints of that guide, and your patch may be a bit unruly.
In the fall, thin your raspberry area back to its original area, removing spindly, displaced, or weak canes. Cut back excess canes. For those that are coming up in the wrong location or spreading, pull them completely out of the ground, roots and all, but be sure not to damage the root system of canes you intend to keep.
At the end of your thinning session, each root ball or plant should have three to four healthy canes, and they should be spaced 18-24 inches apart. This way, your raspberries enter winter and emerge in spring with the strongest canes possible.
Pro tip: Carefully dig out any healthy canes you don’t want to keep, including the root system, and divide and pot them up with some fresh potting soil and a little fertilizer. Bring them indoors or store them in a garage or basement, and gift them to a friend or family member in the spring!
Step 4: Remove Old Canes
 Pruning raspberries is necessary to prevent them from spreading uncontrollably.
Like most other fruits in the bramble family, raspberries need to be pruned, or they will take over. Raspberries send up new canes every year, so they can get out of control quite fast if left alone.
Old canes that are no longer viable will be brittle, cracking on the outside, dry on the inside, and may even have more of a gray tint. They’ll snap in your hands without much effort. Once cut back, use the dry wood as kindling.
If this is your first year with raspberry bushes, you shouldn’t have any old canes to remove. However, refer to the information below about different types of raspberries to ensure you’re not removing canes that may be fruit-bearing in the following season.
Step 5: Cut Canes Back
 Prune primocane raspberries in the fall to redirect their energy to the overwintering roots.
Now that you’ve removed old canes and those that were out of the designated raspberry growing area, it’s time to prune back any primocanes you intend to keep for next year. Cutting them back sends a signal to the plant to stop sending energy to the above-ground part of the plant on fruiting and greenery and instead send energy down into the root system. Floricane varieties should be limited to cutting back only the old wood; do not prune the new growth from that year.
If you trellis your raspberry plants, cut back the canes to just above the trellising lines so you can continue to use this support system over the winter. Trellising may promote healthy air circulation and enhance light penetration. Otherwise, you can cut them back to just 8-10 inches above the soil surface, or about the size the canes would have been sticking out of the ground when you planted bare-root plants.
Pro tip: Wear thick gloves during pruning to protect your hands from thorns!
Primocane vs Floricane Varieties
 Primocane raspberries fruit on new wood annually, while floricane raspberries fruit on last year’s growth.
Primocane raspberries:
- Are also referred to as ever-bearing or fall-bearing
- Bloom on new wood every year
- Should be cut back all the way every fall
Floricane raspberries:
- Also referred to as summer-bearing
- Bloom on the previous year’s wood
- Only canes that have fruited this year should be cut back. Next year’s fruit will come from year-old wood.
There are different varieties of each type of raspberry. Your choice depends on your growing zone, the type of effort you’d like to put into pruning them, and what you’ll use their fruits for.
In many cases, primocane raspberries are easier to maintain and faster to produce fruit. Most raspberry breeders produce many more primocane varieties as a result. However, floricane varieties can be consistently heavy producers once fully established, particularly starting in their third year of production; these varieties are great for farm production but can be slow to start for home growers.
Step 6: Protect Against Critters
 Protect raspberry bushes from deer and rabbits to prevent recurring visits.
Deer and rabbits love raspberries, so it’s important to protect your bushes against them. Once they know where they are, they’ll likely keep coming back. Here are some options to keep them away over the winter and in seasons to come.
This seems like the most logical and obvious thing to do. However, it’s not logistically possible for many gardeners due to space or financial constraints. Check online sales boards or garage sales for used fencing in your area. Deer are very smart creatures, and some will jump over fencing if not done properly. Speak with a fencing expert so you don’t waste time, energy, and money on something that won’t ultimately get you the results you’re looking for.
Pro tip: Having two different depths of fencing at two different heights will confuse deer. It throws their perception off, and they’ll keep on moving in search of something that requires less work.
This sounds a little weird, but wild animals don’t particularly like to hang out where humans or other animals do. So instead of tossing hair or fur from a brush in the garbage, bury it around your garden or spread it around your raspberry bushes. Hair will obviously blow away in the wind, so doing this every few days or so might be necessary.
This works well for deer, overhead predatory birds, and critters like skunks who come out at night. The shiny effects and shimmery movement the tape creates when blowing in the wind freaks animals out, and they’ll likely keep their distance. Just be sure to hang it in the right locations and follow the instructions on the packaging for the best results. Also, be sure to keep an eye on the integrity of the scare tape; most scare tape is not protected against UV rays and can gradually become brittle during use, so it’s important to replace it before it crumbles.
Cayenne peppers contain the compound capsaicin, which gives it its heat. It’s a natural repellent to many pests and critters and doesn’t have any negative effects on your garden fruits and vegetable plants. Reapply every few days to once a week depending on how long the effect appears to last in your climate, and reapply after rainfall.
This concentrate is fairly inexpensive and has a long shelf life. Put it in plastic containers with holes poked in the lid and place them around your garden or sprinkle a granular version of it around your raspberry patch, according to the application instructions. Wildlife may become more immune to the smell of coyote urine, but it’s always worth a shot.
This may not be a great idea if your gardening area is compact and enclosed. But if your raspberries are far enough away from other parts of your garden, it might work. Add more palatable items to a different area, depending on what the critters are. If birds and squirrels are the culprits, try adding a bird or squirrel feeder far away from the raspberries. If it’s deer, put some fallen apples on a table for them. They’re going to go for whatever is easiest to grab and what they prefer.
It’s important to remember when using this method that it can backfire, too. If your wildlife becomes accustomed to finding food at one part of your property, they may visit more frequently looking for that food – and if you don’t always have food there, they will wander towards the next target of opportunity, your garden.
My mother-in-law Pat swears having a radio playing in her garden saved her crops for many years. Raccoons didn’t go after her corn, her peas were safe from rabbits, and deer didn’t come for her lettuce. A simple AM/FM radio (those are still around, right?!) set to a local station at night should do the trick. Change up the station every few days so it doesn’t become background noise to curious, passing-by critters. The deer in our area don’t care for talk radio or the oldies.
Another Pat technique! Pie tins blowing around in the wind create just enough noise to spook critters and keep them from creeping around in your garden. In sunlight, the pie tins also create flashes of light that can trick animals into thinking something is moving around nearby.
Motion activated lights or sprinklers can deter some garden snackers. For larger animals like deer, a blast of water shot in their direction can spook them away very effectively. Smaller animals like raccoons or rabbits can be deterred by a light turning on, but may become accustomed to that quickly; however, they may not always be large enough to trigger the sprinkler system.
Pot up various mints and alliums and move them in range of your raspberry patch. Deer and some insects are repelled by the smell and taste. Plus, they’ll attract pollinators when they’re in bloom.
Step 7: Mulch
 Mulching is essential for winter preparation and can be done with many natural materials.
Mulching is a crucial step when preparing for the winter. When growing in cold zones, the mulch will help keep in heat and protect the plant’s root system. When growing in warmer zones, the mulch will help retain moisture.
Choose a well-aged manure compost, wood chips, organic straw, clippings from your lawn, mulched leaves, or wood shavings. These are all, in theory, relatively weed-free options that are good for soil fertility and ground cover. However, straw may contain a few seeds of the type of grain it was made from (such as wheat or barley), and lawn clippings may contain grass seeds if it was in flower when it was cut.
Brown cardboard can also be used. Just be sure there are no dyes used, no colored ink, and the tape is removed before putting it in the garden. You should be able to easily secure these from your local grocery store for no charge, or you can save up delivery boxes during the season. You can also combine several of these materials as we do at our farm.
Our mulching method:
- We added two to three inches of aged compost around the base of each plant, about a foot in diameter.
- Then we added mulched leaves that were raked up from various other parts of our farm and mowed, mounding them around and between plants.
- Lastly, we created a walking path on either side of our row of raspberries with heavy woodchips.
Mulching will keep the root systems cozy and help retain moisture while allowing water to drain so the roots can breathe. Plus, when laid down thickly, it will suppress weed seeds from germinating.
Frequently Asked Questions
Save the feeding for early spring when your plant comes out of dormancy. The plant will not need the nutrients during that dormant stage.
Consider doing a late-winter application of compost or organic fertilizer to ensure that the organic materials begin to break down in advance so they provide plant-accessible nutrition at the start of spring.
Using a raised bed system will allow excess water to drain from your garden beds. Improving the soil’s tilth and structure will also assist with drainage, so do soil testing or contact your local extension office agent if you have concerns with your soil structure.
Final Thoughts
Raspberries will be long-living and high-producing if we take good care of them. Maintenance doesn’t stop once they stop fruiting, though, so be sure to prune, mulch, and protect them against critters before winter sets in so you have delicious raspberries for years to come!