Plant propagation, simply put, is to create new plants from already existing plants. Three common methods of propagation are through seeds, cuttings, and division. Some plants are best to propagate in the fall after they have finished blooming and are getting ready to store energy for the winter. Here are nine plants that you can easily propagate in the fall.
Poppies
These flowers typically bloom and produce seed pods during the summer.
- Scientific name: Papaver somniferum
- Method of propagation: Seed
Poppies are one of my favorite little flowers. They grow and bloom and self-seed throughout the garden. Poppies come in many colors, including pink, purple, and even near-black.
They usually bloom and go to seed throughout the summer. To collect the seeds, simply shake out the seed pod left behind after the flower fades. You can hear the tiny black seeds shaking around if they are ready. Pour them into a container. You can distribute these seeds to friends, family, neighbors, and other gardeners or reseed them in other areas of your garden.
Choose a sunny location with well-drained soil. Propagate by scattering the seeds in fall (early spring is ok too). Rake them gently into the soil. Water the seeds well; you will be rewarded with poppies when spring arrives!
Columbine
 Columbines are lovely self-seeding cottage plants that bloom throughout the season.
- Scientific name: Aquilegia vulgaris
- Method of propagation: Seed
Columbines are sweet flowers that pop up through a garden. They make a great cottage plant as they self-seed and bloom throughout the season.
Let them go to seed and self-seed as they please, or collect the seeds and scatter them during fall, much like poppy seeds. The star-shaped seed pods will be full of small black seeds. Scatter them in moist garden soil and stir them in lightly. Do this around six to eight weeks before the first frost date in your area.
If you don’t have columbines in your garden, purchase seeds and direct-sow them outdoors in autumn. It is easier than starting them indoors, in my opinion.
Coleus
 Soft stems are best for rooting, about 6″ long, with most bottom leaves removed.
- Scientific name: Coleus scutellarioides
- Method of propagation: Stem cuttings
I am a coleus fanatic. Coleus has phenomenal combinations of colors and textures. But they are so tender that once a hint of frost hits, they wilt away. That is why I take cuttings during fall to bring indoors.
You can take the entire plant indoors if you have the space. But if they’re in large containers and you’re limited on space (or don’t want to bring in bugs), cuttings are an easy way to propagate your plants.
Soft cuttings will take root the easiest. Look for soft stems as opposed to the big, woody ones. I aim for about 6″ of the soft stem. Snip with a pair of scissors. Then, strip off all the bottom leaves, only leaving a few at the top of the cutting.
Place the cutting into water and set it in a sunny window. Change the water daily to ensure it remains fully aerated and does not become stagnant. Your coleus can grow in the water for quite a while this way, although it will eventually need nutrients that soil is better equipped to provide.
It’s harder to transplant a cutting into the soil if it has grown very large roots in water. If you plan to grow it as a houseplant until next season, get it into the soil as soon as possible. If you have not already coaxed it to root in water and are starting with a new cutting, dip the cut end into rooting hormone, then place it into loose, evenly moist potting soil. Cover it with a dome or clear bag to keep humidity up around the plant until it gets established. The plant will perk back up once it has started to root.
If you take a clipping and leave it in water, and it grows big roots, it’s not a big deal. You can take clippings of the clippings and root those. If you do this four to six weeks before the last frost, you will have new coleus to plant outside in spring. You can still transplant a coleus that’s developed an extensive root system in water, but it’s best to transplant those to soil when their root system is 2″ or smaller.
Rosemary
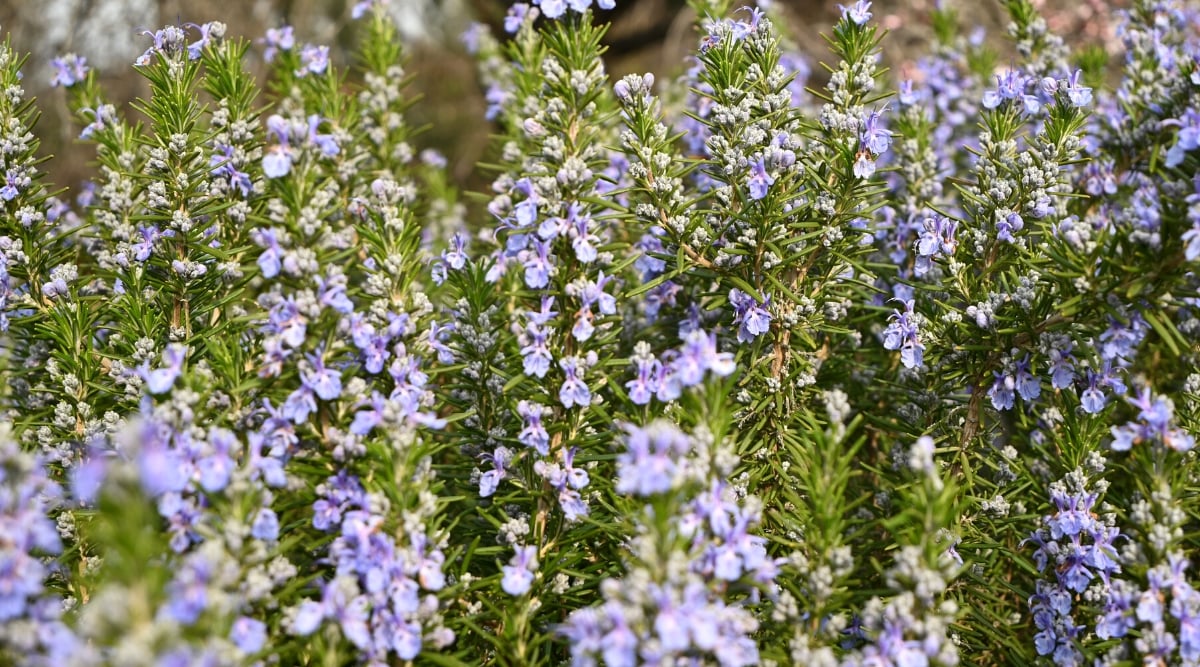 To have fresh rosemary year-round, take soft stem cuttings, strip lower leaves, and dip in rooting hormone if available.
- Scientific name: Salvia rosmarinus
- Method of propagation: Stem cuttings
If you want fresh rosemary year-round, take some cuttings from your established rosemary plant while pruning and root them to create more for the winter. This is a great tip, especially for gardeners who live in a zone too cold for rosemary to thrive during the cold months (zones 7 and under). In these areas, overwinter your plant and replant the rooted cuttings the following spring.
Make sure to select the soft, green stems of the rosemary. Avoid the woody previous year’s growth. With a pair of scissors, cut about 6″ of soft new growth. Strip the bottom leaves off the stem. Dip the stem in rooting hormone (not necessary, but it does help. I recommend getting a small jar if you plant to propagate a lot).
Then, place it into a prepared container filled with loose, moist potting soil. Make sure your container has good drainage so the soil doesn’t turn into mud. Finally, place a bag over the cutting. Check on it every couple of days. After a few weeks, give the stem a very light tug – not hard enough to dislodge it, but just a little pressure. If it doesn’t pull out, it has started to take root. Remove the dome or bag at that time and place it in a sunny window. Keep it moist, but do not over water.
Geraniums
 Easily propagate zonal geraniums from soft new growth cuttings around 6 inches long.
- Scientific name: Pelargonium
- Method of propagation: Stem cuttings
When I say geraniums, I am referring to pelargoniums. These are zonal geraniums that we tend to plant as annuals. They are very easy to propagate and bring indoors or into the greenhouse over the winter.
You can bring the entire plant into the house over the winter, but that takes a lot of space, and there is always a risk of bugs coming in with the plant. The cuttings are small and clean.
Choose the soft new growth to trim, not hard woody stems, for your cuttings. Snip off a piece around 6″ or so. You can place this into water, and it will root from there. But I find if you want to grow the plant in soil eventually, it’s best to get it into the soil as soon as possible. Either straight away or as soon as small new roots start forming.
Dip your cut stem in rooting hormone (it’s not necessary, but good to have if you plan on propagating a lot). Place the cut side into a container with evenly moist potting soil. Then, cover the container with a dome or plastic bag for a quick greenhouse. Check on it every few days to see if it has rooted. If you see new growth or it stays secure when you give it a gentle tug, it is starting to root. Take off the cover and place it in a sunny spot.
Dogwood
 Save money by propagating dogwood from existing plants.
- Scientific name: Cornus sericea
- Method of propagation: Stem cuttings
Trees and shrubs are usually the big ticket items in our gardens. It’s nice to save some money and create new shrubs from existing ones.
Dogwoods are easy to propagate. I accidentally do it almost every year by creating winter planters. I stick dogwood sticks in the center of the pot to add height and color with their glorious red stems. When it’s time to replace my pots with a spring-themed design, I usually have roots developing on some of the dogwood twigs.
If you want to propagate dogwoods deliberately, fall is the perfect time. Take cuttings of first-year growth. These are brightly colored stems that are softer and more flexible than old branches. Clip these off at the base.
From there, I would stick the cut side of the branch into soft, evenly moist soil. I do my winter pots in potting soil, so it works perfectly. But you could plant them directly in the ground. If your propagation succeeds, you will see buds and then leaves the following spring.
Lily of the Valley
 This ground cover is easy to propagate by digging up clumps and planting them elsewhere.
- Scientific name: Convallaria majalis
- Method of propagation: Plant division
Lily of the Valley is very aggressive and toxic to pets and people. But it makes a great ground cover and smells heavenly during spring when it blooms its delicate bells of white flowers. It forms a thick mat that weeds cannot penetrate. In certain areas, it is a great plant to have.
It is also easy to propagate. I never buy this plant. You will always find someone willing to give it away. That being said, plant with caution. It is aggressive and hard to get rid of once it is established.
To propagate, dig up clumps and plant them in a new area. The roots are not deep, so they can easily be lifted with a spade. I will fill the holes I dug with garden soil or compost, and the lily of the valley will fill back in next spring. Then, dig a hole and plant the lily of the valley into it and water it in.
It will come back the next spring, but it will take some time to get established and start filling in. A gardener once told me about sleep, creep, and leap when it comes to a new plant. It sleeps in its first year, meaning it will come up but won’t get too large. In the second year, it starts to creep out a bit and spread. In its third year, it leaps and starts growing and spreading. So be patient.
Allium
 Propagate them in autumn, marking their location if needed.
- Scientific name: Allium
- Method of propagation: Bulb division
Has your allium quit blooming? I am asked about alliums that have stopped blooming all the time. Their once beautiful patches of allium have become stringy masses of foliage with no purple lollipop flower. My first question is always sun. Is it getting enough? Gardens change over time, and a once sunny area might have filled in and become shady. If that is not the case, it usually means it’s time to propagate them.
I wait until the fall to do this. But your allium will usually be long gone by the time fall rolls around. If you know you won’t remember where your allium is, place a marker, like a stick, into the area. In the fall, use a pitchfork to lift the allium bulbs out of the ground gently. You will dig up lots of bulbs.
Plant a few of the larger ones back into the area. The bigger the bulb, the bigger the allium. Then, transplant the small ones into other areas or give them away to other gardeners. Even the small cloves will eventually become full-sized alliums in a few years. Make sure to water them in well before winter.
Iris
 To maintain healthy irises, divide and propagate them in the fall every 3-5 years.
- Scientific name: Iris germanica
- Method of propagation: Plant division
Irises will eventually become a tangled mat and may stop blooming and become stunted if they are not divided and propagated. You will have to do this every 3-5 years.
Fall is the best time to do this to get spring blooms. You will not get much flowering if you wait until spring to divide and transplant. Fall is cooler and won’t stress the plant as much when it’s dug up and divided, and it gives the bulbs time to establish new roots under the soil’s surface.
Using a sharp spade or a pitchfork, gently lift the iris out of the soil. Depending on how crowded and big it is getting, I will take up two-thirds of the original plant. Use your hands or a knife to spit the rhizomes into chunks from there. Each chunk should have some spikey iris foliage on it.
Remove any dry or mushy bits of the rhizome. Then, find a new area to transplant them into. Do not bury the rhizome too deeply, or it will not bloom. Leave it slightly exposed at the soil’s surface but deep enough so it is sturdy in the ground. I will then cut the foliage of the iris in half so the plant can focus on sending energy to the roots. Water your new transplanted iris well.
Final Thoughts
I love garden tasks that can be done in the fall. Spring is such a crazy time with planting and weeding that I struggle to keep up with all the garden chores. But as fall rolls around, the weeds have slowed down and plants need less water and attention. I then focus on other tasks like harvesting and propagating. Creating new plants out of existing ones is a great fall task. It’s a great way to save money and get a head start on next spring’s garden!