

Winter rain, snow, and cold can be rough on the soil, especially if you forgot to mulch or sow cover crops last fall. You may notice your raised beds have sunk an inch or two, and the soil is soggy or compacted from early spring moisture. Rest assured, all your hard work has not gone to waste! Refreshing your raised beds for spring growing is easy and straightforward.
Raised bed rejuvenation is akin to household spring cleaning and early-season tree pruning: It only needs to be done once a year, and just a few hours of work can prevent major headaches later in the season.
Let’s dig into six simple steps to refresh your raised beds for fluffy, rich soil that your vegetables and flowers will love!
Do I Need to Refresh My Raised Beds in the Spring?
Revitalize your garden beds each spring for thriving plant growth.
Most garden beds perform best with an annual soil refresh in the spring. Winter weather can be harsh, and spring maintenance ensures that the beds are ready to be planted with your favorite crops and flowers.
Clearing debris, pulling weeds, adding compost, and aerating the soil are a few easy steps that can tremendously improve raised bed yields later in the year. This will also make it easier to plant your garden and ensure long-term soil health for abundant plant growth.
Why Does Raised Bed Soil Sink?
Sunken soil is an annoying but natural phenomenon that occurs in every raised garden bed. The level lowers because of compaction, particle settling, and organic material decomposition. However, the soil texture and specific maintenance practices can prevent sinking over time.
Preventing Compaction
 Combat soil compaction by regularly adding organic matter and mulch.
If your raised bed soil level seems to get progressively lower, it is likely due to compaction. Compaction is the most common cause of sinking soil and hardened ground. Garden beds sink an average of one to three inches every year, but some beds sink more or less depending on how they are maintained.
A lack of organic matter, high rainfall, and high clay content can cause the soil to compact more quickly. Tilling, plowing, heavy machinery, foot traffic, or otherwise disrupting soil structure are also major forces of downward pressure in growing beds. If you leave your soil bare and exposed to the elements over winter, it is more likely to compact.
Compaction primarily occurs because of the impact of water droplets. It may seem strange that a tiny water droplet could have enough force to push the soil down, but you must consider the overall force of every drop of water that hits the surface throughout the year. Saturation from rain, snow, or overhead irrigation causes the particles to compact together.
Particle Settling
 To counter settling, vary soil particle sizes and add diversity.
Settling is another natural but semi-preventable process that occurs in raised beds. The downward force of gravity pulls particles to settle over time, just like chips or cereal settling at the bottom of a package or cocoa settling at the bottom of your mug. In newly assembled raised beds, soil may settle more noticeably in the first year or two because there isn’t an established structure.
Soil is made up of a variety of differently-sized particles, namely sand, silt, and clay. There can also be large rocks, small gravel, and chunks of organic matter like sticks or manure. All of these particles have different structures and air spaces inside of them, so they settle at different rates. Nonetheless, all particles are subject to the forces of gravity and eventually sink. You may need to fluff them up and add more diverse soil particles to ensure the level of the raised bed stays even over time.
Settling is most common when uniform topsoils are used because all of the particles are the same size, and they gradually fall downward to become closer together. There are no larger particles or clumps to maintain the air spaces between them. This is why it’s important to use a diversity of inputs. For example, you can layer twigs, leaves, straw, and manure at the bottom of your raised bed and only use topsoil and compost for the upper few inches.
Decomposition
 Renew organic matter yearly to counter natural decomposition in beds.
Garden beds also sink because of natural decomposition processes. All of the compost, mulch, grass clippings, manure, straw, and other organic materials added to a bed will eventually break down. This is a good thing, but it can cause the level to look visibly lower.
Decomposition occurs more quickly in microbially-rich soils because beneficial bacteria and fungi are more active. The process of decay is important for making minerals and nutrients available to your plants. However, you may need to replenish the organic matter annually to make up for a loss in soil height as the previous year’s materials are decomposed.
6 Steps to Revitalize Your Raised Beds
Fixing sunken soil can be as simple as adding more soil on top. But if you want to create long-term fertility, resilience, and soil drainage, these steps will help you revitalize garden beds more affordably and efficiently.
Clear the Raised Bed of Weeds and Debris
 Clear weeds and debris thoroughly for a healthy garden start.
Begin by removing any weeds or plant debris from the surface. This includes dead leaves, sticks, twigs, and unwanted green sprouts. Use a hori hori knife or hand trowel to dig up any deep weed roots and remove them before they become too problematic.
Dead plant residues and non-invasive weeds can be taken to the compost pile, but aggressive spreaders like bindweed or quackgrass should go in the trash. If the bed is exceptionally grassy or weedy, you may want to lay a tarp over the top for a couple of weeks to suffocate the unwanted plants.
If you mulch your bed in the fall, you can leave the mulch in place and work around it. You want to be sure your raised beds are thoroughly cleared of weeds so you have a blank slate for new plants to take hold and thrive. Starting off the season with a weedy bed is a bad omen for gardeners. Logistically, it also means that your crops will struggle to get a healthy start because they will have to compete with weeds right away. You may need to shallowly hoe or rake the surface to ensure all newly sprouted weeds are knocked out.
No matter what clearing method you choose, try to clear the bed as much as possible. Layering materials on top of weeds can sometimes smother them, but aggressive perennial weeds often just rise up from beneath. It’s much easier to remove roots, leaves, and debris now than later.
Check for Signs of Decay or Damage
 Inspect and maintain raised beds for structural integrity before planting.
Before you start adding to your raised beds, ensure that they are in good structural condition. Metal raised beds are the most resilient and require the least amount of maintenance. Still, it is worthwhile to quickly walk around the bed, check the hardware and the edges, and ensure that everything is still standing after winter storms.
If you have wooden raised beds, you’ll need to inspect them for signs of rot, decay, or weather damage. This is the ideal time to refinish the exterior wood with a food-grade, non-toxic finishing seal or rot-protectant oil like linseed or tung oil. These natural wood finishes protect the wood from decay without posing any risks to your food crops.
Take note of any broken corners or edges on the bed. You may need to pull out your drill and screws to patch holes or reinforce fallen areas. Structural repairs are easier when there is less soil and plants in the bed. Do not add more materials until you are sure that the bed is in good structural standing. In the worst-case scenario, you may need to disassemble old raised beds, scoop the soil into wheelbarrows, and use it in another area of the garden.
Add a Layer of Compost
 Refresh raised beds with a layer of quality compost annually.
The best organic gardeners and farmers add a healthy layer of compost to their soil every year. Compost is like the frosting on the cake, and it is the most important material for a raised bed refresh in the spring. You can add a one to four-inch thick layer over the top of the bed, depending on how much the soil level sank. If it is exceptionally low, you may add a few inches of garden topsoil first to save money, then finish with a couple inches of compost on top.
It’s important to source the highest quality compost possible or make your own. Ensure the compost is fully aerated, “cooked,” broken down, and has a rich, loamy smell. It should be cool to the touch (do not apply hot compost to your beds!) and properly aged. If the compost spells putrid, rotten, or gross, it is probably not ready. If you see big chunks of undecomposed food scraps or animal manure, the compost is unfinished, and it needs to decay longer.
Dump the compost on the bed and rake or hand-spread it evenly over the surface. Some gardeners like to mix the compost in, but I prefer to leave it on the top. In natural ecosystems like forests or grasslands, the soil has a distinctive O Layer. “O” stands for organic matter.
Leaving the compost on top also provides a welcoming home for new seeds to germinate. Baby plants have an easier time establishing in fluffy, loamy compost. As long as the compost is fully finished, sieved, and well-made, your new round of spring plants will thrive with a generous layer of compost.
Amend with Minerals or Slow-Release Fertilizer
 Spring is prime for soil amending to ensure a thriving garden.
Ideally, you can coordinate your spring refresh with a soil test. A garden soil test is the best way to understand what is happening below the surface. Your soil test report should include soil pH, percent organic matter, and levels of plant nutrients. The Epic Soil Test even generates easy-to-read charts and fertilizer recommendations to make this process a breeze.
Spring is the best time to amend and alleviate any deficiencies. New raised beds may need more amendments, while well-established beds can often go without. If the pH is off, this is an important time to remedy the issue to ensure a successful season.
Most garden vegetables and flowers grow best in neutral or slightly acidic soil with a pH between 6.5 to 7.5. If it is excessively alkaline, you may need to add peat moss or sulfur. If it is too acidic, add limestone to raise the pH. Soil pH takes time to adjust, so it’s important to do this as early as possible.
For mineral deficiencies, it’s best to amend with quality amendments like Azomite. Trace mineral powders come from ashes, rock dust, and remnants of ancient volcanoes. They include a diversity of minerals that will slowly be released over time with the help of microorganisms.
Unlike fertilizers, you do not have to add these amendments every year. Instead, check your annual soil test to see if anything is missing. Mineralizing powders can be blended into the upper layers of soil by hand, and soil microbes will take care of the rest.
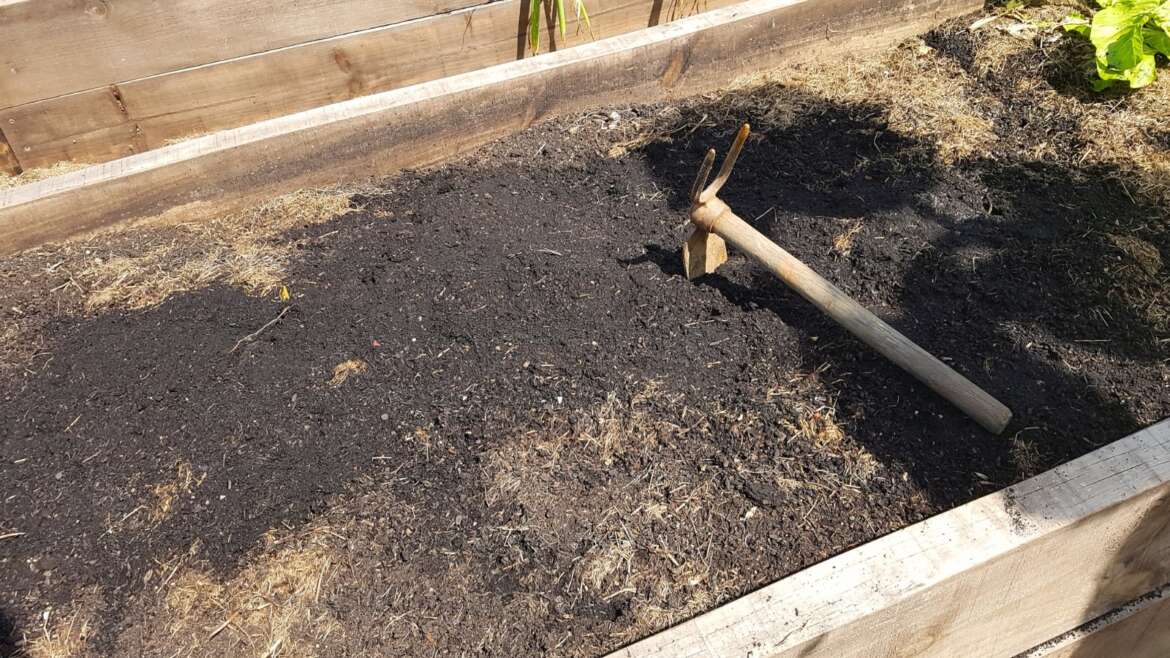
Aerate with a Digging Fork or Broadfork
 Aerate your raised beds for a fluffy, thriving soil base.
Raised beds can easily become compacted due to winter weather, particle settling, and decomposition. As we discussed above, bare soil is more prone to compaction than mulched or cover-cropped soil. If your bed feels exceptionally hard or difficult to dig into, aeration can be useful to prepare for the season. I recommend aerating after you’ve added compost and amendments because it will “fluff” everything up and allow those materials to sink into lower layers without disrupting the overall soil structure.
A digging fork or broadfork are the best tools for the job. They can create long channels to bring oxygenation to lower layers without disturbing or churning up the texture. There is no need to stir or flip over the soil! Instead, dig the fork in, lightly lift it upward and back, then pull it out.
Imagine your soil like a multi-layered cake. Recall that compost was the frosting layer, and we want the frosting to stay on top. Your goal with the aeration process is to create lots of air channels and lightly lift the soil up without mixing together the cake layers. This is akin to “poking” a cake and pouring a liquid filling inside to make the cake more moist and delicious.
Aerating is only poking holes, not blending! You will notice a fluffier texture, but the layers will remain intact. You can finish the process by sprinkling on a bit more compost and raking the surface smooth.
Plant Your Crops or Cover
 Protect your freshly prepared soil with a cozy mulch layer.
Your raised bed garden is officially rejuvenated and ready to plant! If you don’t have veggie starts ready, I highly recommend covering the raised bed with a tarp or leaf mulch to protect the newly prepared soil. Remember, never garden naked! Nature does not like her fragile skin to be exposed! Your soil should be covered at all times with a protective layer of green growing plants, mulch, tarps, or cover crops.
Mulch is the most vital part of this equation because it will ensure your beds don’t sink as much in future years. After planting your crops, tuck them in with a nice, cozy mulch of chipped deciduous leaves or shredded straw. The mulch will suppress weeds, conserve moisture, and protect beds from wind and rain erosion.
Final Thoughts
Refreshing your garden is much simpler than spring cleaning your home. All you need to do is clear out any weeds and debris, add a nice layer of compost, enrich it with missing nutrients, and aerate the ground. Don’t forget to examine your raised beds for signs of structural damage or decay, and repair accordingly.
Remember, the soil is like an intricately layered cake. There is no need to flip it over or aggressively churn the layers. Instead, tread lightly and simply smooth more “frosting” (compost and organic matter) over the top. You will save your soil structure and your back in the process!
When in doubt or short on time, simply add more compost or topsoil and cover with mulch or a tarp to protect the soil until you are ready to plant.
