As gardeners, we can assist our seeds by mimicking what happens in nature. This improves germination speed and rates, resulting in healthy seedlings.
Whether to soak or not to soak is a personal preference. Here, I’ll discuss 13 seeds that benefit from soaking before you sow them. I encourage you to experiment to determine whether you think the benefits are worth the additional step.
First, let’s talk about why soaking may help seeds before planting and a simple method of doing so.
Why Soak Seeds Before Planting?
 Soaking seeds before planting breaks through the tough outer shells.
Some seeds’ coating is extra thick to offer protection from drying out, injury, dangerous environmental conditions, or disease. To grow the next generation of the species, the embryo must survive without damage. The outer shell exists to protect the embryo, ensuring this happens. Growers who have thick clay or sandy soils will surely see the benefits of pre-soaking.
Home gardeners adjust a seed’s natural way of germinating by starting in a protected area like their home or a greenhouse. If you’re storing and sowing seeds inside, they won’t go through a cold winter, which some need to signify it’s time to wake up and grow.
To ensure high germination rates, wake seeds up, and potentially speed up the process, soak seeds before sowing them to soften and loosen that outer protective layer. This step allows all the energy the seed has stored up to go straight into germinating rather than bursting through the tough outer shell.
Not all types require soaking. Many hybrids have been bred not to need this additional step. The amount of time to soak varies by the type of seed and ranges from 6-24 hours, not to exceed the 24-hour mark.
Method of Soaking
 Seeds are soaked, drained, and promptly sown to prevent rot.
Supplies needed:
- A clean glass bowl
- Clean, lukewarm water
- Seeds
- A timer
Cover the seeds you plan to germinate with a few inches of water. Place them away from direct sunlight at a comfortable room temperature. After proper soaking, they’ll lighten in color, plump up, and soften.
Drain the water and discard any that sink to the bottom or look unhealthy. Then, proceed with sowing immediately after draining them from water. If you delay, the seeds may rot and become unviable.
Now, let’s discuss 13 seeds you should soak before planting.
Peas
 Soak peas before planting to accelerate germination, especially in cool climates.
Peas are one of the first seeds many of us sow around the country, and with unpredictable spring temperatures, soaking before sowing them will decrease the time it takes for them to germinate. The longer they sit in cool, spring soil, the higher the chances are that they rot, freeze, or are consumed by a critter.
The day before you plan to sow peas, soak them for 8-12 hours. Adding inoculant during this process may speed up the germination process even more. The peas will plump up and be less wrinkled. Discard the floating peas and drain the water.
Pro tip: If you live in a cooler region, you may do this again seven to ten days later. Fill in empty gaps where seeds did not germinate. Any longer, and the new seed will be shaded out. In warmer regions, sow much earlier to beat the heat of late spring and early summer. Peas thrive in cooler weather.
Beets
 Improved germination rates result from soaking beet seeds for 8-12 hours before planting.
Beet seeds have an exceptionally hard exterior, so soaking them for 8-12 hours before sowing should increase the germination rate. Beets can be sown early in the spring when temperatures begin to warm up, but since soil temperatures may still be cool, seed rot is a risk. When soaked before going into the ground, the chances of them rotting due to quicker germination decreases.
Beetroot is a multi-germ seed. Thin seedlings as needed once germination occurs.
Pro tip: Beets are heavy boron feeders. Add a teaspoon of powder boron to your soaking solution to give them the boost they need.
Tomatoes and Peppers
 To prevent loss of viability, store tomato and pepper seeds in airtight containers.
Tomato and pepper seeds are small and thin, allowing them to easily dry out and lose viability. If you’re growing these crops to process and preserve, poor germination could mean the difference between having enough and not enough food in winter! Store them in an airtight container to keep them as dry as possible and between 35-50°F (2-10°C) during the off-season.
Soaking may help speed up germination and keep them from drying out. These tropical crops germinate best on a heat mat set to 80°F (27°C), but since this increases the risk of them drying out, the quicker, the better.
Pro tip: Sow 15-20 shallowly per row of strip tape and gently cover with seed-starting mix. Mist to tamp the soil down, then water from below to keep the seeds in place. Don’t let the soil dry out.
Cucumbers
 Pre-soaking cucumbers boosts germination in dry, warm conditions.
Cucumbers typically have high germination rates, so it’s not necessary to pre-soak. This is especially true if you’re sowing them indoors and can control the moisture levels in the seed-starting mix.
However, if you’re sowing a summer succession of cucumbers and the weather is dry and warm, pre-soaking will provide them with added moisture that may increase the germination rates.
Pre-soaking cucumber seeds can be done by simply wrapping them in a moist paper towel overnight before sowing them.
Beans
 Sow more beans later indoors to fill gaps by gently tucking seedlings into the soil.
It takes a lot of energy for an embryo to enlarge, break through the seed coating, and emerge with its shoots and cotyledons. In nature, if left to hibernate on the forest floor, the seed coating would soften by snow melt, spring rain, and humidity. When sowing indoors, soaking them mimics this process.
Soak thin-skinned beans for just two to four hours and thick-skinned beans for 8-10 hours before sowing. They don’t prefer to be transplanted, so if you direct sow beans, ensure the soil is above 60°F (16°C), or germination will be delayed. Ideally, the soil temperature is between 70-80°F (21-27°C).
Pro tip: Soak more seeds about ten days later and sow them in cell trays indoors. Their germination will be quicker, but their growth should match those outdoors in a week or so. Gently tuck them in to avoid transplant shock.
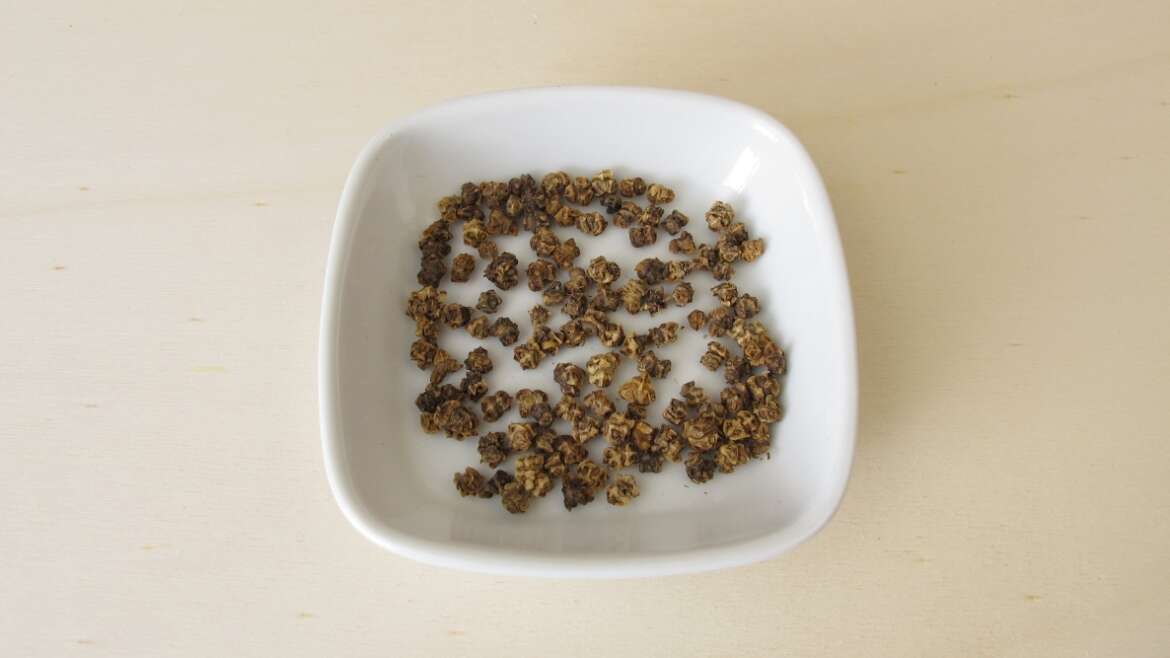
Pumpkin
 Pumpkin seeds are filed before soaking to improve their survival.
It’s not required, but some growers nick or gently file their pumpkin seeds before soaking them. Use a high grit sandpaper or an emery board to file the edges. This provides a path of least resistance for the seed to germinate through.
Experiment by soaking half and not the others to test the germination rates. On average, you should see germination in pre-soaked seeds about four days earlier than non-soaked ones. While this doesn’t seem like that big of a difference, it could be the difference between survival and rot in cool, damp spring soil. Soak pumpkin seeds for 8-12 hours.
If you direct sow pumpkins, space them out according to the variety requirements. Sow them horizontally about twice as deep as they are wide. Thin out any pumpkin seedlings as needed.
Corn
 Soaking corn seeds before planting conserves energy for vital germination and emergence.
The outer shell of corn is very hard and will benefit from a light soaking before being planted. Allowing seeds to soften before sowing them lets them save their stored energy for crucial activities like germinating and reaching out of the soil surface to find light. Those tiny seeds have to work hard in the first few days and weeks of their lives so any assistance we can give them, the better!
Some growers soak their corn in water or tea for several days until they begin to germinate. If you’ve never done this before and fear they may rot before germinating, you’re not alone. Test this method out with a few kernels before putting all your seeds into a jar of water.
Alternatively, soak them 6-24 hours before sowing. Overnight soaking for smaller, thinner seeds will suffice, while larger ones should be soaked longer.
Swiss Chard
Improving Swiss chard germination requires soaking to soften hard outer coatings.
Swiss chard seeds’ knobby, hard exterior can be softened by soaking before sowing for improved rates. While their rates are generally pretty high, they don’t do well in cool, wet spring soil when temperatures are below 50°F (10°C).
Soak for four to eight hours, then sow indoors five to six weeks before your last frost. Don’t allow your seed mix to dry out completely, but don’t overwater as they are susceptible to damping off. Run a fan in your seed propagation area to avoid soggy soil and bottom water if you can.
Similar to beets, Swiss chard is a multi-germ seed and will need thinning once sprouting is complete. Cut out unwanted seedlings at the base using clean, sharp scissors or snips. Don’t tug them out to avoid disturbing the roots of the remaining young seeding.
Pea Shoots
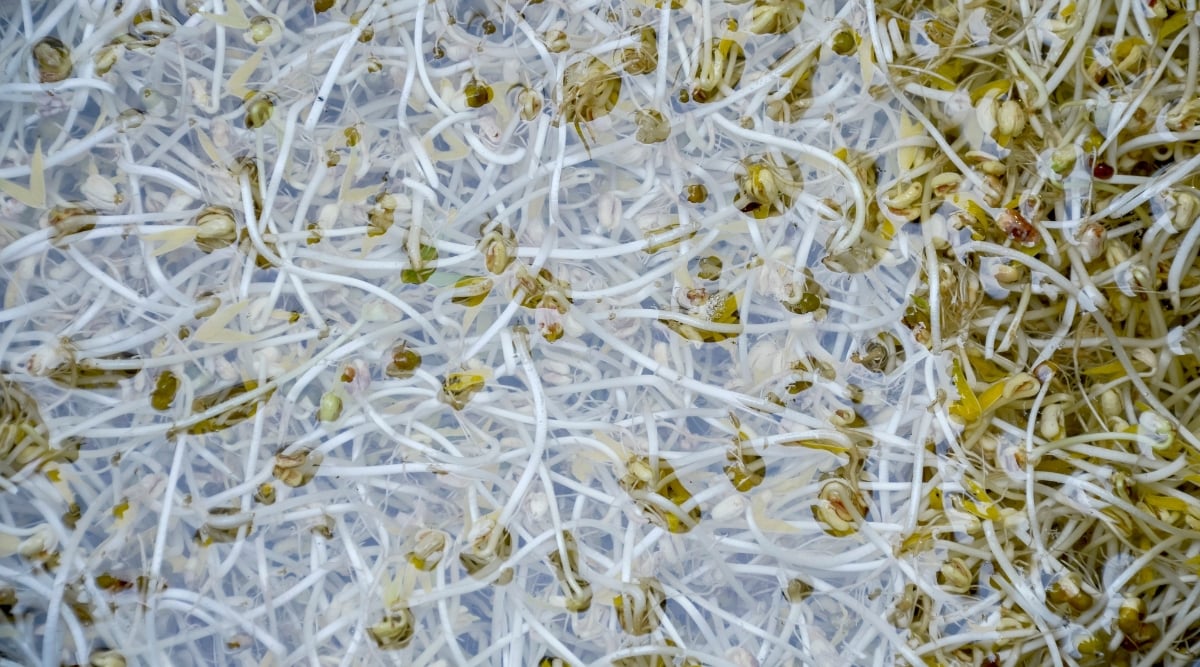 Overnight soaking facilitates rapid germination for harvesting pea shoots.
Microgreens and various shoots are popular and in high demand, and for good reason! They’re easy to grow, provide nutritious homegrown food during the off-season, and have a quick turnaround time. Pea shoot seeds are large and tough. Soaking them for 6-24 hours helps them germinate quicker and more evenly.
Fill a large container and let the seeds soak for a few minutes. Swish them around aggressively several times to release any dust and dirt. Rinse them in a colander until the water runs clear. Add fresh water to the container and allow them to soak overnight.
Drain the water after 8-12 hours, rinse thoroughly, and let them sit on the counter for another day so they begin to sprout. When you can just barely see the root protruding out of the seed, sow them in your medium. Cover them with weights for even germination.
Sunflower Shoots
 Remove debris and soften rigid outer shells by soaking.
Sunflower shoots are a bit more finicky to grow but are very nutritious and delicious. Growers have found that soaking them overnight helps remove any dust and debris and softens the hard outer shell.
Weigh them down so they don’t float while soaking.
These benefit the most from 24 hours of soaking in two increments. Soak them for 12 hours, then drain, rinse, and repeat for another 12. You may sow them now or wait for them to begin to crack a bit.
Pro tip: Some seeds have been pre-treated with inoculant, so don’t use a bowl you use for human food consumption to avoid contamination.
Morning Glories
 Soaking morning glory seeds expands and softens them for accelerated germination.
Morning glories will readily self-seed once established, but if you’re starting them from seed for the first time, soaking them will help soften them up and prepare them for sowing.
Morning glory seeds will double in size after soaking for 12-24 hours. Scarification may accelerate germination. Sow them right away after soaking, a half inch deep in cell trays or outdoors once soil temperatures are at least 65°F (18°C).
Start indoors four to six weeks before your last estimated frost date. Keep the soil moist and temperatures between 59 and 90°F (15 and 32°C) during the germination period.
Canna Lilies
 Canna seed propagation requires filing tough seed coats before soaking and sowing indoors.
While most often propagated by splitting rhizomes in the spring or fall, experienced gardeners may start canna lilies from seed. It’s a bit more difficult and requires patience, but growing anything from seed is quite rewarding. These seeds germinate best when you soak them before planting.
Canna lily seeds are large with a tough exterior. Soak them for 12-24 hours to help soften and plump them up. Nicking them with a file will help improve germination. Sow them indoors around February in cell trays and gently cover them with seed-starting mix. They’ll appreciate additional humidity, so cover the tray with a humidity dome or clear plastic wrap. Alternatively, place the tray into a germination chamber.
Seeds should germinate within two weeks when kept at 70-75°F (21-24°C). Place them under light once you notice germination and keep them warm. Pot them up into individual containers and grow them on until seedlings are ready to be hardened off and transplanted.
Nasturtium
 Improved nasturtium germination requires filing and soaking before spring sowing in cold soils.
Nasturtium seeds are known to have great germination rates, but if you’re sowing in the early spring when the soil temperatures haven’t reached optimal temperatures yet, soaking can increase rates. Many of us over sow to get the amount of seedlings we want, but soaking can alleviate this need and save you from wasting seeds.
Gently file the rough edges to assist with germination. This reliable annual benefits from a one to three-month cold-stratification period, but if that’s not possible, a 24-hour soak will be just fine. Seeds should be plumped up in the morning. Drain out the water and discard any hard or floating seeds. Sow immediately in cell trays or directly outside.
Frequently Asked Questions
This may be an indication of a bad seed that will not germinate. If you have plenty that sank to the bottom of the bowl, simply discard the floating ones.
Yes, some negative effects occur if certain types are soaked before sowing. These include basil, arugula, cress, radishes, mustard varieties, carrots, lettuce, celery, turnips, spinach, chia, and flax. They are mucilaginous. When they come into contact with water, their hull forms a slimy barrier around itself. Attempting to soak them will result in a giant ball of slimy seeds.
Yes, they may start to drown or rot if left in the water for too long. Follow recommendations for the length of time to soak for the particular crop type. In general, don’t soak for longer than 24 hours.
Final Thoughts
While it’s a personal preference to soak or not to soak, I highly recommend trying it out indoors during the off-season and then doing a comparison germination test. Then, collect data and keep records so you know which seeds benefit from this process. It’s a simple process that can have huge benefits!