


Even if your garden beds are still cold and frozen, late winter and early spring are the perfect time to sow seeds indoors to prepare for a vibrant season ahead. Sowing seeds inside helps you get a head start on the season so that you can put robust baby plants in the ground as soon as the weather warms.
Let’s dig into the best seed-starting equipment for strong, happy seedlings that will eagerly take off once the soil warms.
What Do You Need to Start Seeds Indoors?
Containers
A variety of container options work well for starting seeds. The industry standard is cell trays, which allow you to plant many seeds all in one convenient package. However, you may want to opt for biodegradable pots that allow you to transplant seedlings with no root disturbance. Some gardeners like to use repurposed household items, like yogurt containers, which work well as long as you add drainage holes.
Cell Trays
Epic Seed-Starting Bundle
The Epic Seed-Starting Bundle is your complete kit for seed-starting this season.
- Set of 8 4-Cell Trays
- Set of 12 6-Cell Trays
- Set of 2 1020 Universal Bottom Trays
- Made sustainably with long-lasting, durable construction
View at Epicgardening.com
The Epic Gardening Seed-Starting Bundle contains the essentials you need for successful seed sowing this year. Just add soil or a seed-starting mix, and you are ready to go with cell trays that fit into an easy bottom watering system that will last for years.
The Universal Bottom Trays allow you to water from below, preventing disturbance of delicate seedlings and fungal issues like damping off.
Nursery cell trays are often made with flimsy plastic that tears and breaks over time. While you may get a few seasons out of it, the thin material eventually falls apart and may even leave nasty microplastics in your soil.
To avoid this issue, Epic’s founder, Kevin Espiritu, designed Epic Cell Trays in conjunction with the Epic Gardening team. While these trays still contain plastic, they are far more durable and long-lasting. Moreover, the cells have specific features to help seedlings develop in a healthier manner, such as large bottom drainage holes and air-pruning slots. Seedlings are especially easy to remove from these starter trays thanks to the thumb-sized bottom hole that allows you to gently push upward rather than pulling seedlings out of trays by their stems.
Use 6-cell Trays for medium-sized seedlings:
- Kale
- Cauliflower
- Broccoli
- Cabbage
- Eggplant
- Fennel
- Spinach
- Swiss chard
Use 4-Cell Trays for larger seedlings:
- Tomatoes
- Peppers
- Squash
- Beans
- Cucumbers
- Zucchini
- Melons
If you want seed trays that will last your garden a lifetime, this is a great investment. See them in action in this video:
Biodegradable Pots
Recycled Paper Pots

- Eco-Friendly Material
- Sustainable Manufacturing
- Biodegradable Design
- Green Alternative to Plastic or Peat Pots
- Ideal for Sensitive Plants
- Convenient and Easy-to-Use
View at Epicgardening.com
Recycled paper pots and peat pots are popular biodegradable seed-starting containers that can be planted straight in the ground. They break down quickly and become part of the surrounding soil. Instead of removing a baby plant from the container, the entire pot can be buried and decomposes once exposed to consistent moisture and the activities of soil microorganisms.
Paper pots protect baby plant root systems before and after transplanting. They are especially awesome for fragile seedlings that are prone to transplant shock. For example, the taproots of squash and cucumbers are easily susceptible to damage during the planting process. They can become severely wilted or stunted if the taproot is disrupted during transplanting. But if you grow them in paper pots and plant them directly into the ground, the plants are more likely to take off growing without needing so much time to recover.
Botanical Interest’s recycled paper pots are the perfect eco-friendly alternative to plastic and peat pots. They are constructed of 100% recycled paperboard that is food-grade and manufactured with low-energy methods. They decompose readily, and the perforated bottom easily tears away once wet.
Another benefit of biodegradable pots is the airflow to the root zone that prevents fungal issues and root binding. Air easily moves through the porous peat pulp surface. The roots won’t start winding in circles the way they do inside a plastic pot. Instead, they penetrate the wall of the biodegradable container and “air prune” when they reach the oxygen.
Labels
Garden Stakes

Keep your seedlings straight with these renewable, white birch garden stakes.
- Sturdy Construction
- Biodegradable
- 12″ tall for ease and visibility
- Space to record variety name and date planted
View at Epicgardening.com
It is also helpful to label your seedlings and track your sowing dates. Whether you’re sowing indoors or direct-seeding outside, keep track of what and when you planted with a sturdy stake. Record the variety and date you planted, then stick one in each cell tray or mark a section of your garden bed.
At the end of the season, save and repurpose them or add them to the compost pile.
Germination Domes
Germination Dom

Germination domes and bottom trays create the ideal microclimate for seed germination. They fit perfectly over Epic Cell Trays.
- Increase temperature and humidity
- Sturdy Construction
- Made in the U.S.A
View at Epicgardening.com
Warmth and humidity are key for successful seed germination. Germination domes fit over cell trays to create a mini-greenhouse, warming the soil and keeping moisture in, encouraging seeds to sprout.
If you’ve struggled with seed-starting in the past, germination domes might provide the right microclimate for your seeds to get a healthy start this year.
Seeds
The most essential component for seed-starting: the seeds themselves! When just starting out, all the options can be overwhelming. Save time and decision fatigue with a curated bundle of seeds that includes quality, high-performing varieties for your ornamental and edible gardens.
Heirloom Organic Seed Bank Collection
Heirloom Organic Seed Bank Collection

Here are a few of the varieties in this collection. There are 24 total:
- Bean Bush Contender Organic
- Bean Pole Blue Lake FM-1K Organic
- Beet Early Wonder Organic
- Broccoli Di Cicco Organic
- Carrot Scarlet Nantes Organic
- Celery Utah Organic
- Cucumber Marketmore Organic
- Eggplant Black Beauty Organic
- Kale Lacinato Dinosaur Organic and others
View at Epicgardening.com
This seed bundle comes with 24 open-pollinated heirloom vegetable, melon, and squash seeds that have stood the test of time. Each variety has over 50 years of proven garden performance.
If you’re just starting out or looking to add a large assortment of tried-and-true edible crops this year, this bundle will give you a great start on a delicious harvest.
Bee Happy Seed Collection
Bee Happy Seed Collection
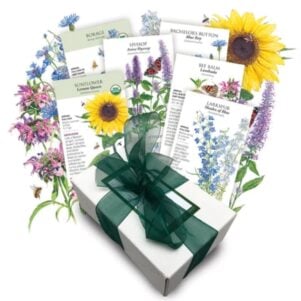
Attract and nurture bees in your garden! Here are a few of the many varieties included in this collection:
- Bachelor’s Button Blue Boy
- Bee Balm
- Borage Organic
- Anise Hyssop
- Larkspur Shades of Blue
- Sunflower Lemon Queen Organic
View at Epicgardening.com
Bring a variety of bees to your flower patch with this collection of pretty blooms. Borage, bee balm, and anise hyssop have charming flowers, but are also excellent in tea and culinary preparations.
Plant this mix near your veggies to draw more pollinators to your crops!
Epic Homesteading Book

The Epic Homesteading book is the ultimate companion for transforming your garden into a thriving homestead oasis.
buy at Epic Gardening Shop
An expert guide may be the most essential item on your seed-starting journey. Learn how to get started growing on your own thriving homestead, even on a small urban lot! This book from Epic founder Kevin Espiritu covers starting seeds indoors and out, composting, food preservation, pest management, keeping small “livestock” like chickens and bees, and more.
This is the perfect guide for the gardener who wants to become self-sufficient while maximizing energy efficiency!
Light
 Provide strong, direct light for seedlings to prevent issues like legginess and uneven growth.
A proper light source is a seed-starting essential for strong early plant growth to avoid leggy, floppy seedlings. Bright, direct sunshine or artificial light ensure that seeds germinate evenly and reach their fullest potential while establishing their first leaves. A lack of light causes all sorts of problems, including low germination rates, weak seedlings, yellow or pale leaves, thin stems, and uneven growth when plants arch one way to reach toward the light.
Seedlings need more light than most full-grown plants. Most species need 10+ hours of direct sunshine per day. The best light for seeds is bright, direct, and straight above them rather than at an angle. A greenhouse is the best option for indoor seed-starting in early spring, but you don’t necessarily need a nursery to meet your plants’ light needs. Bright windowsills and supplemental grow lights make it easy to grow seedlings almost anywhere.
Windowsill
 Start seeds on a sunny windowsill, but rotate trays to avoid leaning and overcrowding issues.
If you have a windowsill with bright sunlight, you can easily start seeds right inside your kitchen or living room. However, you may need to shift and rotate seed trays regularly to ensure that the plants grow straight upward rather than leaning toward the light.
It’s best to put the most sun-loving seedlings, like tomatoes and eggplant, closest to the window. Plants that tolerate less light, like lettuce or spinach, can germinate farther away from the window.
The windowsill seed-starting method is the cheapest and most readily available, but it also has the most limitations. Once you fill the available space, your seed trays quickly get overcrowded and are forced farther away from the light, causing symptoms like spindly stems or pale leaves. Supplemental lighting is helpful to keep the space useful for a larger amount of plants.
Grow Lights
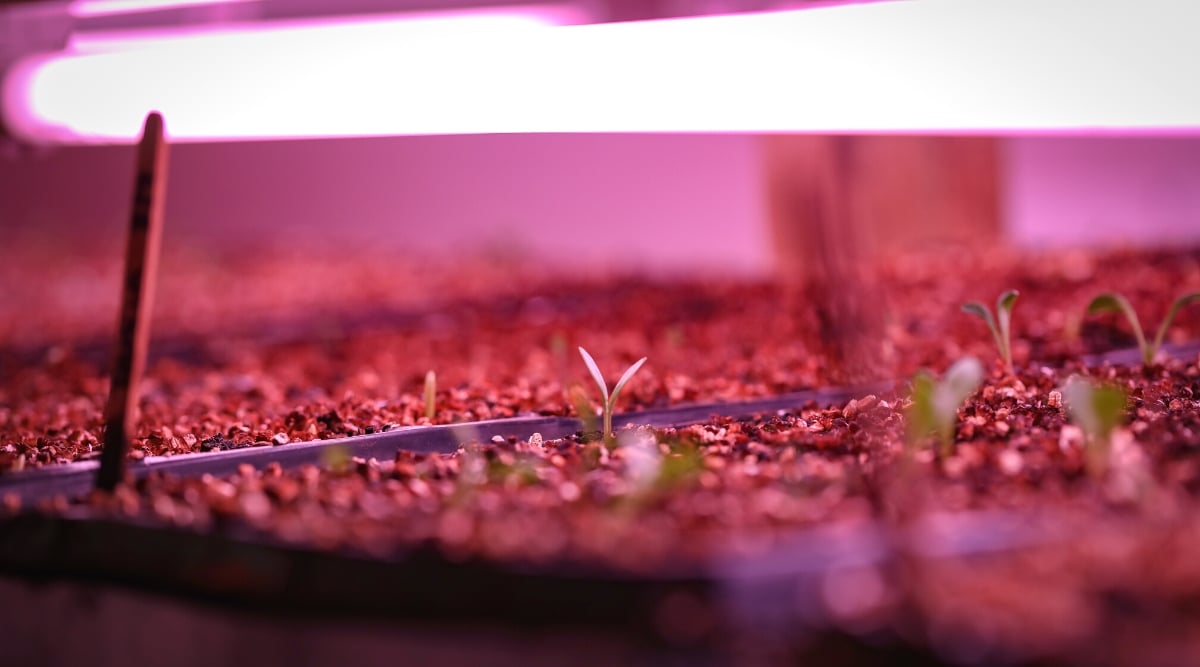 Use affordable hanging LEDs on wire shelving for a cost-effective and adjustable indoor seed-starting setup.
Grow lights are bright, full-spectrum lights that mimic sunlight and allow you to start seeds in any available indoor space. They are available as lamps and hanging LEDs. The best grow lights for seed-starting are labeled as “balanced light spectrum” or “red-blue spectrum” (400-700 nanometers). I prefer the long “shop light” style LEDs available at most hardware stores.
A grow light area does not need to be expensive or complex. This simple setup can help you start seeds inside for under $100 and less than an hour’s work:
- Multi-tier aluminum wire shelving
- Hanging full spectrum LED grow lights
- Mechanical outlet timer, set to 12-14 hours per day
Suspend the grow lights from as many tiers of the wire shelving as desired. It’s helpful to buy adjustable lights that can be lowered or raised as needed. For example, you may seed a tray of tomatoes and suspend the light 4-6” above the tray. After the seeds germinate, move the light upward to allow more space to grow. Keeping the lights a few inches above the plants ensures they can reach maximum photosynthesis without getting scorched. This prevents “leggy” growth like spindly, weak stems with fewer leaves.
Place your seeded trays under the lights, ensuring there is a catchment tray underneath to keep water off the floor. Plug in the lights and set the timer for one to four hours per day. Monitor the seedling growth and the amount of light in the area.
This video includes a great visual of what grow lights look like and how to choose the best ones:
Water
 Avoid displacing seeds by adopting bottom watering or using a gentle fan nozzle.
Seeds obviously need moisture to germinate and grow, but most gardeners overlook how they water their seedlings. If you blast water onto a freshly seeded tray, the seeds can become displaced. If you flood a seeded container with a big dump of water from a bucket or watering can, the seeds may float away. Overwatering can cause fungal issues.
There are two solutions to these problems:
- Bottom watering: Seed trays can be placed in a bottom catchment tray filled with water so they suck moisture up from the roots, preventing overwatering.
- Fan nozzle watering: Distributing water lightly over the soil surface, more like rain, makes it easy to irrigate without harming the newly emerged baby plants.
Dramm Touch‘N Flow Revolver Spray Gun

- Versatile Watering Options
- Nine Distinct Spray Patterns
- Durable Construction
- Ergonomic Handle Design
- Smooth and Quick Pattern Changes
- Lifetime Guarantee
View at Epicgardening.com
An adjustable spray gun like this Dramm Touch’N Flow is the most multifunctional for garden use. Never blast your seed trays with moisture. Instead opt for a steady flow that mimics rainfall and keeps the soil in place.
Heating
 Maintain a warm seedling area with ambient temperatures of 60-75°F (18-21°C) and soil temperatures appropriate for germination.
Warmth is crucial for seed-starting success. If your seedling area isn’t warmer than outside, there is really no point in starting seeds in advance. There are two main temperatures you need to pay attention to:
- Ambient temperature: Most vegetable seedlings prefer 60-75°F (18-21°C) room temperatures until they develop true leaves, harden off, and transplant into the garden
- Soil temperature: Soil temperature is crucial for successful germination and ranges from 50°F (10°C) for cool-weather seeds to up to 95° (35°C) for warm-weather vegetables
Cold temperatures pose the greatest risk to the majority of vegetable seedlings, so it’s important to keep your seed-starting area above 40°F (4°C). Sowing seeds inside your home is the most convenient because room temperatures remain fairly consistent at around 70°F (21°C).
Large fluctuations in temperatures create problems for seedlings like celery or Brussels sprouts and cause them to bolt prematurely. Temperatures colder than 50°F (10°C) can stunt or harm warm-season crops like melons and peppers.
Soil Thermometer
Urban Worm Thermometer – Perfect for the Garden & Worm Bin

- Accurate Temperature Monitoring
- Extended Penetration Depth
- Optimal Zone Indicators
- Versatile Use in Garden and Worm Bin
- Durable Stainless Steel Construction
- Easy to Use
View at Epicgardening.com
One of the most overlooked seed-starting essentials is a soil thermometer. If you don’t like playing the guessing game about when to plant, a thermometer is the most reliable way to determine if it’s time to sow a certain crop. Simply stick the soil probe into a container of soil or a garden bed and wait a minute to get an accurate reading of the soil temperature several inches down.
Most vegetable seeds germinate best between 60-80°F (16-27°C), but the needs for some crops can vary widely. Check your seed packet or grow guide for each crop’s ideal germination temperature. Remember that soil temperatures do not fluctuate as rapidly as ambient (air) temperature because the soil acts like a natural insulator. When it comes to properly timing your seed sowing, warm soil is a better indicator than warm air.
Final Thoughts
Remember, seeds really only need soil, water, and light to germinate. The most basic seed starting setup provides these essentials in an indoor setting. You can start with simple reused kitchen containers, potting mixes, and bright windowsill. If you want to upgrade, consider grow lights or a greenhouse with epic-quality cell trays and watering equipment to grow the most resilient nursery-grade seedlings!

