For low-maintenance gardeners looking for a new project, a rock garden should be top of the list. Whether they are used to create height, fill an empty corner in the garden, or create a natural and unique aesthetic, rock gardens always become standout features in any space – big or small.
These are not simply regular garden beds with a couple of rocks tossed in. The design is intentional, with the idea of highlighting rock as a material as much as the plants that are interspersed between them.
Follow these essential tips to design the ideal rock garden for your space and style.
Choose A Location
 Deciding on the location is crucial before planning.
Before you start planning, deciding on a location for your rock garden is important. The area you choose will influence all areas of your planning going forward, from soil amendments to the plants to use.
Part of choosing a location is deciding on size. For those in urban areas, smaller is typically better to avoid overwhelming a space. If you have a sprawling garden, the cost will be more of a consideration than size. Depending on where you’re getting your rocks, installing a rock garden can be pricey, especially for larger areas.
Generally, rock gardens are most effective on slopes. This comes with the benefit of managing soil erosion, filling what would otherwise be a tough gap in the garden. But with so much variety in ideas and types, you can fit a rock garden anywhere.
Decide On A Style
 Opting for a specific style can elevate the overall appearance.
Designing a rock garden may seem straightforward or, at least, more straightforward than other complex garden types. But it’s not as easy as tossing a few rocks in your beds. Rock garden design can take many forms, and sticking to one will give you a more sophisticated and put-together look.
Many modern rock gardens are desert-like, using drought-tolerant plants and warm tones with plenty of desert-friendly succulents. Mediterranean rock gardens have also risen in popularity in recent years, combining textural plants like lavender and ornamental grasses to soften the textures of larger rocks.
However, just because these styles are popular now doesn’t mean you have to stick to them. Zen gardens often make use of stone and create a completely different aesthetic. Alpine gardens are the more traditional route and offer a different selection of plants to choose from.
When choosing a style, keep the rest of your garden and the façade of your home in mind. While you want your garden to stand out, it should be for the right reasons – not because it looks out of place.
You can always be creative with styles rather than sticking inside the box. But I would avoid combining clashing styles if you want a cohesive design.
Consider Elements of Design
Avoid highly contrasting rocks for a natural look; experiment with plants instead.
You may not be a professional landscaper, but it’s still essential to consider design elements when putting together a plan.
Having a clear idea of the look you want in advance will save you time and money down the line, avoiding any impulsive purchases that don’t quite fit once you get them in.
Color is one of the more obvious ones to decide on. Contrasting colors are useful for highlighting certain areas, while similar shades create a cohesive and harmonious feel. I avoid using rocks with highly contrasting colors as they look unnatural, but you can play around with foliage and flowers.
Texture is also vital to consider in all gardens, especially rock gardens. Rocks add a structural and rough look to gardens. This can be highlighted by using plants with sharp foliage or thorns or softened with cascading foliage and flowing grasses.
Beyond these two elements, there are also things like shape, form, and balance to consider before you start. If you can’t quite decide, look through images online and identify the elements you gravitate towards.
Build Levels
 If your location lacks elevation, you can introduce levels to add intrigue.
This next tip is optional but can have a massive impact on the overall look of your garden. Rock gardens are at their best when height is involved, taking advantage of multiple levels so all garden parts are visible. If your location is completely flat, consider adding levels to the area to create interest.
Building up areas with sand from your garden is possible if you have enough to work with. But you can also create levels with the rocks. The difference doesn’t have to be dramatic – just enough that you have a better look at all parts of the garden.
Remember that popular rock garden plants, particularly succulents, stick low to the ground. Without height in the garden, these will often be hidden behind rocks.
Add Water
 Water features offer a serene touch to soften the rugged appearance of a rock garden.
Another way to soften the tough look of a rock garden is by using water. Water features are known for their calming abilities, adding another level of interest. They can also attract birds and pollinators to the garden, bringing a buzz of life that can benefit your plants, too.
A rocky water feature is the perfect way to integrate water. Aim for a natural flowing look by carefully placing your rocks (although artificially creating something that looks natural is not as easy as it seems). Alternatively, you can place a few rocky bird baths around the garden at different heights.
Develop A Plan
 To create your ideal rock garden, begin by visualizing it based on earlier tips.
After considering the previous tips, you should have an image of your perfect garden in mind. You may think the step is gathering everything you need, but before you do that, it’s best to put pen to paper the old-fashioned way.
As with any new garden project, planning is vital. You won’t know how much stone you need, what types, what plants to purchase, and when without a detailed plan of what you want the garden to look like in the long term. Planning successfully now will avoid any mistakes that could become costly, especially when larger rocks are involved.
The easiest way to plan is to simply draw it out on paper. Measure your garden before you start so you understand what kind of space you’re working with. I like to draw my necessary elements on separate pieces of paper and cut them out to move them around until I find the perfect configuration.
Think About Suppliers
 Utilizing your own truck could also reduce delivery expenses when buying from a supplier.
The most surprising part of starting a rock garden has nothing to do with designs or plants – it’s just how expensive rocks can really be. If you have a large space to fill, finding rocks at an affordable price (whether large feature rocks or gravel) is an entire project.
The first prize is obviously getting rocks from your current garden, if that’s possible. If there are any rocky areas, collect a few feature rocks or combine them from other parts of your garden. In most cases, that’s impossible, so look to neighbors, friends, and family for a cost-effective option.
If you’re lucky, you may also find a construction company or land owner who may want to get rid of the rocks for little to no cost. However, this does mean you’ll need a truck to transport all the stone. Using your own truck can also save money on delivery fees if you purchase stone from a supplier.
If you are buying rocks, stick local and shop around. I tend to be impatient with new gardening projects, but checking prices from multiple suppliers can save so much in the long run. Choosing local suppliers is generally more cost-effective and will save on delivery fees.
Preparation Is Key
 Solid preparation is crucial for an easier installation.
Before installing rocks or planting, ensure you prepare your chosen location well. This starts with clearing any existing plants or grass to provide a clean foundation. If you leave any vigorous growers in the ground, they will pop up between the rocks later, ruining the overall look and becoming a nuisance in your garden.
Also, assess your soil and make any amendments before you start laying rocks. Typical rock garden plants generally prefer sandy soil that drains well, replicating the conditions in rocky, gritty areas. If you’re dealing with clay soil, amend with compost and additional drainage materials to create the right conditions for planting.
A good foundation and solid preparation will make the installation of your garden that much easier.
Pick The Right Rocks
 Consider the style and requirements of your space when selecting rocks.
While the most important choice in a new garden usually revolves around plants, your choice of stone is equally as important. Modern rock gardens often appear naturally formed, even if you don’t live in a rocky area. Your rock choice will dictate how well the garden blends with your space and the wider landscape.
The rocks you choose should fit your chosen style and meet the needs of the space. For example, smaller gravel with a smooth texture is well-suited to Zen gardens, while larger stones with plenty of height fit better in alpine gardens.
But to create the most natural look, choose rock types from your region. These will not only fit better with your existing backyard but will also be easier to find and more cost-effective.
Choose Plants Carefully
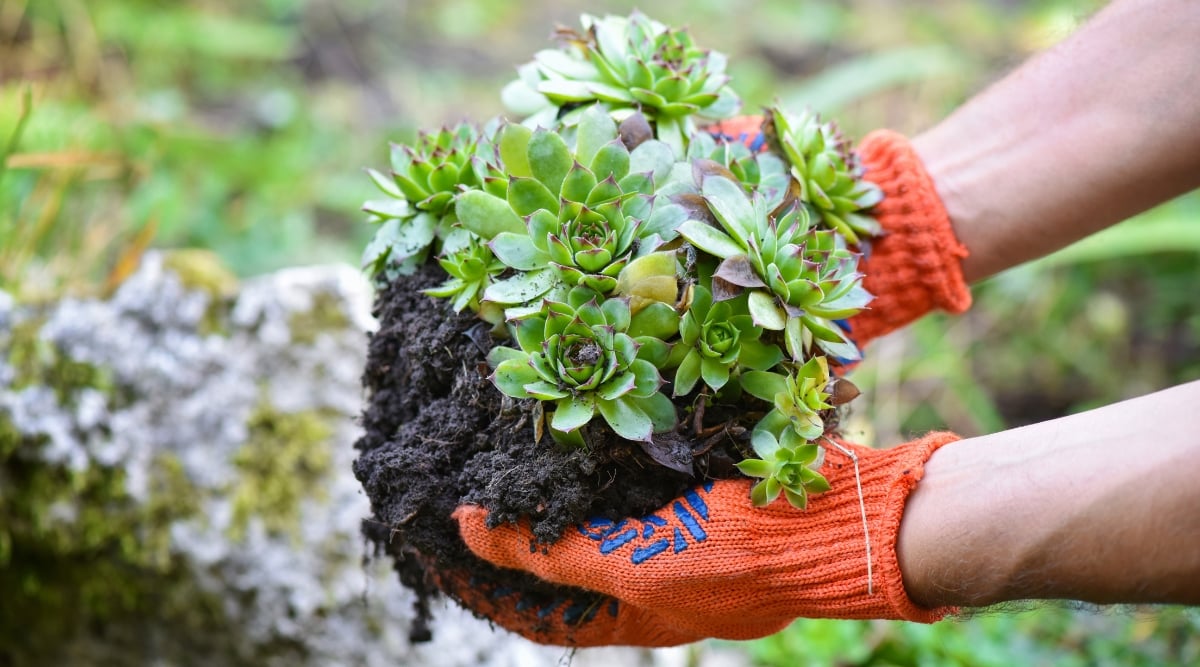 Opt for plants that naturally dwell in rocky environments to maintain a more authentic look.
Now for one of the most exciting parts of any new garden – choosing your plants. This will come down to personal preference, but you must keep some essential factors in mind.
The first is the environment. No matter the type of garden you’re creating, you must always understand your garden environment. Understand the conditions you’re working with, particularly climate, to choose plants that will thrive.
The second is plants that grow well in rocky environments. While there are ways to get around this by modifying your soil and watching your watering, your garden will look more natural if you pick plants that naturally grow in rocky areas.
Finally, look for plants that fit your design and will be happy once they mature. If you have lots of rocks and few gaps, you must pick plants that will grow well in these conditions. The plants also need to work well together – you don’t want any competition for space or resources that will negatively impact growth.
These are just a few plants to consider:
- Phlox
- Sedum
- Sempervivum
- Ornamental grasses
- Alyssum
- Hosta
- Mosses
- Narcissus
Arrange Before Planting
 Avoid the hassle of replanting by ensuring their positioning suits your vision.
After purchasing your plants, don’t be too eager to get them in the ground. Start by arranging them in their planned spots before you plant. The last thing you want to do is plant and realize you need to move something later.
Arrange your rocks first (or the first layer if you’re building a section up). Next, fill in any gaps with soil and add more rocks. Continue layering until the foundation is set. Then, place your plants in their potential spots and ensure you’re happy with their configuration before you get your hands dirty.
Avoid Uniform Placements
 Breaking away from the habit of organized layouts is crucial for authenticity.
One of the arts of landscape design is making it look as natural as possible. Unfortunately, that is easier said than done. For those used to symmetrical gardens and meticulous rows, you need to break out of these habits when placing your rocks.
Random placement is far better than straight lines or symmetry unless you’re creating a particular shape with your rocks for artistic effect. Play around with your plan beforehand rather than moving tons of heavy rocks around later.
Keep Up With Care
 Regular weeding is essential to prevent weed spread, which can hinder the growth of new plants.
Once your garden is in and watered, you may think the hard part is done. To a certain extent, it is, but you can’t leave the garden to settle in on its own. The first few weeks after installation are the most crucial, helping the new plants establish in their new homes.
Water immediately after planting to settle everything in and keep up with watering, especially for sandy soils. While drought-tolerant plants will eventually be able to handle periods without water, they need strong root systems to do so. Watering well now will encourage the roots to grow deeper into the soil.
Weeding is another important maintenance task. If you leave any leftover weeds to spread, they will impact the growth of your new plants and will take over. The more often you weed, the less you will have to worry later on.
Keeping your garden tidy and the plants happy will make maintenance less hassle overall. Plus, it means all the effort to install your new garden isn’t wasted.
Final Thoughts
Rock gardens are more than just a trend. They are a low-maintenance way to landscape your garden that provides interest year-round. With these tips, you can create the perfect garden for your space, regardless of size.