While all containers should be tailored to the plants you want to grow, orchids have particular growing requirements that make container choice that much more important. Potting in the wrong container is not just an aesthetic concern – it can make or break root health and, ultimately, the life span of your orchid.
Most commonly grown orchids are epiphytes. In their native habitats, they grow attached to trees, where they absorb moisture from the air and nutrients from pockets of debris. They are not parasites – they merely use the taller trees for height and to lift the plants away from crowded jungle floors.
The roots are never covered in dense or moist soil, preferring exposure to the air over complete coverage. This includes the beginner-friendly orchids most recognize, such as the famous moth orchid.
But that’s not the only type you may come across. Terrestrial orchids grow directly in soil rather than attached to other trees. Lithophytic orchids are less common, growing on rock faces or cliffs. Because of these native conditions, they are typically planted in mixes amended with gravel to create a similar texture.
Since growing in containers is not natural for orchids, you need to consider these conditions when choosing the perfect pot.
The Best Pots For Orchids
There are a few factors that go into choosing the ideal container. When picking a container, we often consider looks first (particularly for indoor orchids), prioritizing things like pattern or color over conditions.
I’m not trying to say looks don’t matter. You don’t want to choose an ugly pot to house a beautiful orchid. But start with these characteristics first to ensure the best possible growth, thinking about aesthetics last.
Drainage
Ensure proper drainage for epiphytic orchids by using containers with sufficient holes.
The most important concern by far is drainage. Never plant an epiphytic orchid in a pot with no drainage holes, no matter how pretty.
The roots are used to being exposed to the air and will appreciate as many drainage holes as you can give them. Many will grow better attached to pieces of wood or trees outdoors than in a container.
One drainage hole is the bare minimum, but look for containers with even more drainage holes if you can find them. You’ll notice the containers growers use often have drainage holes on the sides of the container and the bottom, allowing more air to flow around the roots and moisture to escape.
Depending on the materials of your chosen container, it’s usually possible to drill extra drainage holes if there aren’t enough. This will expand your container choices without compromising plant health. It’s also great for upcycling if you want to reuse what you already have rather than buying new.
Materials
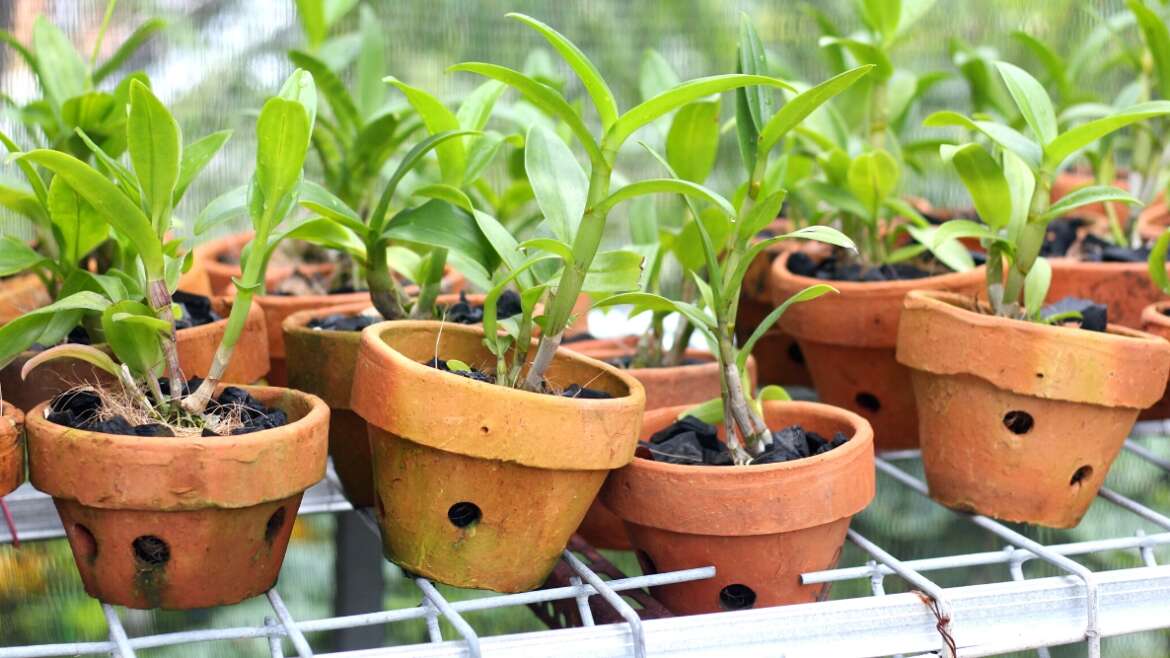
 Choose materials like terracotta or plastic for orchid containers, ensuring good drainage.
Next on the list of characteristics to consider is materials. You can technically plant your orchid in any container with enough drainage holes. However, the moisture-wicking abilities of some materials do help create the conditions orchids prefer.
Terracotta is ideal for growing orchids as the container draws moisture away from the soil, improving drainage. You can also try fabric or mesh pots that allow air to flow, as long as you plant in the right soil to avoid suffocating the roots.
Most orchid pots are made from plastic. They look more like baskets than containers, full of holes that are small enough to stop soil medium from dropping through but large enough to allow air to pass through and excess moisture to drain.
Unfortunately, plastic pots are not the most pleasing to the eye. You can always use these containers inside slightly larger and more decorative containers to cover up the plastic. If you choose this option, take the pot out when you water and only put it back once the excess has drained to prevent water from sitting at the bottom of the outer container.
Size
 Opt for smaller containers to enhance orchid growth, focusing on leaf and flower development.
A massive container is not the answer, even if you want your orchid to grow as large and lush as possible. Orchids grow best when their roots are restricted, focusing on leaf growth and flowering rather than root development.
When you first purchase your orchid, you’ll notice the roots wrapped together tightly in a small space. Smaller orchids will need some extra room when repotting, but it’s important not to go to the opposite extreme. Small containers will give you far better performance than large ones.
Smaller containers also play a role in drainage. You don’t want to plant your orchid in a pot with more potting medium on the outer edges than roots. This will hold onto excess moisture, increasing your chances of root rot. Ultimately, you’ll be stunting growth rather than boosting it.
Whenever you choose a container, keep it small. Either pot into a container the same size if you just need to change the potting medium, or choose a container one size up to give the roots a little extra room.
Color
 Consider clear containers for orchids to monitor roots and provide sunlight exposure.
Color is the final consideration, but not for the reason you may think. Technically, we’re discussing lack of color (or opacity) rather than anything related to design.
Many specialized orchid containers are made from clear plastic rather than a solid color. This not only allows you to inspect the roots closely for signs of damage but also allows some sunlight exposure to the roots as they experience in their native habitats.
If you’re a frequent overwaterer that often causes root rot, you may want to opt for these clear containers. But beyond that, you can choose any color that suits the orchid itself and your surrounding garden.
Orchid Soil Mix
 Use a well-draining bark-based medium for epiphytic orchids, avoiding regular garden soil.
Choosing the right container becomes pointless if you fill it with the wrong soil mix. These plants’ particular potting requirements extend to the soil, too, so regular garden or plain potting soil won’t cut it.
Epiphytic orchids are typically potted in a bark-based medium that drains quickly and doesn’t hold much moisture. This replicates the conditions they are used to in their native habitats, allowing as much air to flow around the roots as possible.
You can purchase an orchid potting medium online or from most nurseries. They contain a mix of bark, perlite, coconut husk, sphagnum moss, and other elements designed to make orchid roots happy. If you have the ingredients on hand, you can also make your own mix tailored to your specific orchid type.
How To Pot An Orchid
 Repot orchids every few years using fresh soil after the flowering season concludes.
When you’re ready to pot up, grab your new container and soil mix. You’ll only need to do this every few years to replace the potting medium as it breaks down over time. You may also need to repot smaller orchids into larger containers if they are too confined.
It’s best to do this when the orchid is finished flowering. Any disturbance before or during flowering can impact growth and the flowering cycle. Once the flowering season is finished, cut back the stem and prepare your soil mix for repotting.
Follow these easy repotting steps to get it right:
- Remove the orchid from its current container, getting rid of the old bark around the base.
- Gently loosen the roots and remove old soil to look closer at root color and health.
- Using disinfected pruning shears, cut back any roots that are damaged or have unhealthy color to give your orchids a fresh, healthy start.
- Fill the base of the new container with fresh potting mix.
- Lower your orchid inside and fill in any gaps with more orchid bark. Continue filling until the plant is secure and stands upright.
Drench the container to hydrate the roots and monitor performance once you’re done. The plant should have settled into its new home within a few weeks.
Final Thoughts
With so much choice in containers, finding the right one for your orchids is hard. You won’t go wrong if you keep these requirements in mind and look for the perfect container to suit your orchids’ unique growing needs.