Canna lilies are such a joy in the garden. With their lush, tropical foliage and big, brightly colored flowers, they impact the landscape in a way that few plants are capable of. Sadly, canna bulbs are not especially cold-tolerant for those of us living in cooler climates.
Fortunately, they can be stored for the winter if you dig them up and give them the right environment to overwinter in. Here are some tips for storing your canna lilies over the winter. If you do it right, you should have beautiful cannas once again next year without the expense of purchasing new plants.
Monitor the Weather
 Waiting until frost naturally withers the foliage makes the task more manageable and easier on the plant.
Canna lilies are relatively cold-tolerant plants, surviving temperatures down to 0°F. This means that if you live in zones 7-11, you don’t have to worry about your cannas at all over the winter. A thick blanket of mulch applied when the weather shifts to around 50°-60°F will give them a bit of extra insulation.
If you live north of zone 7, you will want to dig up your canna bulbs and store them for the winter. This way, you can plant them again to enjoy next year. The sweet spot for digging up these, and many other bulbous and rhizomatic plants, is right after the first frost.
Canna lilies grow from rhizomes, which are slightly different from true bulbs. Plants like ginger and turmeric grow from rhizomes, so it should be no surprise that cannas do as well since the plants are similar. For our purposes, we will refer to “bulbs” and “rhizomes” interchangeably.
After the First Frost But Before a Hard Freeze
While they can tolerate colder weather, we want to leave these plants in the ground long enough for the cold to trigger dormancy. Waiting until a frost kills off the foliage makes the task easier and less painful. No one likes to chop down those pretty tropical leaves before it’s necessary.
As much as you don’t want to dig them up too soon, it’s important not to leave them in the ground too long. A hard freeze can be damaging. You want to harvest them after the foliage dies but before there has been a deep frost.
Grow Your Canna Lillies in Containers
Maintain your containers in an area with a consistent temperature.
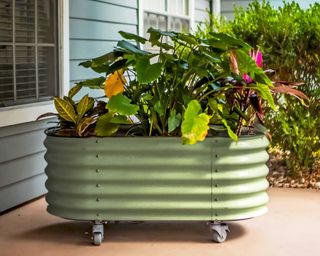
Even easier than digging up your cannas every winter, canna lilies grow very well in containers. Cannas in containers don’t have to be removed from their pots for the winter. Bring your cannas in containers indoors, and keep them in a cool, dry place until spring returns.
If you intend to re-pot your cannas, leaving them in their current containers for the winter is best. This way, they do not have to recover from the transplant while in a dormant state, which means little growth. Strive to keep your containers in a space that stays around 50°-60°F most of the time, and keep them in darkness as much as possible.
Cut the Foliage
 To prepare for bulb extraction, trim away the dead leaves using a sharp, clean tool.
Once you’ve experienced your first freeze, your canna’s foliage should die back, making the process easier. Before you dig, trim off the dead foliage using a clean, sharp tool. Trim the foliage back to about 2” above the ground.
It’s important to use a clean tool when making these cuts. You can even dip the tool into a solution of one part bleach to 10 parts water in between plants. This avoids contaminating the vulnerable bulbs with fungus and bacteria that could be residual on a tool that hasn’t been cleaned.
Dig Up the Bulbs
 To minimize root disturbance, use a shovel or gardening fork when excavating canna bulbs.
Cannas are typically planted at least four to six inches deep, so it is best to use a tool to dig them up that will disturb the roots as much as possible. A shovel or gardening fork works well.
Using your tool, dig down around the plant stalks in a wide enough circle that you don’t damage any potential new offshoots. These can be divided later and planted to become new canna plants in the spring. Dig down beneath the bulbs, lifting them with the shovel.
Once the soil is well loosened, it’s time to get your hands dirty. Use your hands to loosen the bulbs from the soil. Using your hands will help preserve them and potentially vulnerable offshoots. You can separate your offshoots now or in the spring, but more about that later.
Clean Them Up
 Make sure to wipe or rinse off any residual dirt gently.
Before storing, cleaning off the rhizomes and removing any soil is important. These bulbs are typically very sturdy and can tolerate storage. However, any damage inflicted while digging will make them more susceptible to certain pathogens. Any small cuts can make them more vulnerable to these damaging forces.
The soil can contain fungus, bacteria, or other garden pests you don’t want to store. Use your hands or a rag to clean the bulbs, or gently rinse off any dirt with a stream of water. If you choose to wash the bulbs, it is very important not to store them wet, as this can cause them to rot.
Cure the Bulbs
 Be sure to eliminate unhealthy bulbs, as diseases can easily spread in storage.
Once you have cleaned your bulbs, it is time to let them cure. This process drastically reduces the risk of rot. It also toughens the skin, protecting them from mold or fungus. Most bulbs should be cured before storage; cannas can take a bit longer.
Cure them in a cool, dry, dark place, allowing them to dry out for about a week. You will notice the skin starts to wrinkle as they cure.
Once the skin takes on this wrinkled appearance, they are ready to store. Make sure to remove any that appear unhealthy. Diseases spread quickly in storage.
Wrap the Bulbs
 To enhance protection against potential pathogens, ensure your bulbs don’t touch each other.
Wrapping your bulbs before you store them is another layer of protection from any potential moisture left over, which could cause them to rot. Newsprint paper is great for this purpose, as are paper grocery bags.
Another way to protect your bulbs while in storage, if you prefer not to wrap them, is to bury them in peat moss or vermiculite. Make sure that whatever medium you use to wrap or pack is breathable.
Wrapping also prevents them from touching each other. The less contact they have with potential pathogens, the better. If you are storing them in peat moss or vermiculite, ensure they are not touching and that there is a layer of the medium on all sides.
Store Them Correctly
 Choose a breathable container that is not airtight.
Choosing a container and a location should come down to keeping them dormant and at the right moisture level. First, decide what kind of container you want to store them in.
Paper grocery bags work, but this might not leave your bulbs accessible for mid-season inspection. I like to store mine in shallow cardboard boxes. This allows me to put a single layer in each box, making them accessible while insulating them.
If you’ve wrapped your bulbs in paper, you can store them in breathable nylon or open-weave cotton bags. The only concern here is that they need to be insulated from touching one another, and there should be sufficient air circulation around each bulb.
Avoid storing your bulbs in plastic containers. They will rot if moisture is present and the container doesn’t breathe, so avoid using plastic boxes or bags for storage.
Also important is the storage location. The temperature and humidity of the storage space are the two main factors involved in preserving the integrity of your bulbs. You want a space where the temperature stays between 35°-50°F. You also want to avoid fluctuations in humidity, and the space should stay fairly dry throughout the season.
If your basement is cool and dry, this is an ideal place for storage. A garage can be a good choice if your climate doesn’t cause your garage temperature to fall below freezing. Storing bulbs against the wall where the garage is joined to the house’s interior can help insulate them slightly.
A cool closet or shed is another possibility. If you have a greenhouse that will stay in that temperature range, that would also be acceptable, but make sure it doesn’t get too humid.
Check Up Periodically
 Remove any infected bulbs to prevent diseases from spreading to the other bulbs.
With your bulbs properly stored, you should be good to go through the winter. However, it is a good practice to check in on them now and then. Once per month is typically sufficient.
Look to make sure that none are rotting or decaying. If they are, remove those from the box and dispose of them so they do not infect the others. Also, check the moisture level. You want them to stay dry but not dry out completely.
If you see that your bulbs have continued to shrivel and darken, they may be too dry. Use a spray bottle to mist the peat moss, vermiculite, or the outside of the paper they are wrapped in. Don’t saturate anything. Just a little bit of moisture goes a long way. After checking on your bulbs, cover them back up and store them.
Final Thoughts
Storing your canna bulbs for the winter doesn’t have to be complicated. Just keep these tips in mind and try not to skip any steps, or you could end up with bulbs that are rotten, dried out, or otherwise damaged and may not produce growth in the coming season.