


Rhizomes are horizontal stems. They create a growth system by sending out shoots laterally along with adventitious roots to anchor plants to the ground. Common plants that start their life as a rhizome you may be familiar with are ginger, bamboo, rhubarb, asparagus, and bearded iris.
Rhizomes most commonly form an above-ground system, but a few species of iris and ferns grow underground. The key to growing plants and flowers that spread via rhizomes is knowing how to control them, as they can easily become unruly. Rhizomes, or “creeping rootstalks,” continuously form new nodes and send out shoots above ground, creating a network of roots and shoots.
Here, we’ll discuss how to keep rhizomatous plants from spreading so you can keep your garden tidy and under control.
The Short Answer
Rhizomatous plants can be controlled by digging up rhizomes and roots by hand and tools, growing them in raised beds, containers, or grow bags, or using organic sprays, tarps, and minimal tillage. You can also call local experts for help, or if the problem is uncontrollable, kill aggressive rhizomatous plants with chemicals.
The Long Answer
 Understanding the spread of rhizomatous plants is essential before delving into their control methods.
To discuss how to control rhizomatous plants, you must first understand how they spread and that not all plants that spread this way are undesirable.
How Rhizomes Spread
 You can divide rhizomes to propagate plants.
Rhizomes spread via vegetative reproduction. In ideal conditions, a rhizome uses its stored energy to grow nodes and roots above and below ground. The rhizome increases in size horizontally, expanding its underground network.
In winter, rhizomes slow their activity, store energy, and perennate if conditions are right. This means they survive the winter and start again in the spring. You can also divide them to propagate new plants to add to a different location or share with a friend. Do this by splitting the rhizome into smaller chunks, allowing it to grow new roots, then popping it in the ground.
Controlling The Spread
You can control rhizomatous plants in a few different ways. Let’s talk about each one.
By Hand Or Tools
 Remember that the tiny roots you overlook today can grow into substantial ones if neglected.
We’ve all been there. We’re weeding our garden and pulling up a root that seems to go across the whole plot, weaving between flowers and veggies alike. It’s pretty impressive!
Using your hands or a strong shovel or trowel, dig out as much of the plant as possible, being sure to remove roots. Do this throughout the growing season to be sure you don’t have a repeat garden takeover. Remember, if left alone, all the small roots you missed will become big ones.
Propagate New Plants
 To ensure successful replanting, having a few nodes in each rhizome clump is best.
If this is a plant you have chosen to feature in your garden but want to keep under control, dig the rhizome up in the winter for storage or in the spring when cleaning up your garden before the main planting season. Simply wiggle it gently and split it apart with your hands. If it’s stubborn, you can use a clean knife to score an area, which should help it to separate. The larger the rhizome, the harder it may be to split.
These rhizome clumps should grow a new plant with the same genes as the mother plant. Each clump should feature a few nodes for best success when replanting. You can stick it right in the ground or put the bottom half in water and wait until some roots have formed before doing so.
Minimal Or No Tillage
 No-till gardening is highly advantageous for managing perennial plants that spread through rhizomes.
Due to the deep nature of some roots, no-till gardening is very beneficial for controlling perennial plants spread by rhizomes. When tilling or constantly disrupting the soil and breaking apart these strong root systems, each one will likely form a new plant from the remaining piece of the root. They are very resilient!
Instead, consider a broad fork, a walk-behind BCS, or a tilther as good alternatives to rototilling. They fluff the soil with minimal disruption to root systems.
DIY Organic Spray
Carefully spray this mixture onto undesired grasses, weeds, and plants.
Mix together a gallon of white vinegar (preferably horticultural grade with 15% or higher acidity), one cup of salt, and one tbsp of dish soap. Spray this non-toxic weed killer on grasses, weeds, and plants you don’t want, being careful not to get it on anything you want to keep around.
Physical Barriers
 You can create an underground container called a “rhizome barrier” to prevent rhizomes from spreading.
You can plant rhizomatous plants in a pot or bucket and then bury the pot, creating a physical barrier the plant’s roots cannot escape to spread. Just be sure ample drainage is possible through the bottom of the container. There is also a thick plastic film called “rhizome barrier” that can be used to make a sort of underground container that should block the rhizomes from spreading. However, nature is a beast, and not everything can be contained.
Raised beds, grow bags, and ceramic pots are options for growing things that could become invasive if planted directly into the ground, like mint or lemon balm.
Sunlight Deprivation/Silage Tarping
 Incorporating silage tarps with cover cropping alleviates the challenges associated with no-till systems.
Using silage tarps to deprive plants of sunlight has become very popular in no-till gardening and farming as an effective way to kill grass and weeds. This process of killing plants by depriving sunlight is referred to as occultation.
Occultation traps moisture and keeps the soil warm, creating a perfect environment for germinating seeds. However, by blocking the sunlight, photosynthesis cannot occur, therefore killing the plant. This process is sometimes called “tarping” and is a great way to open up new fields that were previously grassy areas or cover crops. Remember, if you’re trying to kill back Kentucky bluegrass or rhizome-spreading red fescues due to their deep-rooted nature, it may take a whole season or longer to clear the soil of these roots. Cover cropping and re-tarping may be required.
Studies have shown that incorporating silage tarps with cover cropping has decreased the pain points of no-till systems, allowing easier termination of cover crops to be used as green manure and mulch. Although finicky to work with in large sizes, tarps are a simple and basic tool with great benefits when combined with cover cropping, such as weed suppression, increased soil fertility, and moisture retention. Comparatively, using expensive and heavy equipment can lead to damaging effects such as soil compaction, decreased soil fertility, and an increased weed seed bank.
Chemical Control
 Using chemicals should be a last resort because they can harm your garden.
Chemicals should only be used in a worst-case scenario as they can have lasting effects on your garden and the personal health of you and your animals. Some OMRI-approved (organic-friendly) herbicides, including chelated iron and corn gluten meal, are available. If you want to stick with organic options, be sure to carefully read labels and look for the OMRI seal. Always read and follow label instructions.
Common Troublemakers
Now that you know how to control rhizome spread, let’s talk about a few common ground covers and weeds that may pop up in undesirable areas of your garden or yard, like sidewalk cracks or under a patio.
Parthenocissus quinquefolia or Virginia Creeper
 This native plant has the potential to dominate its surroundings quickly.
Virginia creeper is in the grape family, so it has a climbing growth nature and large, broad leaves. It is sometimes confused with poison ivy but does not typically cause skin irritation like the ivy plant. Remember the saying, “Leaves of three, let it be; Leaves of five, let it thrive.”
While a native plant with wildlife value, Virginia creeper can easily take over, climbing up cucumber trellises, t-posts, and even the side of your home.
Get rid of Virginia creeper three ways:
- By hand: Heavily prune often, pull out by hand, or shovel clumps of it with the roots. This gets old pretty quickly due to its fast-growing nature.
- Organically: Mix one part white vinegar with four parts water in a spray bottle. Spray your plants with the mixture and wait three days. Remove all foliage and stems that have died. Repeat the process until you are satisfied with the results.
- Chemicals: If all else fails, you can use chemicals to kill Virginia Creeper for good. As always, when using chemicals, thoroughly read instructions and warning labels and protect your skin and other vegetation in the area.
Pachysandra terminalis or Japanese Spurge
 Ensure you extract all the roots during removal to prevent regrowth in the same spot.
This low-growing ground cover is great for shady areas of your yard or garden, including under a patio or deck. Pachysandra terminalis is commonly known as Japanese spurge or spurge for short. Spurge is low-maintenance and grows best in zones 4-8, remaining evergreen yet subtle.
Although this is mostly a lovely ground cover, be aware that it can easily take over native plants and overrun garden borders if you aren’t careful. Like many perennials, this rhizomatous plant can be split and dug up in areas of unwanted growth. You can share it with a friend or throw it in the compost. Be sure when you are digging up the spurge that you include all the roots that you can. Otherwise, it will grow back in that same spot.
Tanacetum vulgare or Common Tansy
 Tansy features charming yellow flowers that attract pollinators in your garden.
Once upon a time, tansy was a very popular medicinal plant found in gardens everywhere. Its first mention as medicine is believed to date back to the Ancient Greeks. A cousin of yarrow, tansy was used to treat intestinal worms, rheumatism, sores, and fever, to deter insects, and in later years, for various fertility and pregnancy concerns.
However, today, tansy is listed as a noxious weed in many states in America due to its invasive nature and potential toxicity. It is dangerous for grazing animals, causing liver and brain damage, and can be deadly if ingested in large amounts. Tansy is a little tedious to remove by hand, so use a strong shovel or trowel. Be sure to get as much of the deep roots as possible. When handling tansy, wear gloves to avoid skin irritation.
However, don’t let its spreading nature scare you away from growing tansy in your garden! Its cute yellow flowers attract pollinators and can be an effective pest deterrent for things like the Colorado potato beetle and ants. Tansy spreads both by dropped seeds from their flower heads or vegetatively by rhizome growth.
Pro tip: Try growing tansy in Epic Gardening fabric grow bags or raised beds to decrease the chances of it taking over parts of your garden. Deadhead flowers as they fade to reduce the risk of seed-spreading.
Planting New Rhizomes
 After mulching and providing regular watering, the plants will begin to thrive.
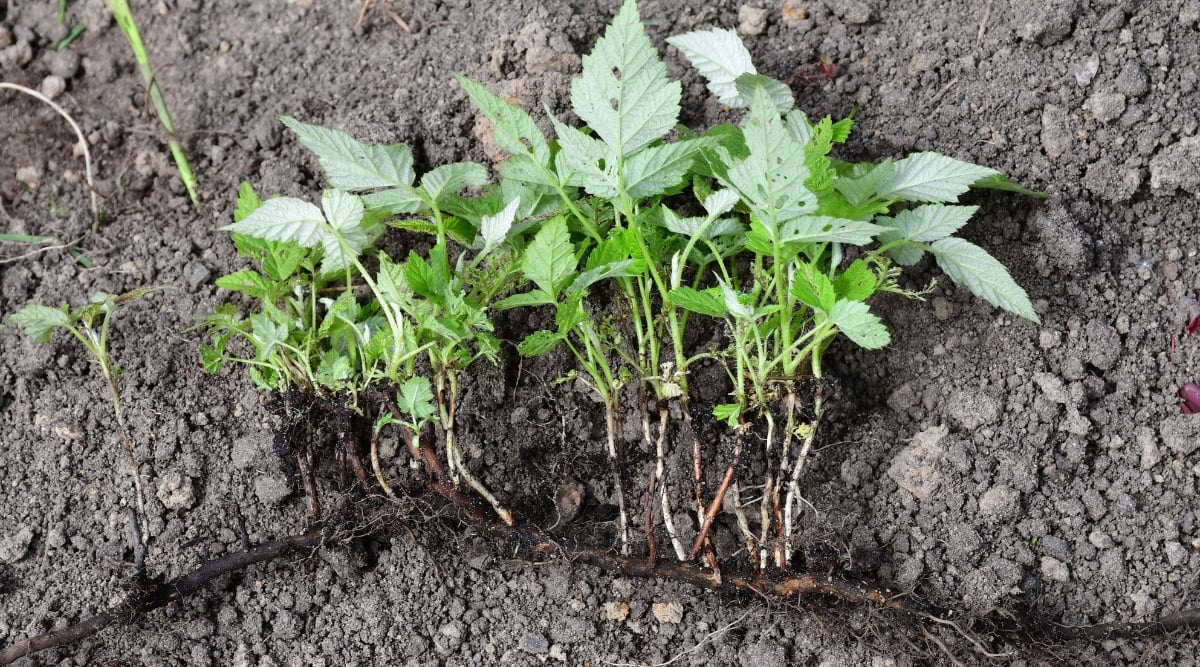
Plant rhizomes in well-draining soil to avoid oversaturation, shallowly in heavy soils and deeper in sandy soils.
A common rhizomatous plant is raspberries. What you put in the ground when planting bare roots is a rhizome with multiple stringy roots and what looks to be a dried-up stick. This is the raspberry cane from last year. Keep the crown an inch or two above ground with the cane sticking straight up, and bury the roots in a shallow trench. After being mulched and watered regularly, about an inch per week, the plants will start to take off.
What’s happening underground is the rhizome is spreading, creating deep roots, longer rhizomes, and offshoots. The offshoots above ground form new canes and, ultimately, new raspberry plants. If you do not want more raspberry plants, you must monitor the new growth and cut the new canes off. Alternatively, dig them up and plant them elsewhere or gift them to a fellow gardener. Raspberries are an incredibly fun and easy fruit to grow, but they can easily become out of control due to their quick and vigorous growth.
Cut the plants back to just a single cane in the fall, and they’ll go dormant through the winter. The rhizomes will have lots of stored-up energy and will be ready to go come spring, so watch out for new canes sprouting up.
Frequently Asked Questions
If you have tried our recommendations and are still experiencing difficulty removing an invasive weed or plant from your property, reach out to your local extension office, plant or gardening club, or even the USDA office. They can guide you in the right direction or may even help you remove the plant in question if it’s a serious concern.
Composting items such as Japanese knotweed is not acceptable as they will simply start growing somewhere else and burning certain invasives can create toxic smoke. Many municipalities do have green bins for disposal, the contents of which are run through an industrial hot composting process to neutralize any seeds or kill off any plant tissues.
If your region does not have green waste bins and you’re uncertain how to handle disposal, the best thing to do is to contact your local municipality or local waste management facility and ask for your area’s guidelines on invasive plant disposal.
Final Thoughts
Many plants are spread by rhizome reproduction, and while some are lovely and desirable, others can become intrusive, and some are considered invasive. There are benefits to most plants, so finding a way to love and appreciate them while organically controlling them is best. If you can’t stand them or they’re causing trouble for you, contacting your extension office or USDA office is a great next step.

