Do you want to grow monster-sized giant pumpkins but aren’t quite sure where to begin? Anyone can produce an epic squash, but extra planning, effort, and research are required to get the largest pumpkins possible.
The heaviest Jack O’Lantern ever recorded was a colossal 2,702 pounds! While you probably don’t want to grow one this big in your garden (how would you move it?), suffice it to say that these autumnal icons have a lot of potential. Let’s dig into 15 tips and tricks for maximizing pumpkin size in your garden!
What is the Secret to Growing Giant Pumpkins?
 Optimal pumpkin growth requires ample sunlight, rich soil, proper fertilization, and diligent maintenance.
Giant pumpkins start with quality genetics and plenty of space. You must choose a pumpkin variety bred explicitly for huge Jack O’ Lanterns.
Then, provide at least 100 square feet of open ground with loamy, well-drained soil, plenty of potassium and phosphorus fertilizer, and lots of water. Warm, sunny days help the plant develop quickly. Be sure to weed regularly and prune excess vines to keep the plant’s energy funneled toward fruit production.
15 Tips for Epic Pumpkins
Growing massive fruits demands significant dedication, including ample time, water, and space.
Massive harvests call for tremendous efforts far more intense than most vegetables require. Before you embark on your epic pumpkin-growing journey, be sure you have plenty of time, water, and space.
Some gigantic Jack O’ Lanterns can grow vines up to 20 feet or longer, requiring up to 120 days to mature. These thirsty plants also need a continuous supply of water.
Here, we’ll elaborate on these requirements and explore 15 tried-and-true tips for colossal homegrown pumpkins.
Choose Giant Varieties
 Various giant pumpkin varieties offer options for carving and decorating.
Not just any pumpkin seed variety can grow to a whopping 100-pound squash 20 inches or more in diameter. You must select the proper cultivars bred for producing ornamental and novelty Jack O’ Lanterns. These are not your standard pie pumpkins or winter squash.
The best giant varieties include:
- ‘Big Max’: The top pick of giant pumpkin growers, this rounded orange pumpkin has smooth skin perfect for carving, decorating, or pies.
- ‘Prizewinner’: This variety is known for vigorous, quick growth and impressive size.
- ‘Atlantic Giant’: This monster plant grows 15-20’ vines and yields up to 200 pounds of squash!
- ‘Dill’s Atlantic Giant’: Popular amongst competitive growers, this variety is similar to ‘Atlantic Giant’ and can weigh several hundred pounds.
- ‘Princess’: While not as massive as others, these beautiful rounded orange pumpkins can grow enormous.
- ‘Mammoth Gold’: The decorative golden skin of this mammoth-sized pumpkin is beautiful on display.
- ‘Howden’: The perfect carving pumpkin, this cultivar yields 18-22 pound pumpkins on long vines.
Choose the Right Seed-Starting Method
 Direct seeding pumpkins relies on warm and settled weather.
Giant pumpkins take over 100 days to mature, so you must be sure they have plenty of time to grow in warm, frost-free weather. Direct seeding is highly recommended.
However, provide your plants a head start in northern regions with exceptionally short seasons. Sow seeds indoors 2-4 weeks before your expected last frost date in the spring or at any point after your final frost, provided that you leave enough time for full maturation before the cold weather arrives again in the autumn. Biodegradable pots are best to prevent transplant issues.
Pumpkins dislike root disturbance like most Cucurbit family members (cucumbers, melons, squash, etc.). Transplanting can cause stress on the plant, mainly if you are overly rough with the taproot.
Direct seeding allows the pumpkin to establish where it will grow for its entire lifespan. As long as the weather is warm and settled, and the outdoor soil temperature is reliably 70-90°F, your plants should germinate quickly. Use a soil temperature probe to check your beds before sowing.
Sow giant pumpkin seeds about 1” deep, or twice the depth of their largest dimension. You should space 2-3 seeds per mound with rows 8 to 10 feet apart. Once germinated, select only the strongest seedlings and thin to 1 plant per mound.
Plant in Full Sun
 These fruits require abundant sunlight for robust growth and fruit production.
Pumpkins demand full sunlight and will not produce large squash in the shade. These sun-loving plants need as much light as possible to develop strong stems and leaves and produce healthy fruits.
Grow them in an area with at least 6-8 hours of bright, direct sunshine. Check that no structures, trees, or shrubs shade out the site at any point during the day.
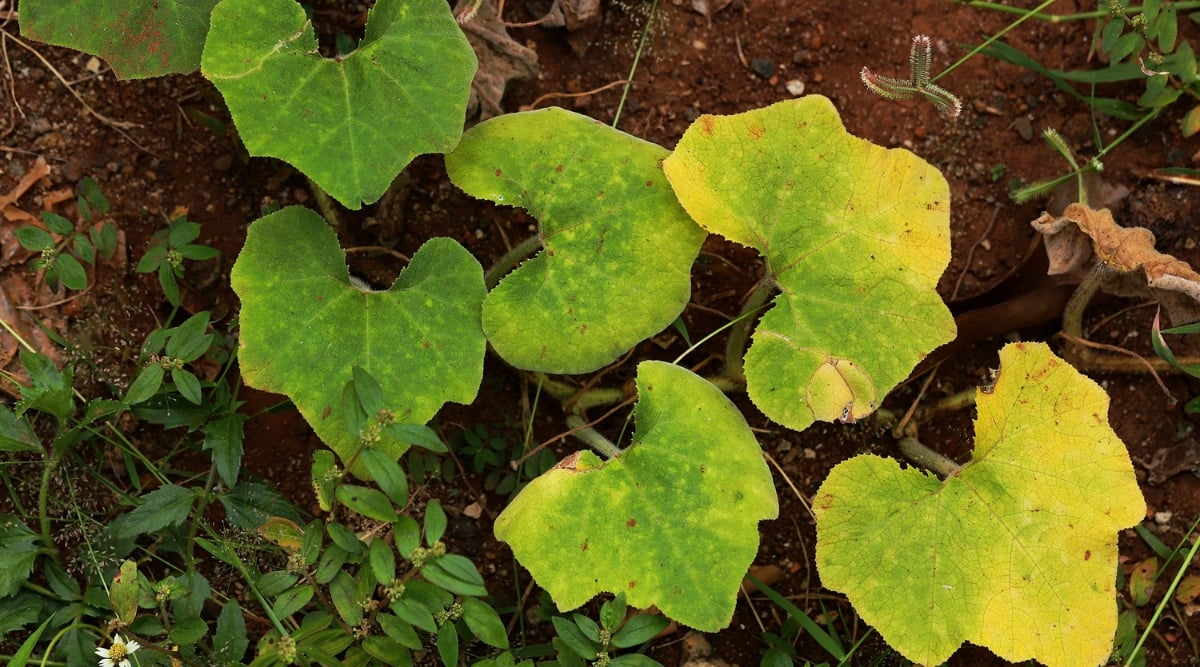
If your plant isn’t getting enough light, it may have the following symptoms:
- Stunted growth
- Leggy, weak, elongated stems with few leaves
- Pale or yellowing leaves (due to lack of chlorophyll production)
- Smaller or thinner leaf size
- Fewer flowers and fruits
- Delayed flowering
- Fruit abnormalities (malformed, small, or poor coloration)
- Higher susceptibility to pests and diseases
An open south-facing field is the best place to grow giant Jack O’ Lanterns. You may need to prune back nearby trees or shrubs and thoroughly remove tall weeds to reduce shading. Use an app like SunCalc to check how the sun will hit your specific garden area during different parts of the day.
Grow In Mounds
 Mounded soil for these plants enhances drainage, warmth, and air circulation.
Pumpkins love growing in mounded soil that elevates the vines slightly off the ground. The subtle hills improve drainage because water flows naturally through the mound.
The elevated position of a mound allows the soil to warm up faster in the spring and creates a better environment for early seed establishment. Better yet, the air circulation of an elevated planting bed reduces the risk of fungal diseases that take hold in stagnant, damp air.
If you don’t have enough quality native soil to make the hills, you can try Hugelkultur. This traditional German gardening method translates to “mound culture” or “hill culture.” Also nicknamed “lasagna gardening,” it allows you to layer lots of rich organic material into a mound so your pumpkins can reap all the benefits of a raised bed without being contained in a wooden or metal box.
The Hugelkultur “lasagna” hill starts with rougher carbon-rich materials at the bottom, like sticks and twigs, then progressively moves to finer materials like straw, manure, grass clippings, and finally, loamy compost-rich soil on top.
The best time to assemble a mound is in the fall before you plan to grow giant pumpkins. To prepare the mounds:
- Find a well-draining, full-sun area and loosen the soil with a broad fork.
- Make your mounds 18-24” wide and 8-10 feet long.
- Begin your lasagna with roughly broken twigs and sticks.
- Add a layer of straw or deciduous leaves.
- Optionally, spread a layer of aged manure. If using high-nitrogen manure like chicken poop, reduce your nitrogen fertilizer.
- Add a top layer of finely sieved compost.
- Use a shovel to pile up soil over the elongated raised areas so they are 6-8” high and 18-24” wide.
- Space the mounds at least 5-10 feet apart, depending on varietal specifications.
- Cover the mound with a tarp or landscape fabric for the winter.
- In the spring, lift the tarp and add another top layer of quality aged compost.
- Weed and rake the mound before seeding.
Give Them Space to Ramble
 This variety requires a large area to grow and produce ample food for its massive growth.
If you have a small garden, this is not the crop for you! These big boys need up to 100 square feet to ramble and grow to produce enough food (via leaf photosynthesis) to fuel monster pumpkin growth.
Overcrowded plants yield small, wimpy pumpkins because they compete for root space, water, fertilizer, and sunlight. Cramping a lot of plants in a smaller area is also a recipe for fungal disaster!
Each variety requires different spacing, but you can follow these general rules of thumb:
- Space individual seeds or transplants 15 to 20 feet apart.
- Thin any unwanted or overcrowded seedlings!
- Leave at least 10 feet between rows for pathways so you don’t step on plants.
- Map out your garden so each plant has a bare minimum of 80 to 100 square feet.
- Remember, 100 square feet is about a 10′ x 10′ space. Some pumpkins produce 20-foot-long vines and may need additional space to ramble.
As the vines begin to grow, guide them to spread from the mound in a direction that won’t impede the growth of nearby plants. You can gently lift any vine and move it where you want it. This prevents vines from crossing over each other and getting tangled up.
Amp Up the Fertilizer
 Proper fertilizer balance is key for abundant squash growth, as excessive nitrogen harms fruit development.
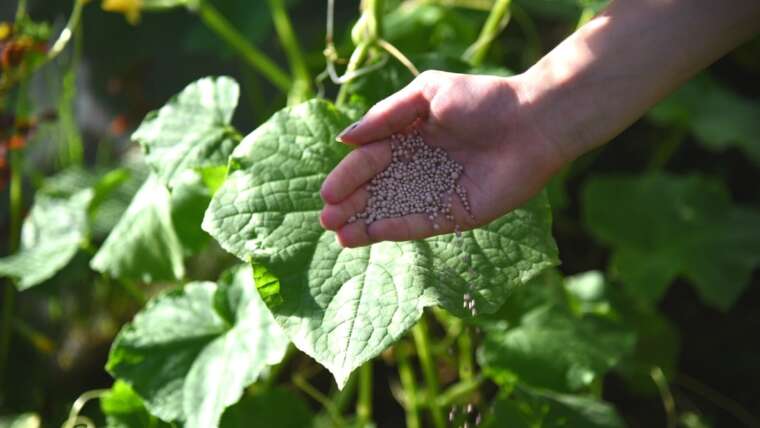
Unsurprisingly, a colossal-sized squash requires lots of food. Fertilizer is crucial for an epic pumpkin harvest, but you don’t want to overdo the nitrogen. Excessive nitrogen can cause an overgrowth of foliage and greenery at the expense of fruits.
The best fertilizers are slow-release organic fertilizers with balanced proportions. In contrast to synthetic fertilizers, organic fertilizers aren’t just better for the soil but ensure you don’t “burn” the plants with an overload of nutrients all at once. Microorganisms slowly break down the fertilizer and make the minerals available for plant uptake.
Look for labels like 10-10-10 or 14-14-14 to ensure the ratios of nitrogen, phosphorus, and potassium are even. Espoma Garden-Tone is our fertilizer of choice! It includes a blend of feather meal, poultry manure, bone meal, greensand, potash, and beneficial bacteria to help break down the nutrients!
Fertilize your pumpkins at the time of planting for an initial boost. Usually, a handful of granular fertilizer in each planting hole is sufficient, but check your product label for proper dosages.
Apply a side-dressing of fertilizer every 2-3 weeks throughout the season. Be sure to water after fertilizing to dissolve the nutrients and deliver them to the plant’s root zone.
Water Thoroughly
Dry soil won’t work for giant pumpkins. These plants need tremendous amounts of water to fuel their substantial fruits. A mature pumpkin is up to 90% water, so you can imagine how much moisture a single vine needs to produce several pumpkins.
I wouldn’t even attempt to grow these plants unless you have a reliable irrigation source and an easy way to get water to your garden. Nobody wants to stand there with a hose daily for the whole summer. Invest in your irrigation system in advance.
Water at the Base in the Morning
 Drip irrigation prevents leaf moisture that can lead to fungal diseases.
Drip irrigation or soaker hoses deliver water straight to the plant’s root zone. You never want to overhead-irrigate Cucurbit-family crops with sprinklers because the moisture on the leaves quickly causes disease.
Powdery mildew will take out your pumpkins quickly, leading to a disappointing harvest. Avoid this by running irrigation lines right up under the vines.
Morning watering is best because it allows the plant to drink before the sun’s heat evaporates soil moisture. As we explain below, mulch can significantly reduce evaporation and allow you to water anytime.
Water Deeply and Consistently
 Proper deep watering promotes strong roots.
Deep watering is essential for epic harvests. Every time you water, ensure the moisture penetrates the lower soil layers several inches down. Shallow watering can cause the roots to grow shallowly, making them more vulnerable to drought and heat stress. More water at once is better than several small waterings.
Check the soil near your vines daily in hot weather. If you stick your finger in the soil and your skin comes out clean, it is too dry, and the plants need water ASAP.
Run your irrigation for at least an hour, and then check again. You don’t want the soil to be soggy, but it needs to be thoroughly moistened throughout all the particles.
Consistency is vital for giant yields. You don’t want to overwater or let the soil dry out. Squash plants are fussy about water, and the vines can quickly become stressed when they don’t have enough. A stressed plant means smaller pumpkins.
Wilting in the Heat
 Cucurbit crops may wilt in peak daylight due to heat, but they recover in the evening.
A wilted plant is usually a sign of drought. However, Cucurbit crops like cucumbers and pumpkins also commonly wilt in peak daylight.
In the heat of summer, it is normal for squash leaves to droop slightly in the afternoon. This is nothing to worry about as long as the soil feels moist when you stick your finger in. They will perk back up in the evening when temperatures cool.
Protect From Pests and Diseases
Insects, rodents, and fungi are pumpkin plants’ greatest enemies. They can destroy all your hard work in just a few days, so prevention is the key!
Insects
 Common pests like squash vine borers can cause various types of damage to plants.
Common pumpkin pests include:
- Squash vine borers: These moth larvae tunnel into pumpkin stems and leave sawdust-like poop at the base of infected plants.
- Aphids: These nasty sap-suckers accumulate on leaf undersides and excrete honeydew, but can also be vectors for viral plant diseases.
- Cucumber beetles: These striped and spotted beetles eat the leaves, stems, and flowers and can transmit bacterial wilt.
- Squash bugs: These brownish-black bugs cause wilting, yellowing, and irregular leaf holes.
- Cutworms: Toppled over seedlings usually are victims of cutworm larvae that chew the young plants at the base.
To prevent insect pest destruction, try:
- Covering with row fabric in the initial growth stages (remove once flowering begins).
- Planting yarrow, dill, alyssum, marigolds, and nasturtiums nearby to attract beneficial insects.
- Releasing predatory insects like ladybugs or beneficial nematodes into your garden.
- Spraying with diluted neem oil.
- Sprinkling diatomaceous earth on the leaf surfaces to kill squash bugs.
- Using insecticidal soaps for soft-bodied pests.
- Hand-removing large beetles and drowning them in soapy water.
Remember to scout regularly so you can catch pests before they get out of hand.
Rodents
 Rodents target young fruits and flowers due to their preference for soft textures.
Voles, mice, rats, and other rodents are always on the prowl for a good squash snack and can ruin your hopes of growing giant pumpkins. These pests usually go for the soft, young fruits or flowers before they’ve had the chance to thicken their skins.
To keep rodents out of your pumpkin patch:
- Use critter cages to protect young plants.
- Cover the crop with a row cover (before flowering) to aid in establishment.
- Try a deterrent like coyote urine.
- Get an outdoor garden cat or dog that loves chasing squirrels off.
Fungi
 Fungal pathogens target these plants due to their spacious leaves.
Fungal pathogens like powdery mildew and Botrytis like to attack squash-family plants because the large leaves provide plenty of space for the fluffy mold-like infection to take hold.
Unsurprisingly, these pathogens thrive in wet, humid, stagnant conditions. The key to preventing fungal disease is maintaining airflow and leaf dryness.
Remember to:
- Keep pumpkin spacing as wide as possible to ensure airflow.
- Stay on top of weeds at all times.
- Prune excess tertiary vine growth and possibly secondary growth as needed.
- Never irrigate from above or intentionally wet the leaves.
- Use drip lines or soaker hoses to irrigate at the plant base.
If you notice signs of infection on any leaves, remove and destroy them ASAP, then use a homemade baking soda spray or organic fungicide to treat the remaining plants.
Keep Them Warm
 These plants require warm temperatures between 70 and 85°F and cannot tolerate frost.
All squash-family crops are warm-weather plants that despise temperatures cooler than 40°F. Ideally, they prefer to grow between 70 and 85°F. They are not frost-tolerant and will die if exposed to freezing temperatures. This is why advanced planning is so important.
Keep an eye on the weather, particularly in early spring at planting time. If the nighttime temperatures drop, you can throw row covers over your plants to protect them.
Granted, if your plants are already large during a cold snap, this requires a giant sheet of row fabric that could be expensive or difficult to handle. Fortunately, they usually only need protection during the seedling phase. Deep mulching can help increase localized temperatures.
As pumpkins mature, they become more tolerant of cooler temperatures in the 50s and 60s. However, sunny, warm weather is still essential for ripening. Always grow giant pumpkins in the peak heat of the season for the best results.
Ensure Proper Pollination
 Proper pollination turns squash flowers into potential giant pumpkins.
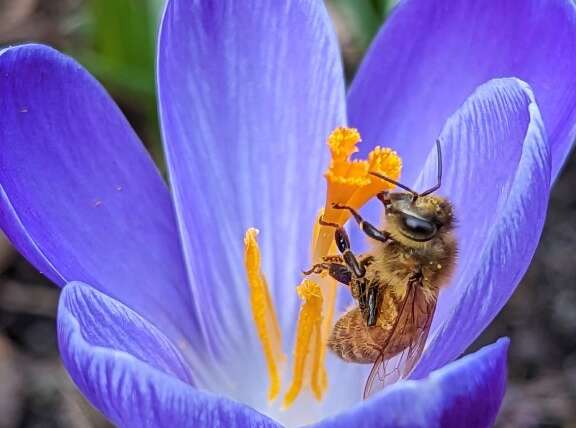
Big yellow squash flowers are no use if they don’t get pollinated. Every flower has the potential to grow into a giant pumpkin if it is properly pollinated.
Squash and pumpkin plants are monoecious, producing separate male and female flowers on the same plant. Male blossoms will extend from a long stem and make heaps of bright yellow pollen. That pollen must reach the female flowers, which are shorter and close to the vine with a swollen base. When a squash flower is pollinated, a bulb will start forming at its base. This is the ovary or future pumpkin.
Bees of many types are the primary pollinators of pumpkins. The flowers only open briefly for a few hours, then wilt and close. Bees must be present in the garden to transfer pollen from the male to the female blossoms.
Pollinator-attracting companion plants for pumpkins include:
- Sweet alyssum
- Yarrow
- Dill
- Nasturtiums
- Marigolds
- Calendula
Hand Pollination
 This technique involves using a paintbrush to transfer pollen in the absence of bees.
Be prepared to hand-pollinate if bees aren’t doing the job due to bad weather or reduced local populations. You only need a little paintbrush, a small container or bag, and a sunny, warm, dry day. The best time is morning when the flowers are fully open and the pollen is dry.
To hand pollinate:
- Find male flowers (they usually open first) and check for yellow powdery pollen.
- Use a clean, dry paintbrush to rub on the central structure (the stamen).
- Check that your brush is covered in pollen.
- Find a fully open female flower with a visible stigma (the center inside the petals).
- Rub the pollen paintbrush onto the sticky, central structure.
- Repeat this process for all the open female flowers.
- Collect fresh pollen for each flower.
- If concerned about cross-pollination, use tape to secure the flowers you pollinated.
- Be very careful not to rip or damage the flowers.
Within a week, the pollinated flowers should begin to wither and fatten at the base. This means more giant pumpkins are headed your way.
Prevent Cross-Pollination With Other Varieties
 Cross-pollination from nearby squash plants may inadvertently impact harvest size.
Believe it or not, nearby squash plants could accidentally affect your ability to grow giant pumpkins. You don’t want bees to accidentally bring the pollen from smaller pumpkin or winter squash crops over to your giant pumpkins, but they often travel with pollen stuck to their furry bodies, unbeknownst to them.
To prevent cross-pollination with smaller fruiting cultivars, don’t plant any other Cucurbita species in your garden that might flower simultaneously with your giant pumpkins. A half-mile buffer or a large barrier like a house can inhibit pollinator movement between different species.
If you want to grow other squash varieties, you may end up with a few funky off-types. While generally, this does not impact the growth of the fruit, there are exceptions to every rule. It doesn’t hurt to be proactive and limit the types of Cucurbita you grow!
Thin the Fruit
 Thinning to one fruit per vine enhances size and energy allocation.
Many experienced giant pumpkin growers insist on thinning to one pumpkin per vine. This method is particularly successful with ‘Big Max’ because the plants push so much energy into each squash. By thinning the fruit, you ensure maximum size rather than a bunch of medium pumpkins.
Once the flowers are pollinated, select the most robust pumpkin to keep and then thin the others. Thinning is as simple as pinching or cutting off the fruits you don’t want. Often, the best fruit will already be out-pacing the others and grow somewhere in the middle of the vine. Although you’re technically putting “all your eggs in one basket” by investing in a single pumpkin, thinning the extra fruits ensures nothing is sucking the energy away from your gigantic prize.
If using this method, I recommend growing several vines (as long as you have the space). Planting three to five vines and thinning to one pumpkin per vine gives you plenty of buffer if one plant dies or a squash succumbs to rot.
Mulch Generously
 Mulching benefits plants by warming soil, retaining moisture, preventing weeds, and reducing rot.
Strawbales and pumpkin patches go hand-in-hand for a reason. These plants enjoy growing on mulch because it keeps the ground warm, retains soil moisture, prevents weeds, and keeps the fruits cleaner.
Mulching is an excellent idea for any vining crop that isn’t trellised. The straw, leaves, or landscape fabric provides a buffer between the pumpkin and the soil, creating more resilience against rot. If you’ve ever picked up a good-looking squash and found its underside (where it lay on the ground) was rotten, mulch likely would have prevented it.
Weed Regularly
 Effective pumpkin growth requires vigilant weeding to prevent competition for resources.
Too much weed competition can put a damper on your giant pumpkin-growing dreams. It’s crucial to thoroughly weed your beds, especially in the early stages of vine growth. The broad leaves should shade most weeds once the plant is established.
Different types of weeds compete with pumpkins for nutrients, water, and sunlight:
- Tall weeds like lambs quarter are problematic because they can shade out the vines.
- Taproot species like thistle and dandelion compete for soil space and water.
- Vining weeds like bindweed and morning glory race to cover the ground and steal space.
Pumpkins are fairly shallow-rooted, so they can’t reach super deep in the soil for water. If nearby weeds are sucking up all the moisture, your pumpkin is less likely to grow as large.
Catch the weeds as early as possible using hand-pulling, hoeing, and mulching. Be extra careful when you get close to the crop vines. Yanking up a large weed or hoeing by the crop’s base can disturb the fragile pumpkin root system. If you are weeding close to your plants, use one hand to hold them in place so you don’t accidentally uproot them.
Be Patient
 The maturation of these giant fruits depends on the climate, taking 100-150 days.
Depending on your climate and regional conditions, these squash take 100 to 150 days to mature. Patience is a virtue when growing giant pumpkins.
You mustn’t mess with your plants too much while they’re growing. Disturbing young fruit too often could damage the vines or accidentally snap it from the plant prematurely.
If you tend your patch once or twice a week and cross your fingers for colossal squash, your Jack O’ Lanterns may be the talk of the neighborhood when harvest time comes around!
Harvest at the Right Time
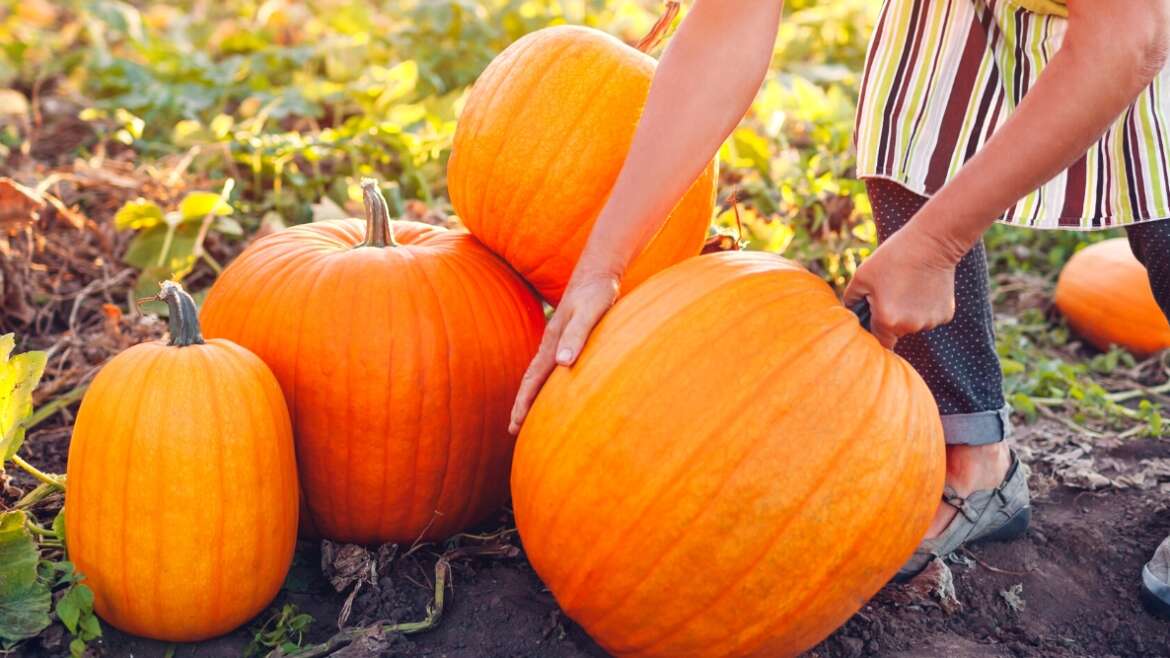
 Harvest giant pumpkins when fully mature with deep, uniform coloring.
When autumn harvest finally rolls around, it is easy to get overly excited. Pause for a moment and take the time to assess your plants before picking them. You also want to prepare for how you plan to lift and transport the massive squash.
To properly harvest your giant pumpkins:
- Look for signs of maturity and ripeness, like deep, consistent coloring without any green spots.
- Check if the vine has started to die back. Senescence (vine death near the pumpkin’s intersection with the plant) is a crucial sign of ripeness.
- Use the thumbnail test by gently pressing your nail into the skin. The pumpkin is likely ready if the skin is tough enough to resist pressure and scratching.
- Bring a tape measure to ensure the size meets the variety’s expectations.
- Check for a “corky” dry stem, which indicates the squash has reached the end of its lifecycle. Pumpkins with green, fleshy stems are not ready to pick.
- Use a sharp knife or loppers to cut it from the vine, leaving 3-4 inches of stem attached to the pumpkin.
- Carefully lift into a wheelbarrow (use your legs!) and avoid bruising or knocking it.
- Place the pumpkin in a dry, dark, ventilated area to cure and toughen its skin.
- Store in a cool, dry place with airflow until you display or use it.
Final Thoughts
It sounds like giant pumpkins are complicated to grow, but they can be quite hands-off once you get the preparation right. As long as you supply continuous moisture (even on an irrigation timer!), fertilize every 2-3 weeks, and leave lots of space for the vines to ramble, you should have giant Jack O’ Lanterns for your favorite autumn festivities!