Brassicas, also known as cole crops or cruciferous vegetables, are a highly nutritious genus of plants that grow best in cool weather. The genus includes plants like cabbage, broccoli, cauliflower, mustard greens, kale, and Brussels sprouts, to name a few.
These plants are rich in health benefits and used in many recipes, but they can cause problems for beginner gardeners. Here are 15 tips for maximizing your brassica harvests for the tastiest, most robust vegetables possible.
Choose the Right Spot
Heading brassicas need full sun conditions to fully develop.
Choosing a spot to grow your brassicas is the first important factor in getting the most out of your brassica plants. Choose a spot that receives full sun for heading or crowning species, like broccoli, cabbage, brussels sprouts, and cauliflower. Full sun is considered 6 or more hours of sun per day.
Leafy species, such as kale, collard greens, and radishes, perform best in partial to full sun. For example, radishes grow well in the dappled shade of tomato plants.
This is one of many companion planting combos you can use to ensure proper sunlight. Generally, 3-4 hours of direct sun is perfect for these cool-weather leafy brassicas. The best scenario for all these vegetables is to receive their direct sun in the morning when the light is not as hot. Give them some shelter, or filtered light, in the afternoon.
Choose the Right Variety
Choosing the right variety of vegetables is fun and useful. Different varieties have different needs and grow better in certain regions.
Popular, standard varieties make growing vegetables more straightforward. However, I’m a big fan of choosing unconventional veggies for their unique appearance. Here are some of my favorite unique brassica varieties.
‘Burgundy’ Broccoli
 Caring for burgundy broccolis can be a bit tricky despite their abundance of flavor and nutritional benefits.
Purple broccolis are known for having loads of flavor and nutritional value but can be a bit finicky about their care. This ‘Burgundy‘ Broccoli has all the benefits of purple broccoli, including a gorgeous rich hue, but is much more tolerant of warm temperatures than most purple varieties. This is a great way to dress up a dinner plate!
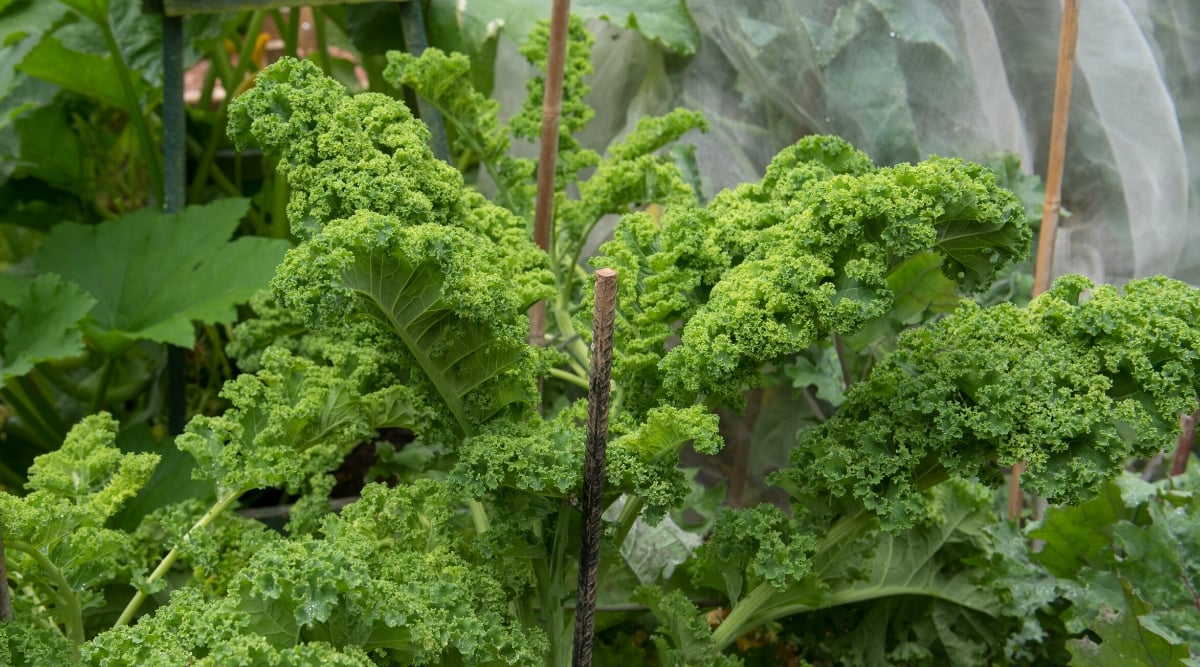
‘Dazzling Blue’ Kale
 The ‘Dazzling Blue’ kale variety is attractive and characterized by blue-green leaves intricately veined with deep purple.
Kale is packed with nutrients and very versatile in your kitchen. The baby greens are wonderful for adding to salads and making green smoothies. I love a batch of crispy kale chips, a super easy, crispy snack. This ‘Dazzling Blue’ Kale variety looks great with blue-green leaves and deep purple veining.
‘Easter Egg’ Radishes
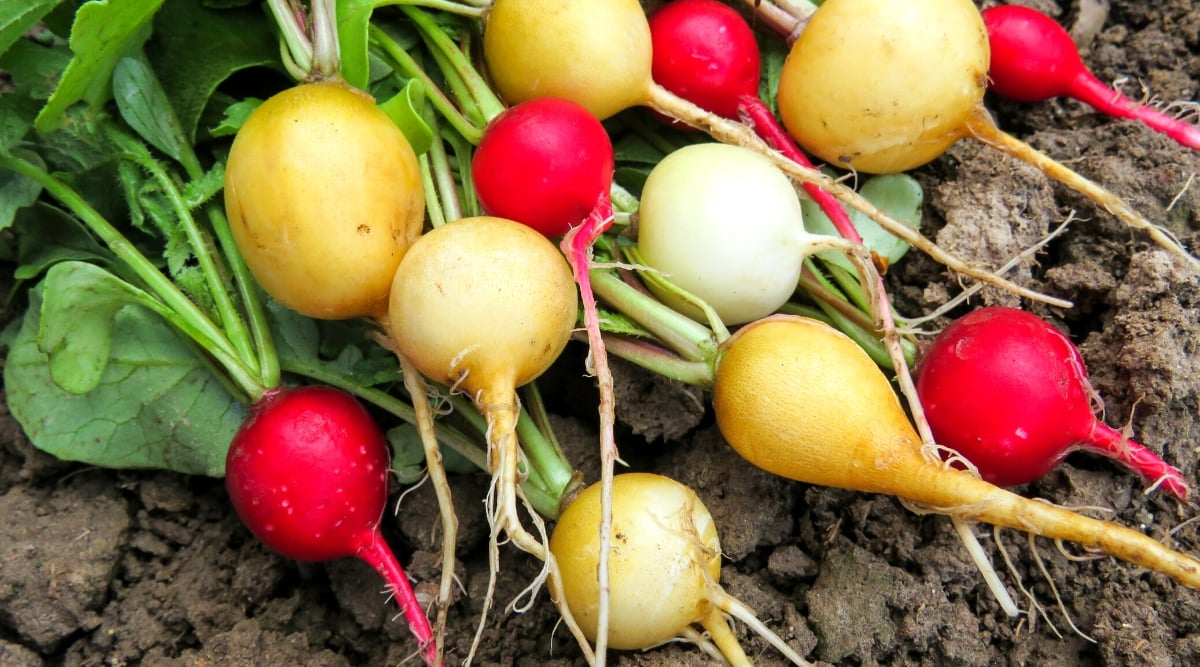 ‘Easter Egg’ radishes are stunning and multi-colored, providing a beautiful and snappy crunch to salads and sandwiches.
These stunning, multi-colored radishes add a beautiful and snappy crunch to salads and sandwiches. With shades of pink, purple, white, red, and bi-color, these little veggies are certain to be crowd-pleasers.
‘Gai Choy’
 Gai Choy, a flavorful brassica, boasts a distinct taste and appearance.
This flavorful brassica has a unique flavor and appearance. Typically used in Asian cuisine, Gai Choy has a mustardlike flavor that is more delicate when harvested young, but it can also be added to stir-fries or pickled for a super delicious punch of flavor.
Whichever varieties you choose, there is no doubt that brassicas are some of the most nutrient-rich crops you can grow and a great choice for the home garden.
Rotate Crops
 It is crucial to implement crop rotation when growing brassicas.
Crop rotation may not seem like it would increase your brassica harvests, but it saves you a lot of pest and disease trouble. Cole crops are susceptible to some fungal diseases, and they are heavy feeders. Rotating your crops can help prevent the spreading of diseases to your vegetables, as well as put nutrients back into the soil.
Rotating legumes with brassicas is a great idea, as legumes are nitrogen fixers that absorb nitrogen from the air and affix that nitrogen to nodules on their roots. Over time as the roots decompose, they give back to the soil they were planted in.
The exception to this is container growing. If you are growing your cole crops in containers, amend the soil to ensure it has ample nutrients. Alternatively, switch out your soil every two years for a fresh batch of potting mix. Either way, you can continue to grow cole crops in the same space year after year.
Test and Amend the Soil
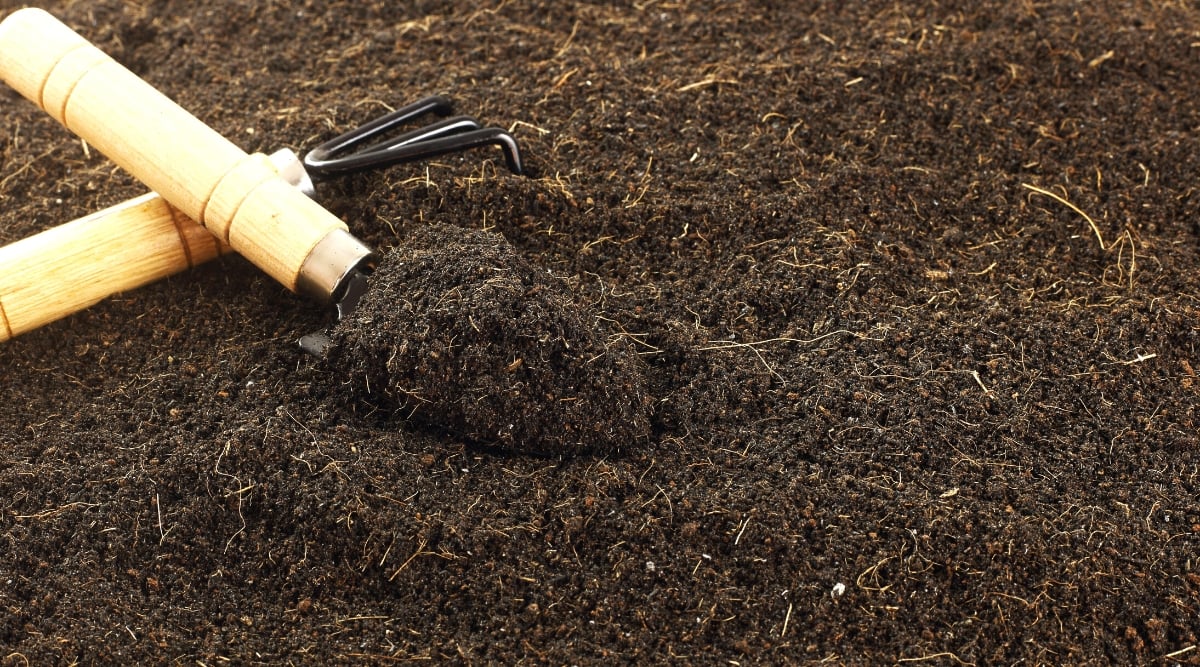 Knowing the composition of your soil is essential when cultivating vegetables in your garden.
Testing your soil is a good habit when growing vegetables in your garden. All plants have their soil preferences, so knowing your soil makeup will help to diagnose many specific issues and help you decide how to balance things out. Brassicas like fertile, loamy soil that is somewhat firm. Soil that is too fluffy may not be able to support its robust stalks. They prefer soil with a pH close to neutral (6.5-7.5).
Brassicas don’t do well in acidic soil, but they need a lot of nutrients. Start your soil amendment in the fall to restore nutrients and neutralize the soil’s pH before planting.
In the autumn, adding good quality organic compost to your soil will contribute to the nutrient composition of your soil. Compost breaks down over time, so getting it mixed in beforehand is a good idea. Before spring planting, check the pH and use lime to bring it up if needed. If planting fall brassicas, switch to composting in the spring and amend the pH in the early fall.
Plant Early
 As cool-weather crops, brassicas can be cultivated during spring or fall if they are planted early.
Cole crops are cool-weather crops. They can be grown in the spring or fall if you get them started early enough. Start your seeds indoors to give them a good start. Epic seed starting trays are a perfect size and last much longer than standard seed trays, and they come in a fun shade of pink and other colors!
For spring crops, the latest you should get your brassica seeds started indoors is about 2 weeks before the last expected freeze, but most varieties are best started at least 4-6 weeks in advance. For fall crops, brassica seeds should be started at varying times, depending on your intended transplant date.
You can start leafy green brassicas in northern states as early as June or July. Central states should wait until August. Southern growers can hold off until late August into early September.
The ideal time to start head-forming brassica seeds indoors is 4-6 weeks before your intended transplant date, which will vary depending on the seed type and the time required to grow it to maturity. These brassicas take longer to develop and benefit from an earlier start!
Transplant at the Right Time
 When dealing with brassicas, it is important to consider the appropriate timing for transplanting.
Some attention should be given to transplanting at the right time, although some brassicas can be direct sown. An ideal time to transplant is once they have 3-5 true leaves and have been hardened to outdoor conditions.
The first leaves (cotyledons) do not count in this equation. These first leaves will have a smooth appearance. These give way to the true leaves, which will resemble the leaves that the adult plant will have. Once there are 2 sets of these leaves, or between 3-5 individual leaves, your seedlings are strong enough to transplant.
Before your seedlings reach transplant age, you will often need to thin them. While you can wait to thin until they’re at the transplant age, you can also monitor their growth and neatly trim off excess plants at the soil level with a pair of garden snips. Thinning by snipping off the excess seedlings prevents disturbance to the roots of your desired plants.
Give Them Enough Space
 Brassicas, like other plants, require adequate space in your garden.
Your brassica harvests can take a big blow from overcrowding. Don’t succumb to the temptation to squeeze as many plants as possible into your garden space.
When it comes to brassicas, these plants need their space. Spacing out your plants means they get the nutrients they need from the soil, as well as getting proper air circulation, which helps prevent fungal infection. Refer to the following chart for proper brassica spacing:
Leafy greens (kale, spinach, kohlrabi, etc…) plants: 1’-2’ apart, rows 6”-15”’ apart
Heading or Crowning (cabbage, broccoli, cauliflower) plants: 8”-24” apart, rows 1.5’-2.5’ apart
Brussels Sprouts plants: 18”-30” apart, rows 2.5’-3.5’ apart
Shelter From the Wind
 Certain brassicas can benefit from support to prevent them from falling over in strong winds.
Some brassicas, like Brussels sprouts, broccoli, and taller, heavier greens, need support to keep them from toppling under strong winds.
You can accomplish this by creating a windscreen with other larger plants but try to avoid casting too much shade on your veggies. Staking these plants will help to keep them upright in inclement weather.
Choose the Right Companions
 There are plenty of good companions for brassicas in the garden.
Companion planting can have several purposes in the vegetable garden. It can help with pollination, pest prevention, disease control, weed control, erosion, and even adding nutrients to the soil. Brassicas have lots of good companions in the garden.
Planting different types of brassicas together, such as cabbage and cauliflower, can work out well if you ensure they have enough nutrients. They have similar fertilizer, water, and sunlight needs, so they can be good neighbors. However, other brassicas have similar pests and compete for similar nutrients, so you should monitor their progress.
Pea and bean plants make great companions for brassicas as they grow taller. They can provide some afternoon shade if planted in the right position, extending the growing season.
Herbs like sage, chives, rosemary, dill, and wormwood all make great companions for brassicas, as they repel certain pests that can damage your vegetables. Root veggies like carrots, onions, beets, and parsnips help loosen and aerate the soil.
Many flowering plants can help deter insects, either by acting as trap crops or secreting something that acts as a deterrent. Marigolds, geraniums, and yarrow all serve this purpose, keeping your brassicas safe from damaging insects.
Mulch
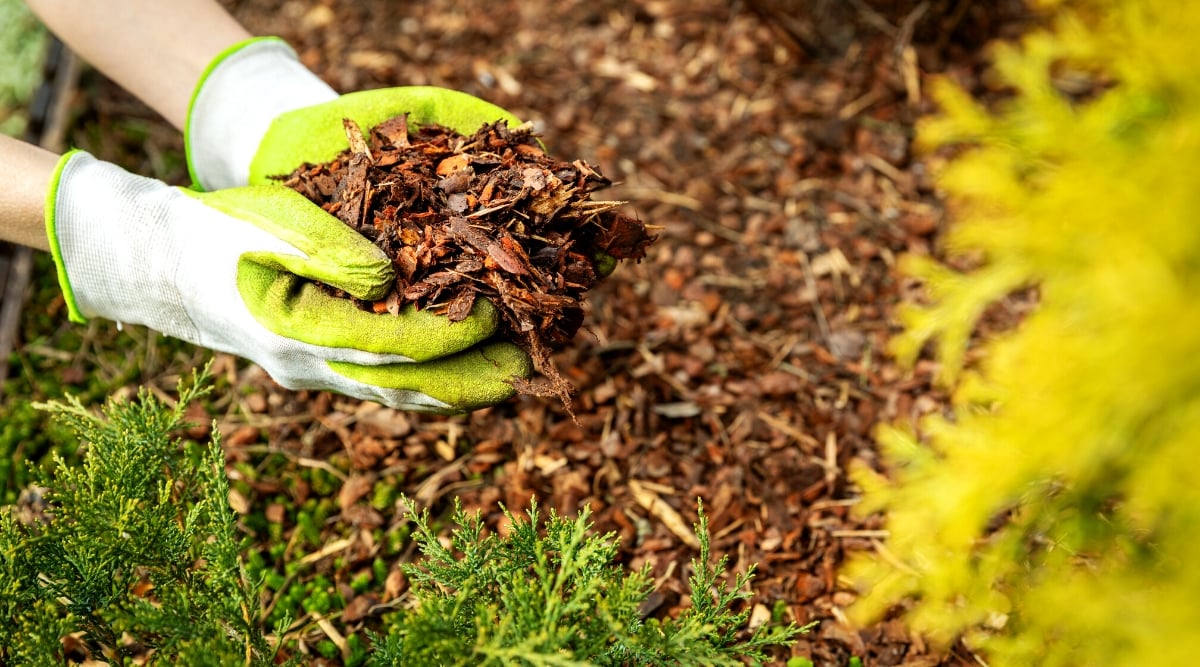 Adding mulch is an excellent method to protect from weeds and moisture stress.
Mulching is a great way to protect your brassicas. Brassicas have shallow root systems that weeds can easily disrupt. Pulling weeds can be a problem for these root systems, and mulch can help to suppress weeds.
Mulch can also help retain water for moisture-loving brassicas. Because they like moisture and are typically cool-weather crops, brassicas must stay hydrated, especially in warmer weather. Mulch can help slow evaporation, keeping the soil moist for longer.
It is important to consider watering needs when selecting mulch. In areas where water is scarce, mulching primarily aims to help the soil retain moisture. In areas where rain is regular and plentiful, weed control is the most important role for mulch.
Keep a Lookout for Pests
Unfortunately, brassicas attract pests. Of course, some measures can be taken to deter insects, but none are completely foolproof.
Keep an eye out and act early when you notice pests in the garden.
It’s best to monitor your plants and catch insects and other pests as early as possible. Protecting your plants with netting is one method of protecting them from pests, as is proper companion planting. Here are some of the main pests that feed on brassicas:
Slugs
 Slugs and snails will swiftly destroy your brassicas if you don’t catch them early.
Snails and slugs will make quick work of your brassicas if you don’t catch them early on. The seedling, in particular, is very vulnerable to these pests.
Fortunately, you won’t end up with hundreds of these guys, so picking them off by hand is typically effective. You can also create a barrier around your plants by sprinkling diatomaceous earth or organic slug bait around them.
Aphids
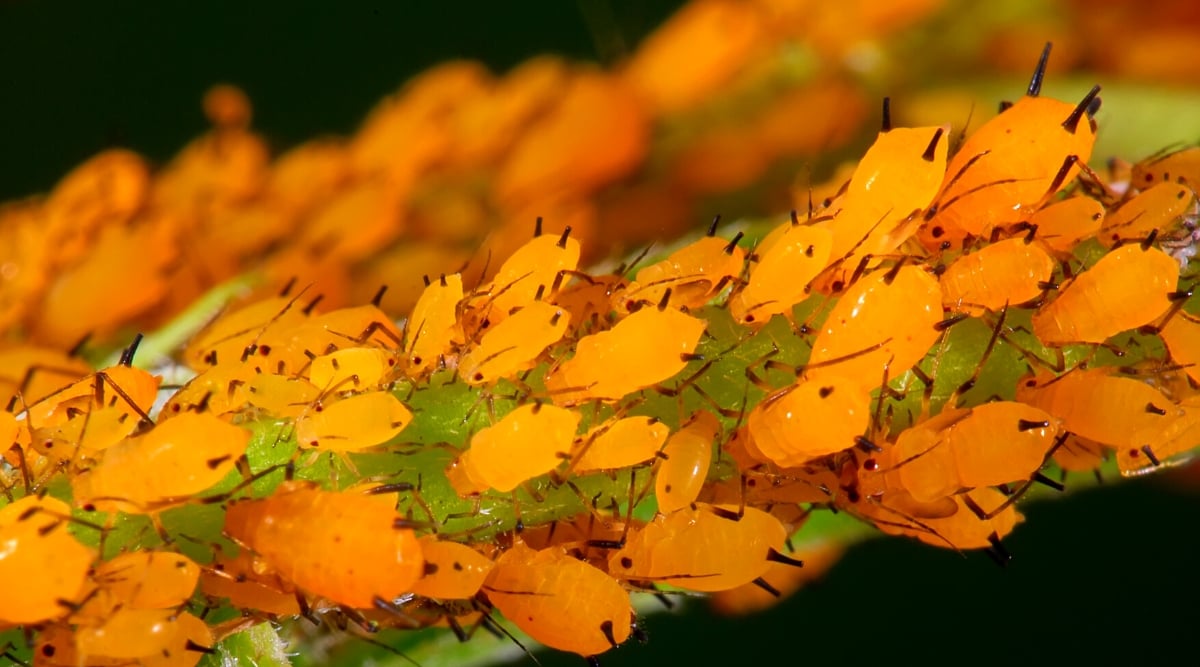 These little bugs are a prevalent pest found in gardens feeding on plant sap.
Aphids are a common garden pest that feeds on the sap of plants, stunting growth, reducing yield, and leaving behind sticky excrement called honeydew. Sooty mold grows in this honeydew, interfering with photosynthesis and further inhibiting the growth of your brassicas.
Ladybugs are natural predators of aphids and can be ordered online and often purchased in local nurseries. Releasing ladybugs into your garden is a great way to control aphids.
Caterpillars
 Both the diamondback moth and cabbage looper deposit their eggs on brassica plants.
Butterflies are beautiful and usually a welcome sight in the flower garden. I’m always more than willing to sacrifice some foliage if it means that these pretty winged insects will return to my garden. However, some caterpillars feed heavily on brassicas, which can be a problem.
The diamondback moth and cabbage looper both lay eggs on brassicas, and their larvae feed on the leaves. A single group of eggs can result in enough caterpillars to decimate a crop of brassicas. If you see a cluster of eggs, it’s best to eradicate them before they hatch. Once they hatch, caterpillars can be picked off by hand. Chickens love to snack on them as well.
Birds
 Pigeons, in particular, have a preference for consuming brassicas, along with various other bird species.
Many types of birds like to eat brassicas, especially pigeons. They feed on the leaves of cabbages and other brassicas, leaving them looking like a huge colony of caterpillars descended upon your garden.
Birds will strip the leaves and leave the veins. Netting is the best way to keep birds away from your garden.
Fertilize Properly
 Blood meal is an organic fertilizer rich in nitrogen, making it an excellent addition to brassica soil.
Adding fertilizer to your soil before planting is a great way to give your brassicas a head start. Brassicas can be heavy feeders, especially when it comes to nitrogen. They also need some micronutrients to develop the biggest vegetables possible.
Mixing blood meal, feather meal, alfalfa meal, or other organic nitrogen sources into your soil before planting will give brassicas the necessary nitrogen to get started. For head-forming types like broccoli or cauliflower, some phosphorus early in the season is also beneficial to spur the growth of the head of flower buds that we eat.
Continue to fertilize once per month for the duration of your growing season. If using organic fertilizers, try to find one that is highest in nitrogen, as its phosphorus or potassium content is not as essential for later-season growth.
Mixing compost into your soil in alternating seasons may reduce the need for fertilizer. If your soil is particularly rich after a soil test, you may be able to skip fertilizing through much of an entire season; an annual soil test is recommended.
Water Regularly
 Brassicas have a high water demand and need an ample water supply.
Brassicas need plenty of water. As a general rule, these plants need at least an inch of water per week. It is important to never let the soil dry out completely, especially in warmer weather. Water your brassicas once or twice a week in cooler weather.
Irrigaiton frequency, of course, depends upon the amount of rainfall in your region. As long as your soil remains moist, don’t worry too much about irrigating; just don’t let that soil dry out.
Final Thoughts
Brassicas are highly nutritious vegetables that make a great addition to the garden, kitchen, and dinner plate. With so many health benefits, is it any wonder brassicas have gained incredible popularity among home and commercial farmers? Keeping your brassicas watered, with a bit of attention to fertilizing, sun exposure, and pest control, will have you well on your way to a bountiful brassica harvest.