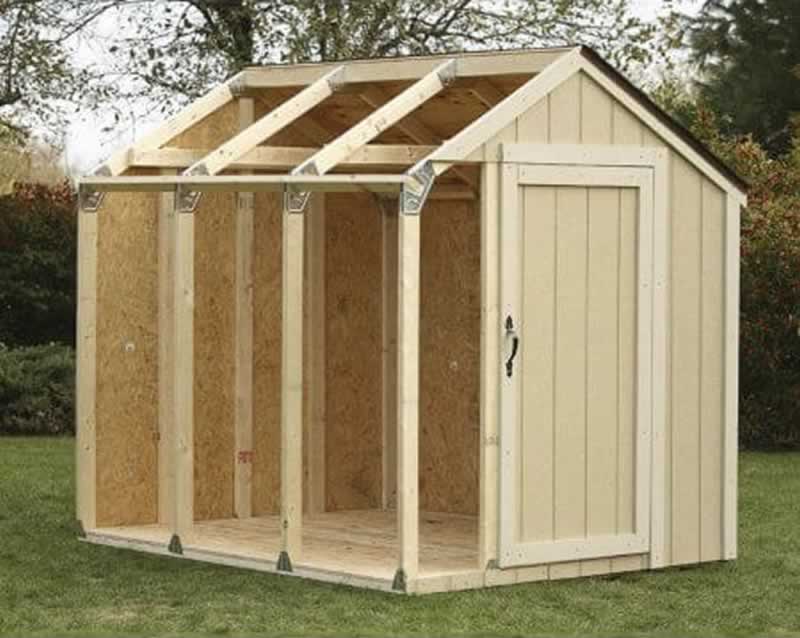
Now that the weather is getting warmer, you will likely be spending more time outside. That means you need a place where you can work on projects. A shed is the ideal way to create additional space for projects, store tools and just be outside after a long winter in the house. Don't have a backyard shed? Don't worry, we are here to help you.
This article deals with a simple plan for building a shed that you can enjoy all year round. Read on to find out how easy it is to build a DIY garden shed without spending a fortune.
Make sure the floor is level
Before starting construction, the floor must be as level as possible. Clear the area of dirt and create a grid to lay out your pillars. These wooden pillars should be 6 feet apart and each point in the same direction. The idea is to create a grid area that measures exactly 12 x 8 feet. The floor must be level so that the structure of your shed is level. For this reason, it is important that each pillar is level before cementing each post.
Place the support beams over the pillars
The second step is to place beams lengthways over your pillars to support the weight of the shed. Now place floor beams on each support beam. The beams are designed to support the floor. This should offer maximum stability. First, create an outer frame by nailing bars to the outermost bars, and then fill in the frame by placing a row of bars 14.5 inches from end to end.
Nail plywood board on floor joists
Once your floor joists are pinned down, it's time to install the plywood board for the floor. The best way to create a strong floor is to place two full-size plywood panels at opposite ends and on opposite sides of each other. When positioned correctly, only half the surface of the edge of each sheet touches the other. Now you can cut a third sheet in half to fill in the remaining parts of the exposed beams. For best results, use H-clips to connect the four plywood panels. Now the covering can be nailed down and the floor is ready.
Frame your walls
Now it's time to start your walls. Construct your walls one by one by first aligning your top and bottom panels parallel to each other. Next, insert your studs and place them 16 inches in the middle along the entire length of the wall. Make sure that you leave space for your door. Nail the studs. Use the stud bolts to build the attachment for your door.
Set up the walls
When you have finished building each wall, you can start mounting it on the floor structure. To do this, the bottom plate of the wall is nailed into the plywood of the sub-floor. Once all four walls are in place and attached to the sub-floor, secure the walls by joining them with nails at each corner. This provides additional strength and stability for the entire structure.

Build rafters over the roof
Next you can build rafters. These are 1 x 5 or 1 x 10 boards that run across the entire length of the roof. They should protrude beyond the walls to provide the shed with additional strength and protection from rain and snow. Make sure your rafters match the spacing of the wall posts for maximum strength and stability.
Nail plywood panels to the rafters
Once the rafters are in place, cover the roof with 3 full plywood sheets. This will cover everything except the overhang from the rafters. You need to cut pieces of plywood to fill the overhang, and then nail everything down. Another option is to simply buy a shed from these metal construction suppliers.
Cover the walls
Now you can cover the walls. You can choose from a variety of materials, including siding or textured plywood. Your material selection should be based on personal taste and remain within your budget. Remember that you can spend as much as you want. And you have the freedom to go back and update your wall material as soon as funds are available.
Add tar paper and roofing material
Back in the room. It's time to add tar paper to protect against moisture and extreme heat. Once your tar paper is pinned down, you're ready for the roofing material. You also have a few types to choose from. This includes asphalt shingles and metal. You also have the option to glue with regular tar paper, although shingles or tin are preferable for aesthetic and protective reasons.
Paint the walls and add hardware
Finally, you have to paint the walls if you wish. This is not essential, but it takes the look of your shed to the next level. Once that's done, you can add hardware like a doorknob and you're ready to trade.
A guide to building a shed for your garden
Creating a work area in your garden can seem complicated and expensive. Fortunately, this guide to building a shed makes the process less stressful and a lot more fun. Keep scrolling for more useful home improvement tips and advice.


