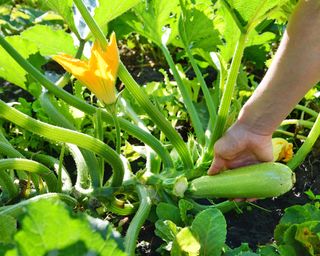
Nurturing home-grown vegetables until they reach maturity takes a lot of love and patience – so it is a crushing disappointment when the finished produce is bland, bitter, tough, mushy, or just plain inedible.
Harvesting a delicious bounty requires more judgment than any other aspect of growing a vegetable garden. Even seasoned pros sometimes get it wrong with the easiest vegetables, so don’t be too hard on yourself if you miss the optimum harvest window or struggle with technique.
All crops are different and require a particular approach to checking for ripeness, harvesting, and storing. Some vegetables can be continuously picked throughout the growing season – such as cut-and-come again crops – while others will be gathered in one big glut. Check our harvesting guides for your particular variety.
In addition, always save your seed packets for reference, as they provide guidelines on the vegetable’s harvesting timeline, as well as the mature size, and a visual reference to what it should look like when ripe.
Learn our golden rules of harvesting vegetables, build up your experience, and in no time you will be able to spot a perfectly ripe vegetable and know just what to do with it.
1. Know What Ripe Looks – And Feels – Like
(Image credit: Getty Images)
A vegetable will not taste delicious if it is harvested too early, or too late. While you can refer to the seed packet for an average maturity date, there is no exact timing that a crop can be harvested – it’s down to the gardener’s experience to spot key signs the produce is ready.
Some crops need to be harvested when perfectly ripe, while others are more forgiving and will continue ripening after picking. Crops that need to be harvested when ripe include root vegetables, summer squashes, sweetcorn, eggplants, garlic, zucchini, cucumbers, beans, and peas.
If you have grown a particular vegetable for the first time, it can be difficult to know when it’s time to harvest. Here are some checking points to help make it easier:
- Color. Does the color match the image on the seed packet? Does it look fresh and vibrant with a sheen? Is the coloring evenly distributed across the fruit? If the color has started to fade or go yellow or brown, then the produce is likely overripe.
- Feel. Fruiting vegetables, such as tomatoes and peppers, should soften a little when they are ripe. If they feel very hard, then they are not quite ready – but don’t let them get too soft. They should have a good supple weighty feel. Root vegetables are generally firmer, and go soft when overripe – thinner vegetables like carrots will go floppy. Bean and pea pods should feel full but not swollen.
- Size. Check the mature vegetable size indicated on the seed packet. Certain crops need to grow to full size to taste good, while others can also be enjoyed as tender “baby” vegetables – such as beans, beets, carrots, corn, cucumbers, and onions. Root vegetables, such as carrots and beets may start to pop up above the soil surface, meaning it’s time to harvest.
- Ease Of Picking. Fruiting crops and legumes should be easier to pick when they are ready. Pick one vegetable and see if it comes away easily from the vine.
- Foliage. Root vegetables and alliums, such as onions and garlic, grow underground, so the foliage may offer the first indication of ripeness. Usually, this will have begun to turn yellow or brown. Potatoes aren’t mature until the foliage has dried up and gone brown, but onions and garlic will be in the early stages of turning. Some vegetables, such as beets and carrots, will retain fresh-colored foliage so you need to look at the length of the leaves – they should be long and well-developed.
- Taste. Harvest one or two vegetables and taste them – cooking if necessary. If it tastes bland and tough, it is probably underripe; sour and too soft, it is overripe. You will quickly get a sense of what stage to harvest your produce.
2. Harvest At The Right Time – In The Right Weather
(Image credit: Getty Images)
Early morning is the best time to harvest most vegetables, when they are plump and well hydrated, and crisp from the night’s moisture.
Don’t harvest during the hottest part of the day, as vegetables can wilt and lose flavor.
You should also avoid harvesting vegetables during and just after the rain. Walking on the soil to access crops will compact it, reducing air pockets and drainage. Additionally, the wet leaves of vegetables may splash water onto other plants during harvesting, increasing the potential for disease transfer.
Some crops, such as onions and garlic, ideally need to be harvested following a few days of dry weather. If harvested wet, they will be more prone to going moldy.
If a heavy rain spell is forecast following a dry period, then quickly harvest any tomatoes and other softer fruits that are ready, as they can take up the water and swell, resulting in splitting.
Another reason to harvest in dry weather is to avoid transmitting harmful bacteria. In particular, listeria thrives in wet soil and can contaminate root crops and low-growing vegetables. Following rain storms, the bacteria is found on crops in a much higher concentration.
3. Tailor Your Technique To Different Vegetables
(Image credit: Getty Images)
Of course, the ultimate goal when harvesting vegetables is to get them off the plant or out the ground. However, different types of crops require different techniques.
All vegetables should be handled as gently as possible to avoid bruising and damage.
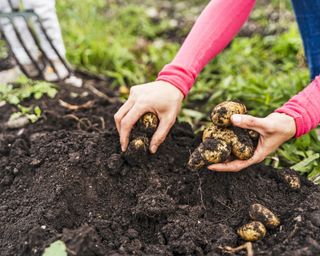
- Root vegetables should be harvested after loosening the soil around them, to avoid breakage. Do this with your fingers in loamy soil to minimize damaging crops, or gently use a fork in firmer soils. The vegetable should then be easy to pull out of the soil – if not, dig some more. Trim excess leaves immediately to prevent moisture loss.
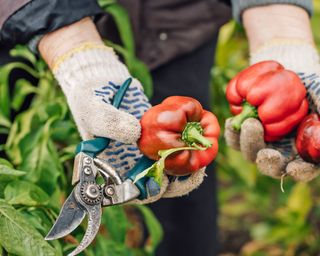
- Fruiting vegetables such as tomatoes and peppers can be harvested with a simple “twist and pull”. However, if they offer any resistance, snip the stem with sharp sterilized hand pruners.
- Leafy greens may be harvested whole or as “cut and come again’”, leaving behind the heart of the plant to allow it to continue growing. If harvesting whole, then use sharp sterilized hand pruners or a knife to make a clean cut at the base.
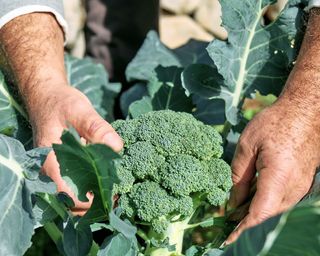
- Brassicas should also be harvested at the base using sharp pruners or scissors.
4. Use The Right Tools For The Job
(Image credit: Getty Images)
You don’t need many tools to harvest vegetables, but the ones you use need to be good quality to avoid causing damage to your produce.
- A hand or digging fork is essential for loosening soil around vegetables before harvesting them, where a spade would damage the crop much more easily.
- A Japanese hori hori knife is a fantastic multitasking tool that can be used for everything from weeding to harvesting. Use the blade to cut crops of the vine or slice them at the base. Or, use the tip for greater precision when loosening soil around root vegetables.
- Use hand pruners to cut vegetables from vines.
- A basket with a handle is ideal for holding your harvest, as its flexible sides will avoid bruising and help prevent softer vegetables from being squashed as others are placed on top.
It’s vital to sterilize cutting tools to avoid transferring disease between plants. Take a cloth soaked in disinfectant and use it to wipe the blade after harvesting each plant.
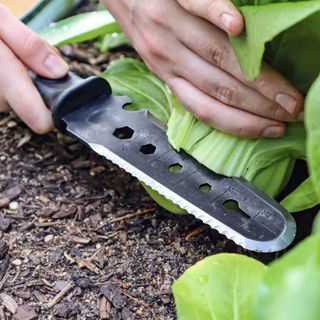
Vego Garden 10-in-1 Hori Hori Knife
Sharpen your gardening skills with Vego Garden’s Hori Hori knife kit. This innovative tool takes a classic knife to the next level with 10 functions and a heavy-duty case. It’s the last garden knife you’ll ever need!
5. Extend The Season By Harvesting Little And Often
(Image credit: Getty Images)
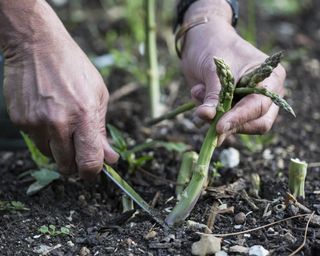
The trick of harvesting vegetables is to avoid ending up with a huge glut – you want to enjoy produce throughout the season. Succession planting helps with this goal, staggering planting and combining varieties that mature at different times. However, there is an art to extending the productivity of many crops.
Regular harvesting encourages further production in certain crops, such as beans, peas, tomatoes, and zucchinis. Start picking as soon as the veg is tasty, starting with the biggest, and the plant will keep producing for weeks.
Beans and peas need to be picked every day until they stop producing. Do not let pods become old on the plant or it will slow down production.
Picking tomato plants regularly also keeps them productive. To get the biggest crop, pick them when slightly green and allow them to continue ripening on a warm windowsill indoors.
Zuccinis should be picked once they are 6-8 inches, and should not be allowed to grow too big or the plant will slow down.
Certain crops can be grown as cut and come again, which means the heart of the plant remains and will keep putting out new shoots. Lettuce and greens such as kale, Swiss chard, and collard greens will keep growing if you only harvest the outer, older leaves, leaving behind the center growing point.
You can harvest the delicious leaves of turnips and beets without harming the main plant, as long as you leave a few on.
Other plants, such as broccoli, will produce a second flush of smaller crops once the main head is removed, along with mild greens, while kohlrabi will keep growing tasty foliage.
Leeks will keep on growing if you cut them a couple of inches (5cm) above the soil surface, leaving the root system undisturbed.
6. Cure Vegetables Before Storing
(Image credit: Getty Images)
Preserving vegetables is a key skill to learn. Even if you harvest and eat vegetables from your garden every day, you will likely have crops that you want to store. Certain produce lends intself well to freezing, canning, pickling, or drying. However, other crops can be stored for months in a cool basement or garage.
Potatoes, onions, carrots, parsnips, garlic, and beets are all crops that tend towards a larger glut that needs to be stored correctly in order to extend its lifespan.
Vegetables need to be dry before going into storage, or they will go moldy. If you intend to eat them shortly, then you can just lay them out on a table to dry for a few hours. However, long-term storage requires more effort.
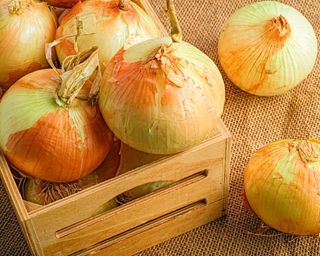
Storing onions involves giving them 2-3 weeks to “cure”. Dry them indoors spread out on a clean dry surface in a single layer until the skin is papery and the neck is dry. Store them in a crate or basket with airflow in an unheated basement or garage.
Storing potatoes starts in the ground by reducing watering in the weeks before harvesting, to toughen up the skins. Wait until the plant dies off to ensure maturity. Brush the dirt off the potatoes, then lay them out to dry indoors for 10-14 days. After this, store them in paper or hessian sacks in a dry, unheated room.
Carrots, parsnips, and beets should have the greens snipped off at harvest. Give them a brush to remove the dirt and let them dry for a while on the table. They will last a few weeks in the refrigerator, or up to several months when laid in a bucket or crate and covered in sand. Leave them in a cool, unheated room.
Another option is to overwinter carrots and parsnips in the ground before harvesting.


