This spring, I planted the last of my favorite carrot variety. The goal in this planting was not to produce the tasty carrots I love so much but to gather seeds from the carrot flower so I can have more later! In this process, I learned that collecting carrot seeds requires a period of vernalization.
I knew about vernalization for sowing wildflower seeds. Certain perennial wildflowers need a period of cold stratification to sprout in the spring. That generally entails scattering seeds in fall to overwinter in the garden. The process can also be simulated in a freezer if the natural outdoor cold period has passed.
While the process for vernalizing carrots is essentially the same, there are marked differences. Much of this has to do with the fact that you are dealing with carrot roots, and keeping them in good condition through winter is important.
Carrots are biennial plants and need that cold period with warmer periods before and after to produce seeds. In many areas leaving roots in the ground during winter is not possible, but in temperate climates, you can.
About Carrot Vernalization
Vernalization for carrots involves exposure to cold temperatures for 6 to 8 weeks below 50°F to trigger two growing seasons.
Vernalization is simply exposure to cold temperatures for a set period. In the case of carrots, you’re looking for at least 6 to 8 weeks of temperatures below 50°F (10°C). Because carrots are biennial, there are two growing seasons on either side of the cold period.
Gardeners can practice two ways to carry out vernalization: either by the seed-to-seed or root-to-seed methods.
Seed-To-Seed
Those who live in regions with mild temperatures can leave their roots in the garden to overwinter. This includes gardeners with long fall or spring seasons and often warmer winters. If you know your winters don’t dip below 15°F (-9°C) for at least 10 weeks, spreading a layer of mulch to protect the roots is enough to keep the roots alive.
In this case, all gardeners have to do is let the carrots remain in the soil over winter and allow them to seed out in the following spring. This is where the seed-to-seed phrase comes from. As the flowers brown, let the plant re-seed itself into the surrounding soil or alternatively collect and store those seeds for the next season.
Root-To-Seed
In a cold winter, the carrot roots must be removed, as temperatures can freeze the ground and kill the plant. No roots mean the plant doesn’t have the capability to grow and develop seeds. Those carrots grown in areas where temperatures continuously dip below 15°F (-9°C) should be taken from the garden ahead of winter.
In this case, a layer of mulch won’t do the trick. Much like dahlias, you’ll need to remove the roots and place them in a sterile, climate-controlled area to overwinter. Then you can plant them out in the following growing season.
Carrot Growth Stages
 Carrot flowers bloom and fade, leaving behind pods that contain seeds.
Before we get into the how-to portion of this guide, let’s cover the basics of carrot reproduction so you have a sense of what each growth stage looks like.
Every carrot plant starts with a seed, each producing one root. The germination process takes anywhere from 1 to 2 weeks. During this time, the seed coat breaks open, and the cotyledon branches out to develop roots below ground and simple leaves above ground.
The seedling stage is roughly the same length as the germination phase. In this part of the carrot’s growth, simple leaves continue to mature as the roots dip deeper into the soil below. Each simple leaf grows into a more complex form as the seedling matures.
 Carrot plants begin with a seed that germinates in 1 to 2 weeks, developing roots and simple leaves.
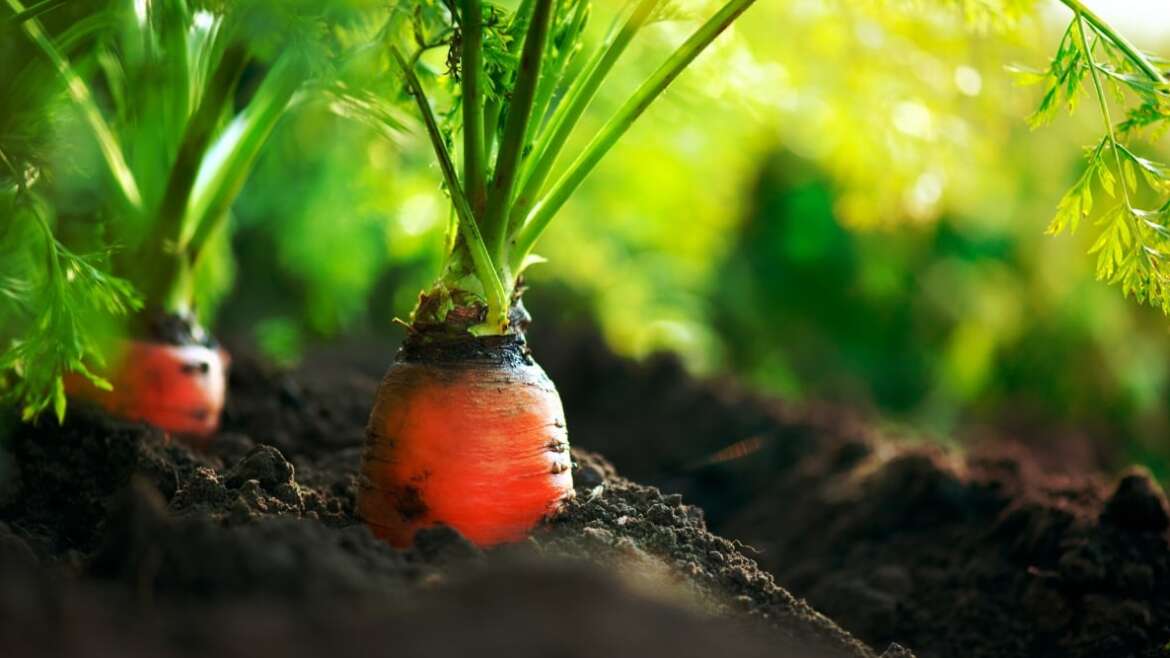
Then the seedling goes through a vegetative stage. During this period, the carrot root develops leaves that photosynthesize light and nutrients. Meanwhile, the root takes in water, and with help from the leaves, develops into the thick taproot we all love to eat!
After a few weeks, you have a maturation period that lasts more time when compared to the phases. Depending on the variety and the growing conditions, maturation takes anywhere from a month to a couple of months. When this is complete, the shoulders of the carrot are visible at the soil level.
Finally, we come to the phase that is the topic of this piece: the reproductive phase. This occurs when specific seasonal conditions are met and the carrot root has matured enough to push out a flowering stalk. This stalk produces an umbel, and in each of the sections of the umbel, seeds form.
At this time, the taproot becomes thick and woody. It’s too tough to eat, and it can’t be saved by cutting the flower off like you could for basil. Therefore, seed is the best thing you can glean from your carrots when they’re blooming.
Long Seasons, Quicker Seeding
 Carrot seeds form after flowers fade, and the resulting pods turn brown.
Not all carrots require a vernalization period to produce seeds. In fact, some conditions prompt plants to seed in just one season. You can simulate these conditions in climate-controlled areas if you want to produce seeds in a quicker time frame than the climate allows.
That means all your interesting varieties, like Black Nebula, Cosmic Purple, Pulsar Pink, and the cute, round Parisian carrot, can produce seeds quickly in these conditions. This applies to your basic Danvers carrot too.
If you end up in a situation like mine, where you don’t want to buy more carrot seeds, and you’d rather try to produce your own, use a long season, or vernalize your carrots!
Collecting Seeds
 Mesh bags ensure carrot seeds don’t fall into the garden before you collect them.
After your carrot flowers and the blooms fade, the seeds are one step closer to being mature enough for gathering. In the wild, a carrot plant will seed out in the soil below and sprout again in spring. But you can collect those seeds easily as long as you catch the seeds at the right time.
Initially, your carrot flower will have white petals, which fade, revealing green pods. These pods dry on the plant and brown. After a while, the brown pods pop open, and the seeds fall out. You want to wait for the browning to collect your seeds.
Tying a small mesh bag around the umbel is a great way to collect the seeds before they fly everywhere. As the pods pop open, the seeds end up in the bag rather than all over the garden. A paper bag works for this same purpose too.
When the seeds are mature enough, cut the flower head off the plant. Voila! You have collected your seeds.
Cleaning and Storing Seeds
 Save seeds from at least 5 carrot plants, and separate them from the umbel and debris through rubbing and sieving.
Most carrot-growing sources recommend saving seeds from at least 5 plants to ensure viable and reliable germination for a healthy harvest. I wish I had known this before I set out harvesting the rest of them! In my garden, only one flower remained.
Snip off the umbel just below the area where you’ve secured the mesh bag. Empty the bag and separate the individual seeds from the seed head. Then lightly rub the areas where the seeds have not been freed from the umbel. This should remove the remaining seed pods.
To separate seeds from pods, rub the seeds between your hands. This will take some time, but cleaning the seeds ensures good germination and keeps plant debris out of your garden. Then place them in a metal sieve and rub them against that lightly to avoid damage to the seeds. This should separate seeds from the plant matter still attached.
Shake the sieve, and the seeds will fall below with some of the ground-up plant matter. Throw away whatever remains in your sieve, or compost it. Then stage up with a fine sieve, and the smaller, less mature seeds and dust will fall through, leaving the viable seeds above.
You can winnow the seeds with a fan as well, if sieves are not your thing. As you rub the seeds between your hands, use a fan to blow the dusty plant matter off the seeds, separating them with less effort. Then, store your seeds in small manila envelopes in a cool, dry place.
You can also store them in mason jars or even add a layer of extra protection by storing the envelopes themselves in mason jars. Keep these in a cool, dark, dry place as well. They should last you a couple of years if they’re stored properly.
How To Vernalize Carrots in 5 Steps
As we mentioned, you can vernalize either through the seed-to-seed method or the root-to-seed method. Both require exposing the roots to a cool period, but not so cold it kills them. Here are the steps to take to ensure those roots give you lots of healthy seeds.
Removal
 Remove carrots before the first fall frost in areas with cold winters by gently loosening the roots and pulling them without breakage.
Remember, this step is only necessary for areas with cold winters and 10-12 weeks of temperatures at or below 15°F (-9°C). If your climate is warmer than that, mulch well around your carrots and allow the foliage to die back in winter.
When it comes to removal, wait until the garden soil is dry before the first fall frost. Loosen the roots gently by inserting a Hori Hori knife or trowel a couple of inches outside their shoulders. Loosening the soil will help you to extricate the roots without damage. Gently pull them, ensuring you don’t break them in the process.
Preparation
 Dust off carrots, avoid washing to keep them dry, and trim leaves carefully to prevent root damage.
Dust off the carrots with your hands to remove excess dirt. Avoid washing them. You want them to stay dry in storage to prevent mold and bacteria.
Trim off the leaves of the plant at the area just above the crown with pruning and harvesting snips. In this entire process, try not to damage the roots. If they are wounded as you remove them, they could rot. Dispose of any damaged carrots before storing them.
Storage
 Prepare a ventilated container with substrate to store roots at 35° to 48°F for 10 to 12 weeks until spring.
Locate a bin or plastic bags to store your roots in over the cold season. If you’re working with plastic bags, ensure they’re perforated or evenly make holes in the bag to provide air circulation. Overall, any ventilated container will work.
You want to fill your container with a substrate to keep the taproots dry and prevent molding. Sand, wood shavings, peat moss, or dry leaves are all suitable. Line the container with the substrate, then place your roots within. Cover them with additional substrate if desired.
Store them at temperatures between 35° and 48°F (2° to 9°C) for 10 to 12 weeks until the soil is warm enough to be worked in spring.
Spring Planting
 For seed production, prepare the soil and gently plant undamaged roots at the soil line, spacing them 6-18 inches apart.
Prepare your garden soil in your raised bed or in-ground bed ahead of time by tilling or loosening it with hand tools. Gently plant the carrots at the same time you would sow carrot seeds. If any of the roots took on damage or mold in the storage period, do not plant them. They’ll have to be thrown out.
Plant the taproots at the soil line with just a little of the crown above the ground. If you’re growing the carrots for seed, space each root at least 6 inches apart and up to 18 inches apart. Rows of carrots replanted for seed production should be at least 2 to 4 feet apart.
Interplant the roots in areas where carrot companions are growing if you’re not working in a row system. The flowers are a lovely attractant for pollinators and predatory insects.
Seed Production
 Observe the flowering process, wait for the browned seed head, and collect and store seeds for next spring’s sowing.
Now you get to sit back and watch the flowers bloom and fade. After the white carrot flowers bloom, the petals fall away and reveal bright green pods that are covered in little spikes. The pods dry in the sun and turn brown. This is how you know it’s time to collect seeds!
As mentioned in the section about carrot reproduction, you can affix a bag over the browned seed head to ensure none of the seeds are lost in the garden. After you’ve collected the seeds, clean them and store them for next spring’s sowing.
Final Thoughts
Those in temperate and tropical climates may not need to do much more than monitor their carrot plants. But many people in zones with cold winters should remove roots in winter if they want to collect seeds in the following spring. The process isn’t hard, but it does involve multiple steps.
Now that you have a guide, you can vernalize your carrots safely and save every seed. Companion plant your carrots among other plants, or plant them in rows. Whichever style is most suited to your situation is best!