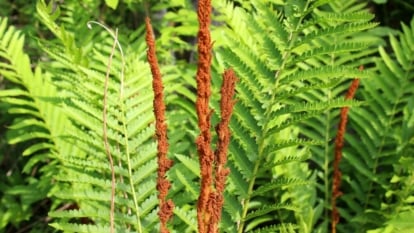
Growing peppermint in your garden is a no-brainer if you’re a mint lover. There is so much more variety in flavor when you grow mint yourself rather than purchasing from a store. Plus, there’s nothing like picking fresh leaves from the stalks to use instantly in the kitchen.
Among the many interesting mint options to choose from, peppermint is a crowd favorite. It packs a refreshing punch without overwhelming the senses, perfectly complementing a range of ingredients.
Mint is also one of the easiest herbs to grow indoors or out. Although it has a bad reputation for taking over gardens, there are many ways to keep it under control. If you want to try growing peppermint, this guide will help you with everything you need to know.
Peppermint Plant Overview
| | |
What Is It?
 Peppermint, a hybrid of watermint and spearmint, offers the refreshing coolness characteristic of spearmint.
Scientifically known as Mentha x piperita, peppermint is popular in both the herb garden and the kitchen. This species is a hybrid cross between watermint and spearmint, producing that icy freshness spearmint is known for without the overwhelming intensity.
Where I’m from, it’s best known for its excellent pairing with chocolate and caramel in desserts, but this herb is wonderfully versatile in the kitchen. It’s a great addition to cocktails (especially in summer), and I often pick the leaves to mix with a bit of cucumber and cilantro for a fresh salad topping.
Peppermint extract is even used in cosmetics for its soothing effects and has a few uses in traditional medicines too. From soothing an upset stomach to freshening your breath, there are many potential uses beyond the culinary benefits.
Native Area
 Peppermint, like other well-known garden herbs, is thought to have originated in Europe and the Middle East.
Like other popular garden herbs, peppermint is believed to originate from Europe and the Middle East, with other related species dotted in different regions around the world. But thanks to its wonderful scent and taste, this herb didn’t stay put for long.
Today, peppermint is widely grown around the world. It grows best in temperate regions matching its native climate, but its ease of growth and rapid (almost invasive) spread make it a must-have in almost any home garden.
Characteristics
 The leaves have a delightful fragrance and share the characteristic leaf texture of other mint species.
The star features of peppermint are the vibrant dark green leaves emerging from tall stems that can reach up to three feet. The leaves are wonderfully fragrant and have the characteristic leaf texture shared across many mint species.
In summer, the deep green leaves are complemented by small, purple flowers that lend a subtle pop of color to your herb garden. Although many gardeners pull these off to encourage more dense leaf growth, the flowers are also edible and are fantastic to add to summer salads or cocktails.
Like so many other mints, peppermint doesn’t have a great reputation in the garden. It loves to spread out and take over beds, spreading its vigorous root systems below the soil. I know many gardeners who have struggled with mint, including my mother, who still finds stems popping up around her vegetable garden long after the mint was “removed.”
If you’re a peppermint lover, this may not be a problem. However, if you’re growing your peppermint next to other plants, it can become somewhat of a headache.
If you’ve got some gaps to fill in your garden, peppermint’s got you covered. I’ve even used it to fill in gaps in a retaining wall, turning previously unused space into an edible paradise. But those looking to maintain a precise garden layout or grow peppermint alongside other herbs must keep a close eye on its spread to keep it contained.
Propagation
As mint plants spread so quickly, you likely won’t need to propagate if you want to grow them in the same spot. However, if you want to move plants to containers or another area in your garden, you can propagate from cuttings or by division.
Cuttings
 Choose a vigorous stem with ample leaves from the parent plant to propagate peppermint.
Propagating from cuttings is super simple and doesn’t require any uprooting. Begin by selecting a healthy stem from the main plant with plenty of leaves. The cutting should be around 4 inches long and free of any signs of disease or stress. Cut just below a leaf node – the small bump where leaves emerge – and strip the leaves from the bottom half of the cutting.
You can root your mint in water, but the cutting will develop stronger roots if you pop it straight into the soil. If you opt for water, use a transparent container to monitor root growth and replace the water every few days to keep it fresh. Within a few weeks, you should notice small roots beginning to form. Allow these roots to grow to about an inch before transplanting your cutting to the soil.
Transitioning from water to soil can sometimes be challenging for young plants. That’s why it’s better to root in soil from the get-go. To ensure your cutting continues to thrive, keep the soil consistently moist and place it where it will receive plenty of indirect sunlight until it becomes established.
Division
 Peppermints might require a few weeks to adjust to handling and show new growth.
The second propagation method – division – is ideal if your peppermint plant is well-established and needs to be kept controlled or requires some rejuvenation. Start by carefully uprooting the peppermint plant from its current location, keeping as much of the root system intact as possible.
Once the plant is free, gently separate the roots into two or more sections. Each division should have a healthy amount of roots and several stems to ensure successful growth. Replant these sections in individual pots or directly in the garden, ensuring each new plant has ample space to spread.
Be patient with your newly divided plants. It may take a few weeks for them to adapt to the handling and produce new growth. During this time, water regularly and keep them in a sunny location to boost root growth.
Planting
 You’ll need a sunny spot with rich, well-draining soil for the most robust growth of your peppermint.
Where and how you plant your peppermint will determine how well it grows and how easy it is to control. If you’re willing to manage spread manually, planting mint is simple. But if you’re planting in a mixed bed, you may want to bury your mint inside its container to stop the roots from spreading.
Beyond that, you’ll need a sunny spot and rich, well-draining soil for the strongest possible growth. After planting, they only need a little care to take off.
Preparation
 Peppermint thrives in well-draining, fertile soil with a neutral to slightly acidic pH.
Mint’s vigorous nature does mean it can tolerate poor conditions quite well. But, if your goal is to harvest as many leaves as possible to use in the kitchen, a strong soil foundation is essential to avoid slow growth and bare stems.
Peppermint loves well-draining, fertile soil with a neutral to slightly acidic pH. Mix in organic compost or sand to improve drainage and soil health if you have dense or clay soil. It should maintain some moisture but not so much that it becomes soggy.
When planting in containers, choose a relatively deep and wide pot to give the roots space to spread. For the potting mix, a blend of standard potting soil with a small amount of perlite or sand helps to boost drainage.
Transplanting
 When planting multiple peppermint plants, space them approximately 1.5 to 2 feet apart.
Once your location is set and the soil prepped, it’s time to introduce your peppermint plant to its new home. Dig a hole 1.5 times larger than the original container and lower the plant inside, keeping the soil level the same as the original container to prevent stem rot. Fill in any gaps with remaining soil and water thoroughly to settle the roots and help them spread downwards and outwards.
If you’re planting the whole container to prevent the plant’s spread, dig a hole the same size as the container and bury it inside, covering it with a very light layer of soil so the pot’s rim is no longer visible.
Be forewarned that if the peppermint sprawls along the soil’s surface, it may try to set root outside of the container; when doing this method, it’s best to trim sprawling sprigs off and keep the plant in an upright growing habit to prevent natural spread!
When planting more than one peppermint plant, you can space them about 1.5 to 2 feet apart. Don’t worry if the bed looks sparse initially – they will quickly grow to fill in the gaps. If you’re growing in containers (even larger ones), stick to one plant per pot and wait for it to fill out.
How to Grow
Peppermint plants spread easily and don’t require much attention to grow well. In fact, most of your attention will likely be focused on stopping them from growing so rapidly. But, with the right care, your peppermint plants will provide a bountiful supply of leaves throughout the year.
Light
 Rotate your container plant every few days to promote even growth and ensure equal light exposure on all sides.
Peppermint plants prefer a sunny spot and need around 6 to 8 hours of direct sunlight daily in moderate climates. While they’re adaptable enough to handle partial shade, the strongest growth will come with a healthy amount of sunlight. Lack of light (either indoors or in heavily shaded areas) will lead to leggy growth and sparse leaves, leaving you with far less to harvest.
Peppermint is a popular option for indoor growth, but you’ll need to ensure you have the right amount of light before you start. They need a spot right next to a well-lit window, ideally south-facing, where they can get plenty of direct light throughout the day.
Windowsills – especially in the kitchen – are an ideal choice, as long as there isn’t a strong draft coming through the window. If you are determined to grow indoors and don’t have any ideal positions with direct sun, you can also supplement with grow lights.
It’s important to watch your peppermint plants closely indoors. Rotate your plant every few days to ensure all sides receive equal light exposure and promote even growth. If you see any signs of a lack of light, such as leggy growth or lack of leaves, give them a sunlight boost, or consider moving your containers outdoors.
Water
 To establish a sturdy plant foundation, water slowly and deeply.
Peppermint plants thrive in moist but not soggy soil. They appreciate a deep watering to satisfy the thirsty roots deep down in the soil, left to dry out afterward before their next watering. You can generally water along with the rest of your garden but pay particular attention to your mint patch if temperatures are high.
Continuous overwatering can lead to root rot, an issue that is unfortunately fatal if not resolved. That’s why it’s vital to maintain a moisture balance, not allowing the roots to dry out too much but also not watering them so much that they suffocate. Prevention is always better than trying to nursemaid unhappy plants!
Peppermint plants have vigorous root systems and like to stretch deep and wide. Always water slowly and deeply to encourage the roots to grow downwards and establish a strong foundation for the plant. This will also make them more drought-tolerant and able to withstand sudden temperature increases.
Keep in mind that well-draining soil is a key accomplice in this process. It ensures the water gets to the roots without the soil becoming overly damp or waterlogged. If you notice water pooling at the top around the base of the plant and not draining away, your soil structure needs to be improved.
For indoor peppermint plants, the watering routine is slightly different. Exact water requirements can change based on the pot’s size, the potting mix, and the lighting that the plant receives.
Typically, indoor plants dry out slower than their outdoor counterparts, so you need to be cautious not to overwater. Wait until the top layer of soil is dry before watering again. Use a pot with drainage holes to avoid stagnant water at the bottom that could cause root rot.
Soil
 This herb prefers loamy soil with a slightly acidic to neutral pH but can thrive in various soil conditions.
Like many herbs, peppermint plants prefer a well-draining soil rich in organic matter. They love loamy soil with a neutral to slightly acidic pH but can adapt to most soil conditions (as long as they drain well).
If your garden soil is heavy clay, you must amend it with compost and sand or perlite to boost drainage. This will improve its texture and fertility, promoting healthier and stronger growth from your peppermint plants. Soil is the foundation of all other growth, so it should be top of mind before planting anything, including peppermint.
When planting peppermint in pots to grow indoors or out, selecting a suitable potting soil is essential. Ordinary garden soil is often too heavy and doesn’t drain well when used in containers.
Instead, use a well-draining potting mix designed for herbs with additional perlite for drainage if you’re keeping your peppermint indoors. This mixture will hold moisture but drain excess water, protecting your peppermint plant’s roots from rot.
The size of your container also plays a role in how quickly the soil dries out. Smaller pots will require more frequent watering as they dry out faster, while larger pots retain moisture for longer. Regardless of the pot size, ensure your container has enough drainage holes to remove excess water.
Temperature and Humidity
 To prevent plants from wilting or burning due to extreme heat, ensure they are provided shade.
Peppermint plants can handle varied temperatures, although they prefer moderate climates to extreme temperatures. They thrive most in cooler climates but can also tolerate some heat, growing in USDA Zones 3 and above. The ideal range is around Zone 5 to 8, but don’t worry if you’re out of this range – they can usually manage.
Extreme heat can cause the plants to wilt or even burn, so ensure they have some shade during the hottest part of the day if you live in a warmer region. They will also survive a light frost, but extended frosts or extreme cold will damage the leaves and stems.
As for humidity, peppermint plants are not fussy. However, good air circulation is crucial to prevent moisture accumulation on the leaves and subsequent fungal growth if you live in a high-humidity region. Beyond that, they will be happy almost anywhere.
Fertilizing
 Refrain from overfertilizing to prevent damage to peppermint’s roots and hindered growth.
In case the rapid spread and invasive nature of peppermint weren’t enough of a clue, these plants aren’t heavy feeders. They are usually happy with high-quality soil and the occasional boost of compost. However, if you’re growing in containers or have soil that lacks nutrients, an extra boost of fertilizer wouldn’t hurt.
As per the package instructions, a simple application of a balanced fertilizer once a year is usually enough to stimulate plenty of leaf growth. If your plants struggle or the leaves appear dull, a quick dose of low-concentration fertilizer may improve conditions. But, as always, avoid overfertilizing, as this may damage the plant’s roots or hinder growth.
Maintenance
 To ensure mints survive year after year in regions with severe winters, offer them some shelter during the cold months.
Regular harvesting or pruning is one of the most important maintenance practices (both for the plants and your kitchen efforts). It promotes bushier growth and helps keep the plant size under control.
You can pinch back the tips of your peppermint plants or cut entire stems, depending on how much you need. Trim back the flowers as they pop up to direct the plant’s energy toward foliage growth rather than flowering.
Peppermint plants may need repotting every couple of years when grown in containers. Signs that your plant is root-bound and needs a bigger home include roots growing out of the drainage holes and stunted growth, along with disintegrated or poor-quality soil. When repotting, prune the roots lightly before planting them in a new pot.
Controlling the plant’s spread is an essential maintenance task you cannot skip when planting in beds. Prune often and consider using barriers around your planting area to keep the peppermint plants from overtaking other plants.
Snip off any stems that have full contact with the soil so the plants don’t produce adventitious roots and start a new plant! If they become a problem, move the plants from your garden bed and keep them in containers instead.
To keep your plants thriving year after year, provide them with some shelter in the winter if you live in a region with harsh winters. While peppermint can survive frosts, a layer of mulch around the base of the plant can help protect the roots from freezing temperatures.
Harvesting
 Your peppermints can be harvested approximately one month after planting.
The best thing about growing peppermint is, of course, harvesting time. Plus, the more you harvest, the better your plant thrives – a true win-win.
You can begin harvesting around a month or so after planting. Avoid harvesting too early, as this may stunt the growth while the plant is trying to establish itself.
To harvest, pinch or snip off leaves or stems as needed, using them immediately to retain their fresh flavor. Harvest in the morning or evening when the plants are well-watered for the best possible taste.
You’ll want to harvest regularly during the growing season to encourage bushier growth and prevent the plant from becoming woody. If you’ve grown more than you can use, don’t avoid pruning – give some to friends or neighbors instead. Near the end of the season, cut back any leggy growth to boost growth the next season.
Uses
 In the garden, this herb attracts beneficial insects like bees and butterflies.
Peppermint leaves are a fantastic addition to a variety of dishes. I often see them used in desserts and drinks, but my favorite use, by far, is in salads.
A regular staple in my home is something that we call “sushi salad,” although it’s certainly nothing close to authentic sushi.
I use a mixture of iceberg lettuce and sliced cucumber as the base, topped with heaps of mint and cilantro. Then I toss on some smoked salmon, pickled ginger, a bit of feta, and a crumble of nori. Finish with a side of sushi mayo, and you have a fresh seafood salad perfect for summer.
Peppermint tea is another essential you have to try. As someone who used to frequently purchase peppermint tea from the grocery store, I can tell you fresh peppermint tea is far superior – especially with a few ginger slices and a dash of lemon.
In the garden, peppermint is also known to attract beneficial insects, such as bees and butterflies. They enjoy the flowers, so it’s best to leave them on to reap the pollinator benefits.
For creative and crafty gardeners, peppermint leaves can also be used to produce home and beauty products like potpourri, lotions, or fresh soaps. The cooling and calming scent is as irresistible around the home as in the garden.
Common Problems
Growing peppermint plants is relatively easy, but like all plants, they have their share of issues. Identifying these early on and addressing them promptly is the key to a healthy, thriving plant.
Leggy Growth
 Encouraging bushier growth in the peppermint plant involves pruning its leggy stems.
Due to insufficient sunlight, peppermint plants often become leggy, with long, spindly stems and small leaves. While they can handle some partial shade, full shade is not recommended for these herbs.
If your plants are not receiving enough light, consider relocating them to a sunnier spot. Pruning the leggy growth also encourages the plant to become bushier.
Yellow Leaves
 Peppermint plants thrive in moist soil but dislike waterlogged conditions that can cause root rot.
Yellow leaves are often a sign of overwatering or poor drainage. While peppermint plants enjoy moist soil, they do not like waterlogged soil, which can lead to root rot. If you’re noticing yellow leaves, check the soil’s moisture levels. You might need to cut back on watering or improve soil drainage to prevent permanent damage or the early death of your plant.
Yellowing can sometimes indicate pest issues, but most pests are less inclined to go after mint!
Vigorous Spread
 Peppermint plants can rapidly dominate a garden due to their vigorous growth if left uncontrolled.
Peppermint plants are known for their vigorous growth habit, which, if unchecked, can quickly take over a garden. If you’re planting in the ground, use barriers to contain their spread and prune regularly to manage growth.
Planting in a pot or container, whether above ground or sunk into the soil, is one of the most effective ways to limit their spread.
Pests
 Catching infestations early before they become a significant issue is crucial for your peppermint plants.
Common garden pests like aphids and thrips can attack your peppermint plants, although these issues aren’t particularly common. You can handle these pests by using an insecticidal soap or a strong water spray to knock them off the plant.
Regular inspections will help you catch any infestations early before they become a significant issue.
Diseases
 Fungicides can control powdery mildew if it appears on your peppermint plants.
Peppermint plants can suffer from powdery mildew, especially if the air circulation around the plant is poor or the leaves are frequently damp (often caused by overhead watering).
Water your plants at the soil level rather than from overhead, and ensure they are not overcrowded. If powdery mildew does appear, fungicides can help keep it in check.
Frequently Asked Questions
Peppermint plants’ tendency to spread mean they don’t make great companions for most plants. With this in mind, it’s best to plant peppermint alongside other robust herbs or perennials that can hold their own (like rosemary), or simply keep it separate.
Peppermint plants are generally safe for dogs and cats in small amounts. However, if consumed in large amounts (or high concentrations like in peppermint oil), it can cause adverse reactions.
Peppermint plants are well-known among gardeners for their vigorous spread. It’s best to keep it contained in pots or designated areas where you can control the plant’s spread.
Peppermint plants often wilt due to watering issues – namely overwatering or underwatering. Check the soil’s moisture level to check if your watering routine needs adjusting. Potted peppermint may wilt if it’s root-bound or the container has poor drainage. Pest infestations or diseases can also cause wilting too. So, if the issue persists after addressing possible watering problems, check for signs of pests or disease.
Final Thoughts
Now that you’ve learned all there is to know about growing peppermint in your garden, it’s time to start planting away! With proper care and the right growing environment, there’s no reason you won’t have an abundant peppermint harvest in the coming growing season.