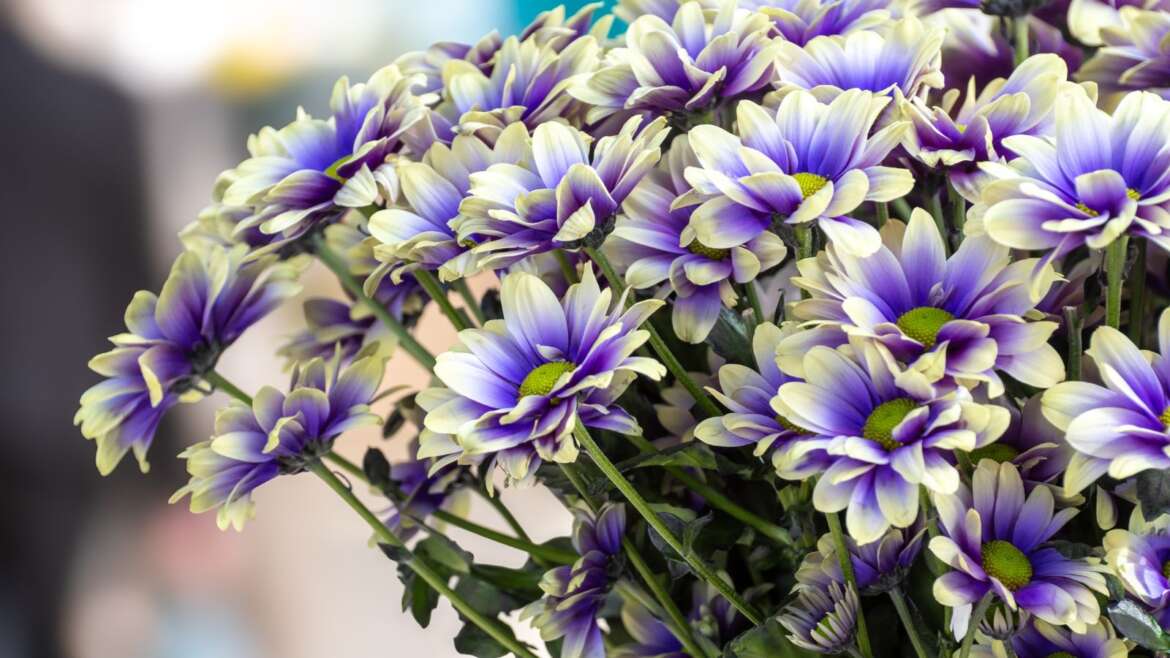
A hallmark of autumn, chrysanthemums bloom in profusion from early fall until frost in showy colors of the season. Scarlet, gold, orange, or purple blooms cover dark green leaves in a rounded habit, perfect for a cheerful welcome at the front door or embellishing garden beds.
It takes a lot of energy to produce that flurry of blooms, and light, well-timed feedings help enhance the spectacle. With the easy, strategic application of organic amendments or fertilizers, beloved mums bloom all season long.
Role of Fertilizer for Mums
Using compost can be beneficial for the flowers.
In organically rich, humusy soil, hardy mums don’t require fertilizer to grow and bloom. They’ll likely have a loose, cascading form with their characteristic blanket of fall color. I love this naturalized look along a wall or border edge where the foliage softens the edge, and the blooms bring surprise.
Fertilizer, though, provides benefits beyond the plant-and-forget mum practice I’m guilty of. These additional nutrients:
- Support bushy, strong stems and even more prolific flowering than usual
- Stave off premature budding and blooming by promoting leafy growth prior to the bud stage
- Foster vigorous plants with fresh, green growth and higher budding.
Commercial growers rely on it for those picture-perfect specimens we find in the fall. Fortunately, the applications are less intensive in the home garden, ranging from organic soil amendments to liquid feeds.
Moderation and Types
 Improper application can lead to an overproduction of leaves and stems.
Just as fertilizer boosts plants, an excessive amount or improper application time hinders them. Too much nitrogen leads to overproduction of leaves and stems, often weak due to superfast growth. The result is leggy, floppy branches. Overfertilizing limits budding, leading to fewer flowers. Excessive salts left behind damage the roots.
While fertilizing chrysanthemums is easy, timing and method are important. Feeding is valuable during their vegetative stage, ensuring nitrogen and potassium to support healthy leaf and root development.
Before planting, amend with compost or organic material. Blood meal, bone meal, or greensand help beef up available nutrients. Choose your fertilizer method of choice to determine when and how to apply it.
Fertilizer types for mums:
- Soil amendments at planting/as topdressing
- Compost
- Leaf mold
- Blood meal
- Bone meal
- Greensand
- Alfalfa
- Controlled release granular
- Slow-release granular
- Liquid feed (water-soluble or fish emulsion, kelp, or compost tea)
When to Fertilize Mums
 Follow proper application guidelines and measurements.
The overall timing in fertilizing chrysanthemums is to feed them before the bud stage and before the summer heat. This means a spring and summer application, depending on fertilizer type. And there’s no need to fertilize those you intend to compost or toss at season’s end.
Always follow application guidelines and measurements to prevent overfertilizing. Using the NPK ratio (nitrogen-phosphorous-potassium), aim for a nearly balanced formula. Nitrogen promotes leafy growth and stems, phosphorous stimulates roots and flowering/fruiting, and potassium, sturdy stems. When it comes to mums, we want to avoid an overly high phosphorous (P) number to prevent premature flowering early in the season.
General application timing, depending on type:
- Controlled release granular (like 10-10-10, 7-6-5, 6-2-4) – spring (April-May) and summer (June-mid-July)
- Liquid feed (like 15-15-15) – monthly from April/May until mid-July when buds begin to set
- Slow-release granular (like 10-10-10, 8-8-8,12-6-6) – once a season, in spring
Controlled release tends to last for a few months, releasing more during warm temperatures (above 70°F or 21°C) and to rain and irrigation. Slow release holds for an entire season, releasing variably. Liquid feeds absorb quickly into tissue and roots and require a more frequent, once-monthly application.
Growth Stage
 Allow young flower transplants to establish roots before applying any compost.
For garden plantings and container arrangements of mums, use a well-balanced fertilizer at planting. If transplanting divisions or installing a nursery-potted specimen, wait a few weeks to apply a balanced formula. Young transplants need time to establish roots, and display-ready nursery pots are usually fertilized prior to sale and flowering. For established perennials, start a regimen in spring, after frost passes and new growth emerges to four to six inches tall.
Stop fertilizing when buds begin to develop in early to mid-summer. At this point, plants should direct energy into flowering rather than producing leafy growth. It also gives plants a break during periods of intense heat when growth slows. You may opt to use a high-phosphorous fertilizer to promote root growth (without hampering flowering) in the fall.
How to Fertilize Mums
 Add plant food early in the day, ideally away from the sun’s afternoon rays.
Apply fertilizer to mums early in the day and out of the sun’s intense afternoon rays. Overcast conditions are ideal to prevent burning. Rinse plants and water roots immediately after granular applications. When planting (especially in poor soils), apply one to one and a half pounds per 100 square feet and work it into the soil.
When using granular material, spread it evenly around the base of the plant, away from the stems. Uniform spreading helps to avoid hot spots and burn damage.
Use water-soluble and liquids as a foliar feed and root drench, spraying the foliage and root zone to disperse the nutrients. Plants absorb and utilize liquid feeds quickly, so they’re applied more often than granules.
Consider pH
 These flowers prefer neutral to slightly acidic soils.
Chrysanthemums prefer rich, loamy soils with good drainage. They thrive in neutral to slightly acidic soils with a pH between 6.5 and 7.0. If your mums show signs of yellowing despite fertilizing (and over or underwatering isn’t the issue), there may be a pH imbalance.
Beneficial microorganisms do their best work in neutral to slightly acidic soils. An off-kilter acidity or alkalinity level impacts the roots’ ability to access and absorb nutrients. Beneficial microbes have difficulty breaking down organic matter for roots to uptake.
If your soil is alkaline, it has high pH levels (above 7.5). Soils with a high pH are less soluble, making it more difficult for roots to uptake nutrients. Unable to access nutrients, the result is yellowing leaves (chlorosis) and a lack of vigor. Apply iron to counteract chlorosis in the short term. Adding garden sulfur lowers the pH level and makes them less alkaline over time.
In low-pH (acidic) soils, essential macronutrients like calcium, phosphorus, and magnesium become less available. An excess of aluminum leads to toxicity at high levels. Add calcium (eggshells) and magnesium (Epsom salts) to remedy the situation. Amending soils in the fall with garden lime helps balance the pH level for the next season.
The best way to determine pH is with a soil test. At-home kits that interpret the results and offer recommendations help assess the soil’s conditions and what needs improving. Your local university extension office is another resource for tests and recommendations.
Post-Bloom Care
 The cold can damage their roots, so leave a layer of protection around the plants’ base.
The best time to plant mums is in the fall or spring, and planting nursery mums late in the fall presents a risk of surviving winter since most of their energy goes into flowering rather than establishing roots. To protect the roots, insulate them with a layer of mulch. Cut back stems after heavy frost as they enter winter dormancy, and use a light layer of mulch on crowns or evergreen boughs for added protection against ice and frost heaving (natural freeze and thaw soil cycles). Frost heaving can damage roots and expose them to winter conditions.
Mums overwinter in containers, too. Transfer nursery-potted selections to a larger pot. In cold climates, move them to a cool, sheltered location like a garage or basement until the warming temperatures of spring. Check the soil occasionally for moisture to keep roots from drying out completely. Hold off on fertilizing until new growth emerges in spring after plants are back outside.
Key Takeaways
Hardy chrysanthemums don’t rely on fertilizer to grow and bloom with nutrient-rich soils to support healthy growth. To give a boost of nutrition for sturdy, leafy stems and loads of blooms, opt for organic amendments, granular, or liquid feeds.
- Apply in spring and early summer, according to fertilizer type
- Use at planting and during vegetative growth until buds form
- Enjoy a bounty of autumnal blooms before putting the perennials to bed for winter