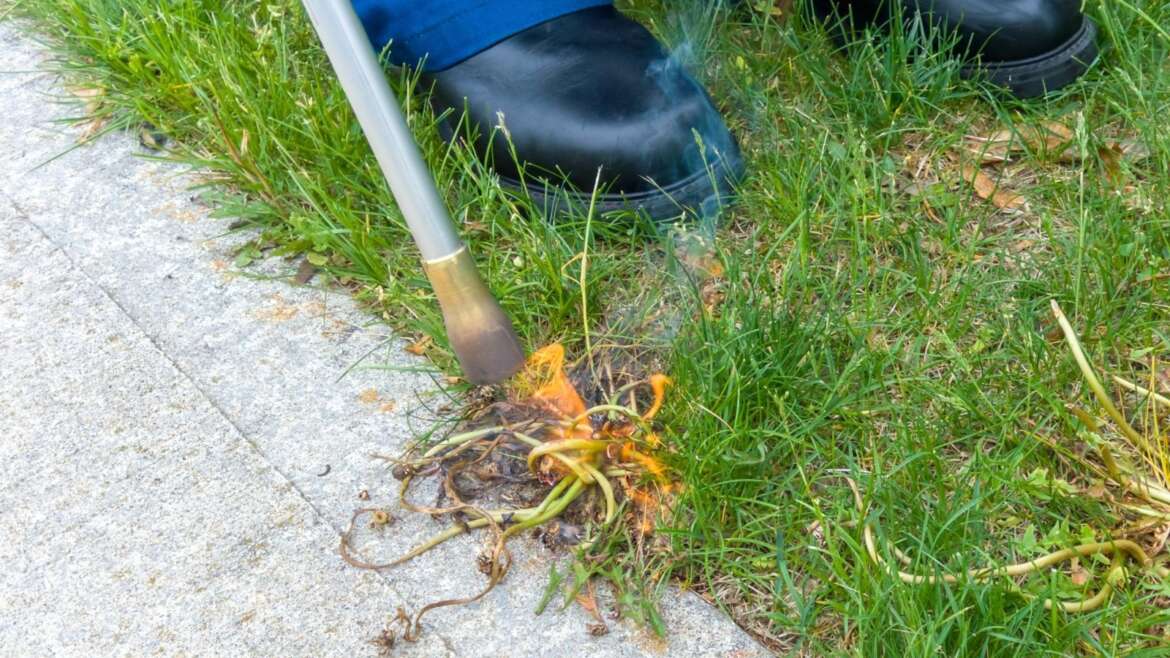
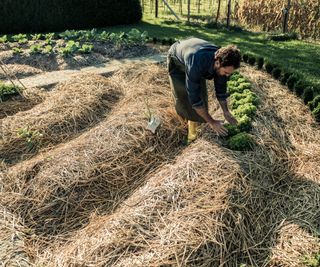
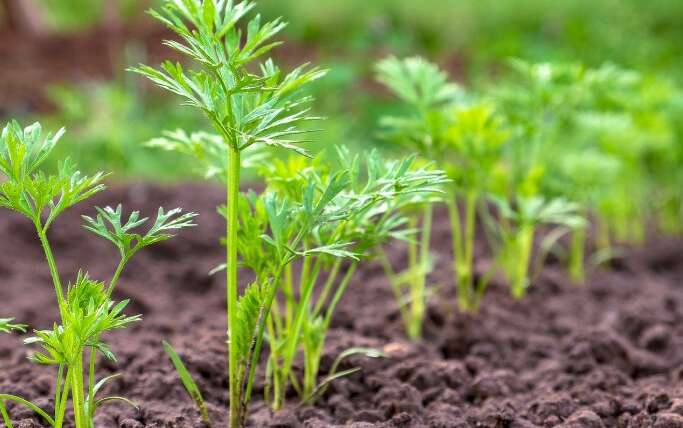
Lighting unwanted plants on fire may not seem like the best idea, but it is far less toxic than using herbicides. Thankfully, flame weeding is not a reckless torching of your garden. Instead, this weed-burning strategy uses a handheld propane torch to burn small weeds selectively. The heat from the flame doesn’t actually light plants on fire. Instead, the searing heat of the flame overheats leaf tissues, causing them to wilt and die once exposed to temperatures above 160°F (71°C).
This tactic is used by professional organic farmers to cut back on small weeds and help with another strategy called stale seed bedding. But before you grab a torch, there are some important safety measures and planning strategies to put in place to avoid fire risks.
Let’s dig into how you can burn weeds for non-toxic, long-lasting weed control in the garden.
What is Flame Weeding?
This weeding method effectively eliminates small, green weeds from bare soil.
Flame weeding uses a handheld propane torch to sear (not burn) small weeds with enough heat to destroy their tissues. This method is best used when weeds are small and green.
It is very important to avoid flame weeding anywhere with flammable materials like dry debris, wood, bark mulch, plastic, or flammable yard borders. Instead, torching is ideal for bare soil and empty beds being prepared for planting.
9 Steps to (Safely) Burn Weeds
 Flame weeding uses high temperatures to sear plants quickly.
Avoiding herbicides in an organic garden is a lot easier when you adopt a diversity of weed-control methods. Hand-pulling is not your only option! You also don’t have to constantly rototill to deal with weeds. Instead, prioritize passive, non-toxic methods like mulching, tarping, drip irrigation, and flame weeding.
The first methods are focused on weed prevention, but flame weeding is a unique form of chemical-free control. Plant tissues wilt and die when exposed to temperatures above 160°F (71°C). So you don’t really need to light them on fire. Instead, you should use the heat of the torch to sear the plants. You only need to pass over each weed for a split second, and some garden areas should be avoided.
Here is how to prepare and use a flame weeder:
Choose a Torch
 Using a torch with a 5-10 pound propane tank is ideal for medium to large gardens.
There are many DIY options for flame weeding, but the most beginner-friendly setup is a simple flame torch weeding kit from your local hardware store. Certain brands offer reliable choices, but there are many great options to choose from as long as the handle and hose are long enough for comfortable use. These kits are usually “plug and play.” All you need is a propane tank and a propane torch kit. Screw the hose end of the torch into the tank, and you are ready to go.
A standard torch and five to ten-pound propane tank are best for medium to large gardens. However, smaller gardens may opt for a handheld propane or butane torch. Some are sold with MAP gas. These torch kits use much smaller tanks and a short-handled wand for holding above the soil of raised beds or large (non-plastic) containers.
Smaller torches are more manageable and less dangerous, but they also require bending over to reach them. If you prefer to stand up while you weed, a long flame torch is ideal. You can even modify the tank by strapping it to a metal backpacking frame. This allows you to walk around with the tank on your back instead of picking it up to move between locations. Look for a torch at a rate of about 300,000 to 500,000 BTU.
Attach the Torch to Fuel
 Ensure you understand how to operate this tool before lighting the flame.
It’s very important to understand how this tool works before you use it. Always set up your flame weeder on a non-flammable surface like concrete or bare dirt. You don’t want to accidentally spark the torch while the propane nozzle is on high, as this could create a giant blast of fire that can get dangerous quickly.
Ensure your propane tank nozzle is off while attaching the torch hose. Screw the hose securely and double-check all attachments. Then, turn the dial to open up the gas flow to the hose. When you press the handle at the base of the torch, you will hear and smell the propane gas coming out of the hose.
Of course, nothing will happen until you light the torch. This is the time to tinker around with the parts and ensure you understand them before lighting the flame. Remember to turn the dial back down before lighting.
Avoid Flammable Materials
 Pull unwanted plants if they’re too close to crops rather than using a flame weeder.
Clearly, flame weeding poses a fire hazard. Avoid this method anywhere and any time prone to wildfires from extended summer droughts or extended dry periods. Even a small breeze can blow the flames into neighboring dry grasses, potentially causing a disastrous fire on your property. It’s just not worth the risk!
It’s also important to avoid any flammable materials in the garden. Pay close attention to where your wand is pointed. Do not use the torch within 5-10 feet of:
- Dry plant debris
- Dry grasses
- Plastic of any kind
- Dry bark or wood chips
- Straw mulch
- Synthetic mulch
- Resinous trees
Obviously, you should also keep your flame weeder at a safe distance from your plants. Crop leaf tissues die at the same temperatures as unwanted plants. Many crops are more tender than their weedy counterparts. If they’re growing very close to your crop, it may be s
Find Small Target Weeds
 Avoid using this tool near dry vegetation to prevent fires.
Before you start burning, be sure you know exactly what you’d like to target. It’s most useful to flame in bare beds before planting your crops. This method works best with small, green weeds. This method is most effective for those areas of the garden where a billion tiny weeds seem to sprout at once. If you flame them at the bean thread stage (when the seedlings are still tiny and pale), you will be very satisfied with the results! Broadleaf weeds up to six inches tall are also fair targets.
Remember, bare, unplanted soil is best. You don’t want to accidentally blast your crops. The main exception to this rule is newly seeded garden beds. Some gardeners will direct-sow crop seeds (such as carrots), water them, wait a few days, and then run a flame weeder very lightly over the surface to wipe out any sprouts before the crop germinates. This technique is a little more advanced because you must perfectly time it.
You want to catch the sweet spot window where they have germinated, but your crop seeds are still safely underground. If you accidentally hold it in place for too long, or if your crop has already started germinating, you will kill the crop seeds as well.
Do NOT use a flame torch on dry grass, dry debris, giant plants with seed heads, lawns, or anything else that could cause a fire hazard. It is very important to avoid flame weeding in areas prone to wildfires. Timing is also key here. Do not use one of these during fire season or local burn bans. Avoid burning too close to your plants, or they may suffer from heat scorch. Always aim your wand toward the ground to ensure the flame doesn’t accidentally spark higher-growing foliage.
Light the Flame
 Gradually adjust settings to ignite and control the flame size with a flint spark lighter.
Once you’ve got your plan and safety precautions covered, it’s time to light the torch! Most kits come with a handheld flint spark lighter. This metal-handled contraption only requires a simple squeeze to ignite. Instead of using more fuel (like a standard lighter), you can hold the flint spark near the end of your torch. It is safer to use a flint spark because it only produces a tiny spark for the propane gas to catch. A standard lighter is not recommended.
- Hold the torch facing away from you and toward the ground.
- Turn the dial on the propane tank to fully open.
- Next, just slightly turn the dial on the torch to open the gas flow through the hose.
- Press the lever handle on the torch until you hear a small amount of gas exiting.
- Finally, hold the flint spark lighter at the end of the torch and flick it.
- It should now emit a visible flame.
- You can turn the dial on the torch handle to increase or decrease the size of the flame.
Hold the Flame 2 to 6 Inches Above Weeds
 Aim the flame two to six inches above the soil and use a sweeping motion.
It is a common misconception that you need to burn weeds directly with the flame. Recall that the goal is to sear them with heat, not to light them on fire. The most efficient way to kill small plants is to aim the torch two to six inches above the soil and move it in a sweeping motion. For extra tiny ones, you can lower it to just an inch above the surface.
Torch Weeds for Less Than 5 Seconds
 Digging with a hori hori knife may be necessary for perennials.
Just a quick sweep over the desired weeds is enough to kill them. If the flame is on high and it’s hovering two to six inches above the foliage, five seconds or less will be plenty of time to heat-kill the leaf cells. The average propane torch burns to thousands of degrees! The plants only need about 160°F (71°C) of heat to die. It is unnecessary to hold it in place until the plant is blackened. Instead, keep your arm moving so you can singe an entire area efficiently and effectively.
Remember that flame weeding only kills the above-ground plant parts. It will not kill the roots, so perennials and grasses may resprout. Repeatedly flaming can be helpful, or you may need to dig them up with a hori hori knife.
Alternatively, a tarp can be used to smother them and exhaust the perennial plant’s energy stored in the root system. When you lift the tarp, water the area and allow the unwanted plants to resprout, then flame treat them again.
Wait A Few Hours to Days for Weeds to Wilt
 Heat treatment can revive instead of kill perennials with strong taproots.
Most will take an hour or up to a day to wither and die. Sometimes, the foliage still appears green or yellow immediately after being singed. The plant is likely to turn dark green before it turns brown and dies several hours after the treatment.
Ironically, some sources insist that burning the plant to a crisp can actually allow it to recover. I’ve found this only true with perennials that have strong taproots. Still, most will easily wither and die within a day of this form of heat treatment.
Prepare Beds as Usual
 Avoid disturbing the soil after flame weeding.
After weeding a bare area, you are ready to prepare your garden beds and plant as usual. The weed residues can be raked away and removed if desired, or the foliage can just decay into the soil. Weed burning is an excellent method for creating a clean seed bed or a fresh bed for transplanting.
However, it is important that you don’t disturb the soil too much after flame weeding. You don’t want to heavily hoe or till the soil. Turning over the ground after torch weeding will negate the process. This is because many weed seeds hide beneath the surface. If you flip the soil profile over, more weed seeds can come to the surface and sprout.
Instead, gently plant your seedlings or sow your seeds while disturbing as little soil as possible. For extra weed prevention, lay down drip irrigation or soaker hoses to deliver water straight to root zones. Follow up with a layer of mulch, and your garden will be on its way to weed-free invincibility!
Final Thoughts
Weed burning is a great chemical-free method for quick weed control. However, it is not always effective for large or perennial weeds. The torch is meant to hover over them for a split second to sear their leaves and heat-kill the leaf cells, not burn them to a blackened crisp.
Be sure to familiarize yourself with the safety and functionality of your flame weeder before beginning. Avoid burning anywhere near flammable materials, and do not use this weed control method in areas prone to wildfire. Do not disturb the soil after flaming, or you may bring up more weed seeds to the surface. Lastly, keep your crops safe by aiming at least 12-24 inches away from plants that you don’t wish to heat damage.


