When the heat of summer arrives, it’s often challenging to keep your garden well-watered. High temperatures and lots of sunlight mean you have to water your raised beds every few days, if not every day! While irrigating with a hose or watering works fine, it can take a long time and become a taxing job.
If you want to simplify the watering process, consider adding a drip irrigation system to your raised beds. These systems allow you to easily irrigate your beds by turning on a facet or flipping a switch. And when they’re installed correctly, they last for years.
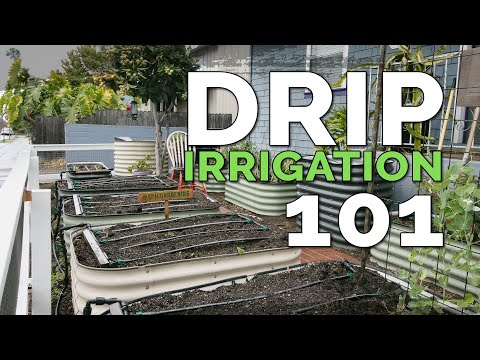
So, where do you start? Strolling through the irrigation aisle at a home improvement store or browsing irrigation fittings online is one option, but it can easily lead you to become overwhelmed. That’s why I’ll explain the necessary parts and steps to set up an irrigation system that works well for any type of raised bed garden.
The Benefits of Drip Irrigation
 Efficient watering conserves water, keeps foliage dry, and automates easily.
If you’re unsure if a this irrigation system is right for your raised beds, consider its benefits. I love drip irrigation systems for all of the following reasons.
- Save water: Since drip irrigation systems add water directly to the ground rather than into the air, they use less water than overhead irrigation systems. This is especially helpful if you live in an area with limited access to water.
- Keep foliage dry: Drip irrigation adds water to the soil surface, which means plant leaves stay dry. This decreases the odds that plants will develop fungal diseases like downy mildew and septoria leaf spot.
- Easy to automate: You can set irrigation systems on a timer, meaning you can water your plants even when you’re not present! Going away for the weekend? No problem! Need to water your newly planted seedlings in the middle of the workday? Just adjust your timer as necessary.
How to Set Up Drip Irrigation for Raised Beds
Before I explain one way to set up irrigation for raised beds, I want to be clear that this isn’t the only method that will work well! There are many different irrigation parts and fittings available, which means setting up an irrigation system is a bit like putting puzzle pieces together. While not all of the pieces will fit together, there’s more than one suitable way to set up irrigation for a raised bed.
That said, the following setup will work well for many raised bed gardens, whether you have a single small bed or a handful of larger beds. You can either follow these setup instructions to the T or adjust them based on your preferences.
Create a Sketch of Your Garden
 Plan your garden layout carefully to optimize watering efficiency.
Before you even think about buying parts, make a quick sketch of your garden area. It doesn’t have to be perfectly precise, but try your best to include the correct length and width of your raised beds, the space between the raised beds, and the distance between your water source and raised beds.
After you have a rough layout, it’s time to determine the number of lines of drip tape you want on each of your raised beds. The ideal number of lines depends on the plants you’re growing, the soil type, and plant spacing. In general, it’s a good idea to have a piece of tape every 6-12 inches. That means you should have anywhere from two to five lines running down the length of a three-foot-wide bed.
Along with determining how many lines will run down each bed, measure the spacing between your spigot and the start of the closest raised bed. You should also measure the distance between each raised bed.
Determine Which Type of Drip Tape to Use
Once you’ve figured out how much drip tape you need to cover your beds, it’s time to choose which type to use. There are three main factors to look at when you’re choosing: emitter spacing, emitter flow rate, and wall thickness.
Emitter Spacing
 Choose drip tape with appropriate emitter spacing for efficient watering.
The emitter spacing refers to the space between each emitter. The tape is made up of a thin and flexible tape with a series of holes or slits along one side of the tape. As the tape fills with water and pressure builds, water slowly trickles out of the emitters.
You can find emitter spacing ranging from 4-60 inches, so it’s important to pay attention to this spacing when you’re buying your irrigation supplies. If you’re an average home gardener growing an array of veggies, herbs, and flowers in a raised bed mix, six-inch to 12-inch emitter spacing works well. This spacing allows water to penetrate all areas of your bed and ensures all crops are well-watered.
However, if you’re only growing tomatoes at 18-inch spacing, it makes sense to choose 18-inch emitter spacing. You can then plant your tomatoes along the emitters and avoid wasting water.
Emitter Flow
 Select drip tape with suitable emitter flow for optimal watering efficiency.
Emitter flow refers to how much water flows out of an emitter at a specific water pressure. In the United States, this flow rate is measured in gallons per hour (GPH). You can find emitter flows ranging from 0.11 to 0.46 GPH.
Two main factors impact the ideal emitter flow rate: run length and soil type. Since most home gardens will only use short sections, the run length isn’t a big factor for raised beds. That means you’re onto soil type.
High-flow emitters are best for sandy soil, while low-flow emitters work well for clay. Since most raised beds are filled with a soil mix that’s similar to loam, a mid-flow emitter works well. Look for a flow rate of 0.18 to 0.46 GPH for your raised beds.
Wall Thickness
 Consider the longevity and cost of tape thickness wisely.
Finally, take a look at how thick each piece is. One wall thickness isn’t better than the other, but thicker tape costs more and lasts longer. You can find wall thickness ranging from 5-15 mil. Five mil tape will likely only last one year before it needs to be replaced, while 15 mil tape can last upwards of five years.
If you’re unsure if drip irrigation will work well for your garden, consider going with the less expensive five mil tape. But if you want to create a long-lasting system and limit waste, go with 10-15 mil tape.
Determine the Gallons Per Hour of Your System and Choose a Header
 Calculate total water flow for efficient selection of mainline tubing.
After you make a sketch of your system and determine which type you’ll use, you can determine the maximum gallons per hour that will flow through your system at one time. Calculate this number by multiplying the number of emitters by the emitter flow rate.
For example, let’s say you have a 12-foot-long raised bed with four lines. You’ve chosen six-inch emitter spacing and a flow rate of 0.33 GPH. To calculate the number of emitters on each piece, multiply 12 by 2 to come up with 24. You can then multiply this number by four since you have four lines of drip tape per bed. In the end, you have 96 emitters on your bed.
You can then multiply 96 by 0.33 to determine your total flow. When all is said and done, your system will use about 32 gallons of water per hour.
If you have multiple raised beds you’d like to water at the same time, complete this calculation for each bed and add these numbers together. For example, if you have four raised beds in the configuration listed above, your system will use 128 gallons of water per hour.
Once you have your system’s maximum gallons per hour, you can choose the proper mainline tubing. This is the material that will run from your water source to your dripline. In most instances, 1/2” or 3/4” poly tubing works well for raised bed gardens.
 Begin setting up your irrigation system by securing the header.
With your supplies in hand, it’s time to start setting up your irrigation system! There’s not one best place to start, but I like to start by setting up the header on each bed. The header is a line of poly tubing that the drip irrigation lines connect to.
Start by measuring the top of your raised bed and cutting a length of poly tubing to fit. For example, if you’re setting up drip tape on a 3 by 12 foot raised bed, cut a three-foot length of tubing to run along the top of the bed. You can connect the header to a piece of wood like Kevin does or secure it to the ground with landscape staples.
Once the header is secure, plug one side with an end cap. This will stop the water and prevent it from flowing out the side. Add an elbow fitting to the other side of the header so water can flow up the side of the bed and into the header. You can then add another piece of tubing to the open end of the elbow fitting. You can either run this tubing directly down to the ground or add a valve that allows you to turn the water flow on and off.
Complete this process for each of your raised beds.
 Attach drip lines to headers with careful alignment and secure fitting.
Attaching the Drip Lines
Once your headers are at the top of the bed, it’s time to attach the drip lines. This can be a little tricky at first, so don’t get discouraged if it takes more than a single try.
Start by marking your headers in the places you’d like to attach your lines. Aim for even spacing between the lines. For example, if you’re running four lines across a three-foot bed, set a line at six inches, 12 inches, 18 inches, and 24 inches.
Next, grab an adapter fitting for each piece. These adapters will allow you to attach the flexible drip tape to the rigid tubing. You can find many different types of adapters, but most have a barbed end that inserts into the tubing and a twisting end that locks the tape into place. Some adapters also have a valve that allows you to turn each piece on and off.
Regardless of which type of fitting you choose, take note of the size of the barbed end. Your goal is to poke a hole in the header that’s the same size as the barb. For example, if you have adapters with a seven-millimeter barb, poke a seven-millimeter hole in the tubing. Fortunately, you can purchase specific hole punches that allow you to poke precise holes quickly and easily. Make sure all of the holes on your header are facing the same direction.
Once the holes are in place, gently twist the barbed end of the adapter into the header until it clicks in place. This is easier to do during cool weather when the poly tubing header is more rigid.
Securing the Tape
Next, cut a piece of drip tape that’s just a few inches longer than the length of the bed. You can stop the flow of water on the ends in a few different ways. Epic Gardening founder Kevin uses another piece of poly tubing to create a footer at the end of the bed. Securing the lines to the footer stops the water flow and keeps the lines in place.
My favorite method involves folding the bottom inch over itself two times. After these folds are in place, secure them by slipping a one-inch long piece of tape over the folded end. Once the ends are blocked, I pull them taut and secure them to the ground with landscape staples.
Now it’s time to connect the drip tape to the header. Start by twisting the locking part of the adapter all the way towards the header. Insert the tape over the adapter’s barb with the emitters facing up. Hold it in place as you gently twist the end over it until it locks in place. Give the tape a gentle tug to make sure it’s secure.
Set Up Your Water Supply Line
 Install a pressure regulator and filter for optimal water flow.
Next, set up your water supply line so it’s ready to flow. Regardless of whether you’re working with a standard faucet connected to city water or a no-freeze hydrant connected to well water, you should install a pressure regulator and filter.
Install the water filter right below the water supply to remove any particulates that can clog the emitters. When you’re installing your filter, pay attention to the water flow lines and set up the filter accordingly.
Once the filter is in place, add a pressure regulator. Most irrigation systems work well at 15 PSI, so choose a regulator that reduces the pressure to 15 PSI.
 Connect headers to the main water supply with appropriate fittings.
After your filter and regulator are in place and your lines are set, it’s time to connect the headers to the main water supply line. The exact setup will depend on your garden’s layout. However, the overall goal is to run tubing from the water supply to each header and use the appropriate fittings to connect the different pieces of tubing together.
Depending on the layout, you may need to use elbow fittings or T-fittings to connect the different pieces of poly tubing. For example, a T-fitting is useful to run a piece of tubing from the mainline up to a header on a raised bed. And an elbow fitting works great to direct the mainline tubing around sharp corners.
When you’re all said and done, each header should be connected to the mainline tubing, and all tubing ends should be secure. Take a minute to walk around your garden and tighten any loose fittings.
Test Your Irrigation System
 Conduct a test of the system for leaks and adjust as needed for efficiency.
Once the system is all set up, turn the water on and watch it flow! Keep your eyes and ears open as you closely monitor the system for any leaks. If you see water spouting out for a fitting, tighten the fitting and give it another test.
It can take a few minutes for your system to fully pressurize, so don’t be alarmed if water takes a while to start flowing out of the emitters. However, if you don’t see water after ten minutes, there’s likely a problem with your system. There may be a hidden leak lowering the water pressure, or your water source may not have enough pressure for your entire irrigation system.
It often takes a few trial runs to get your system running as you like, so don’t get discouraged. Try tinkering with different parts and valves until the water is flowing well.
Final Thoughts
Setting up a drip irrigation system may seem overwhelming, but the right knowledge turns it into a fun and satisfying project! Once your system is finished, you’ll be able to water your raised beds by turning a single valve. That means you’ll have more time to harvest your crops, experiment with new varieties, and spend time with those you love.