In a home garden, you might want to combine the size of one tomato variety with the color or flavor of another. This is reason enough to hybridize tomatoes! Hybridizing tomatoes is a wonderful activity regardless of your motivation.
Hybrid tomatoes are the offspring of two separate parents, combining to display the characteristics of both. This is why they are often strong and disease-resilient. They exemplify “hybrid vigor,” a characteristic in which hybrid plants are typically stronger than their non-hybrid parents.
Before we dive deep into hybridizing, there are a few things to note. Hybrid offspring grows unpredictably. To hybridize, you must transfer pollen off one plant into the ovules of another. This process leads to many random genetic combinations, and the only way to know what type of tomatoes you have is to grow the new seeds.
Additionally, newly crossed hybrid tomatoes are not genetically stable. It takes a few years of hybridizing and growing seeds to stabilize new varieties’ traits. If you like the type of tomato you create, you’ll need to keep its seeds. Then, you’ll begin a yearly journey of growing new varieties, testing which ones you like, and keeping the seeds of the hybrid types you prefer.
One final note to consider is that tomatoes sometimes hybridize on their own! When pollinators are plentiful and tomato plants grow near each other, it is easy for pollen from one plant’s flowers to reach the ovules of another. Save tomato seeds each year and there is a strong chance you’ll discover a new hybrid variety.
Without further ado, here are 11 steps for creating hybrid tomatoes. Follow along and learn how to be a plant breeder in your garden!
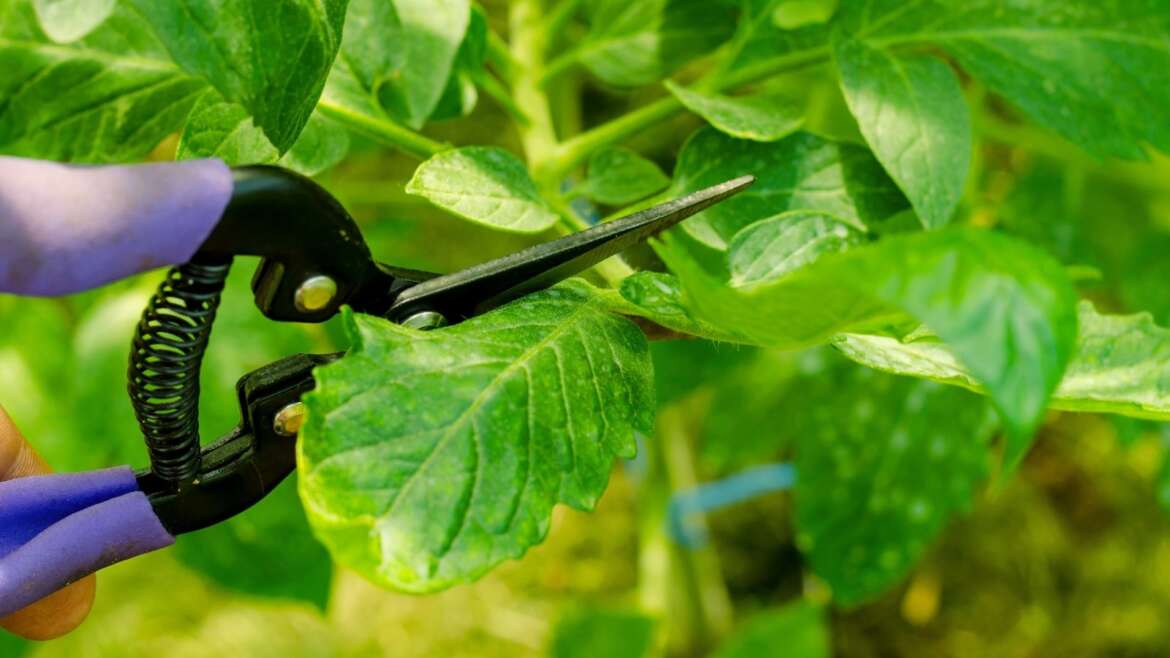
Hybridize tomatoes with scissors, paintbrush, and micromesh bags.
A propagation or bonsai kit has all the tools you’ll need, plus a few you don’t need. Hybridizing tomatoes involves snipping, brushing, and bagging, so as long as a kit has a few basic tools, it should be suitable. Use materials around your house if a kit is hard to find. This list has everything you need to hybridize tomatoes:
- Thin snips or scissors.
- Small cup or saucer.
- Micromesh bags.
- Fine paintbrush.
I hybridize tomatoes using a cuticle clipper, a fine paintbrush, and a little saucer from my kitchen. If you don’t have something on this list, think of other tools that can take their place.
Step 2: Hybridize at the Right Time
 Hybridize tomatoes in late spring or fall for best results.
Tomatoes struggle to form seeds and fruit when temperatures soar over 95°F (35°C). Aim to hybridize tomatoes during late spring, when the temperatures are still cool, moisture is abundant, and flowers start to appear.
Fall is also an ideal time to hybridize tomatoes, especially in areas that don’t receive winter frost. In some warm-winter areas, tomatoes grow year-round as perennials, and hybridization can occur whenever conditions are ideal. However, you will have the most success at peak vigor in temperate weather.
In cold-winter areas and areas with early winter frost, do this experiment in spring. Frost kills tomato plants, prevents fruit formation, and leads to rotting fruit. Avoid these issues by choosing to hybridize during the spring in zones with extreme winter.
Step 3: Choose Your Varieties
 Choose two heirloom tomato varieties to hybridize for best results.
Before you get your hands dirty, the first step in hybridizing any plant is identifying which two plants you’d like to hybridize. Heirloom tomatoes are the best types to use in hybridization, as they are genetically stable and cross with other varieties easily. Mixing hybrid varieties with other hybrids may be less predictable, as hybrid offspring grow differently from their parents.
There are hundreds of heirloom tomatoes to choose from, and this list has a few superb options to start with:
Once you’ve selected two varieties you’d like to blend, you’ll need to grow mature tomato plants of each variety. Start seeds indoors a month or two before your last frost date, and transfer seedlings outside once the danger of frost has passed.
Step 4: Isolate the Flowers
 Select freshly opened flowers to pollinate for best results.
Here is where the science fun begins! Each tomato flower is bisexual, meaning each one has both male and female reproductive parts. The male parts are the anthers, and they produce ample amounts of pollen.
The female parts are the stigmas, and there is usually one per tomato flower. Each stigma houses ovules at its base that, when pollinated, form seeds. Think of the stigma as the pollen receptor and the anthers as the pollen holders.
The perfect flowers to hand-pollinate are recently-opened ones. Long-opened flowers have likely already received pollen and are not ideal candidates for this experiment. Select freshly opened flowers to pollinate for best results.
Step 5: Collect the Father’s Pollen
 Choose one tomato variety as the father and one as the mother for easier hybridization.
This part is a little tricky. To make things easier, choose one tomato variety as the father and one as the mother. The father plant donates pollen, and the female plant receives pollen and forms seeds. Select open flowers on the father variety to begin. You’ll also need a thin paintbrush, a cup or saucer, and small trimmers.
Using the paintbrush, dust off pollen from the father plant’s flowers into the small cup. The yellow flecks collect over time as they form a dusty powder at the bottom of the cup. Once you have a thin layer of pollen, you’re ready to transfer it to the mother plant.
Collecting pollen from multiple flowers on the father plant is a good idea, as it increases the amount of genetic diversity for the tomato offspring. Each flower’s pollen is different from the next. Mixing pollen from many flowers on the father plant will help your hybrid varieties in the long run by adding more disease and pest-resistant genes.
Step 6: Cut the Mother’s Anthers Off
 Prevent self-pollination by snipping the mother flower’s anthers carefully.
Tomato flowers are bisexual, or “perfect,” and designed for self-pollinating. To prevent self-pollination, you’ll need to snip the mother flowers’ anthers off before transferring pollen. We want the father’s pollen to go inside the mother’s stigmas, as opposed to her pollen.
Find the selected flower on the mother plant that has recently opened. The best mother flowers to use in hybridizing are ones with low amounts of pollen. Tomato flowers’ stigmas are receptive to pollen for 24-48 hours before their anthers form their pollen. Find a recently open flower, cut off its premature anthers, and you’ll have lower chances of accidental self-pollination.
Cut the multiple anthers out of the inside of the flower by locating their stems, called filaments. Snip each filament at its base without touching the stigma. Any slight cut to the stigma threatens successful seed formation. Try to also avoid touching the stigma with the anthers as you cut them off. This helps prevent unwanted self-pollination.
If you’re unsure which part is which, notice that there is only one stigma per tomato flower, and it resides at the center. At its tip rests a donut-like structure that forms the opening of the stigma. Surrounding the stigma are multiple anthers, and they are long, yellow, and coated in pollen.
Step 7: Dust Stigmas With Pollen
 Cross-pollinate by brushing the male pollen onto the female’s stigma gently.
With the anthers cut off the mother plant’s flowers, the father’s pollen in a cup, and a paintbrush in hand, you are ready to begin cross-pollinating! Create a new hybrid tomato variety by brushing the father’s pollen from the cup onto the mother’s stigma inside the antherless flowers.
The goal is to get pollen from the father’s flowers to travel into the stigma on the mother’s flower. From the stigma, it travels down a tube called a style. Inside the flower, the style connects the ovary, and the ovary is where the ovules lie. Ovules start to become seeds when pollen reaches them. The ovary then grows into a tomato fruit that protects the seeds.
To transfer pollen, brush it onto the flower’s stigma a few times with the paintbrush. Ensure optimal pollination and fertilization by brushing more than once. The more pollen present, the higher the chance it travels down the stigma and fertilizes the ovules.
Dust as many of the mother’s flowers as you’d like, as long as they have their anthers cut off. A single tomato produces over 150 seeds on average, and one or two flowers produce enough seeds for the home breeder. I recommend dusting at least two of the mother’s flowers. That way, if one fails, you have another to fall back on.
Step 8: Bag the Flowers
 Protect pollinated flowers with mesh bags to ensure successful hybridization.
This step prevents pollen from other tomato flowers from reaching the ones you’ve already pollinated. A bag with fine mesh keeps unwanted pollen out of the flower, and it allows air, water, and light to still reach the tomato. Not only do these bags prevent pollen from the wind, but they also protect flowers from pollinators with tomato pollen on them.
Use a bag with micromesh—ones that say “mosquito netting” or “fruit protection” should work well. Avoid touching the stigmas, and place the bags so that they surround each flower. Close their drawstring and tie them securely. Do not overtighten the drawstring, as it can cut into the tomato plant’s stem over time.
Keep the bag on the flowers until you see the fruit fully forming. Once the fruit is forming, the seeds inside gain protection from the naturally growing tomato skin. Take the bags off carefully by loosening the drawstrings. At this point, your hybrid fruit will look like every other tomato on the plant. Tag it with a plant tag or tie a piece of string loosely around the tomato stem. This flags hybrid tomatoes for easy identification.
Step 9: Collect Seeds
 Ferment hybrid tomato seeds for successful sprouting and future planting.
Tomato seed collection involves a natural phenomenon known as fermentation. Tomato seeds have a unique coating on them that prevents germination. When you collect the seeds from your hybrid tomato, follow these fermentation tips and they’ll sprout in no time.
To collect seeds, first pick the hybrid tomatoes once they are fully ripe. Slice the tomatoes and scoop out the goopy, seed-filled insides. Place the seeds and flesh inside a cup. Then, fill the cup with water.
Cover the cup loosely, and let it sit for three days on the kitchen countertop. The three days allow for fermentation on the seeds, as bacteria eat the germination-preventing coating that grows on them.
After three days, separate the fermenting tomato parts from the seeds. The seeds sink, and the flesh floats to the top. Then, dump the seeds into a mesh bowl and rinse them well.
Once all the rotting parts are separate from the seeds, place the washed seeds on a towel to dry. Seeds are dry when brown and fuzzy, and they lack their slippery coating. When they are fully dry, place them in a container in a dark and cool place.
I store mine in a closet, where they stay dormant until planting. Stored in proper conditions, tomato seeds germinate successfully for up to five years before their rates decline.
Step 10: Sow Seeds
 Nurture your hybrid tomato seeds and watch them flourish.
Patience is key when creating hybrid tomatoes. You’ll have to wait about a year from when you first started creating the hybrid to see the fruits of your labor! When you finally grow the seeds and see the varieties you’ve created, all the hard work and patience pay off.
To sow seeds, gather the hybrid seeds you collected. Sow two seeds each in 5” pots with potting soil, burying the seeds no deeper than a half-inch. Water the soil well, and keep the pots under sunlight or grow lights. Seeds germinate in one to two weeks indoors. Transplant seedlings outside once the danger of frost has passed in your area.
Wait for your tomato seedlings to grow, and watch as they exhibit new traits and characteristics. Hybrid tomatoes may grow different leaves, colors, and shapes. Their flowers and fruit may look completely different than their parents! Observe your new hybrids, take notes of their growth, and watch as they perform each spring and summer.
Step 11: Repeat!
 Refine your hybrid tomatoes until they become heirloom classics.
Congratulations! You’ve successfully grown a hybrid tomato! At this stage, you have two options. Let’s say you grow out your hybrids and they perform worse than you had anticipated. You can bolster your hybrid’s genetics with another year of cross-pollination.
Select the parent variety with the traits you like, and follow steps one through ten above. Use your hybrid tomato plant as the mother and one of the other parent varieties as the father. Grow the new plants each year in spring, cross-pollinate them if you’d like, and select seeds from the best tomato hybrids in fall.
Once your tomato hybrids appear to your liking, stop cross-pollination and save seeds each year from the most vigorous plants. After about seven to ten years of this process, your hybrid will stabilize itself and grow true to seed—at this point, you’ll have successfully created a new tomato!
If you’d like a more lax approach than the seven to ten-year process, save seeds from the hybrid varieties you enjoy eating. Grow the seeds, identify the best tomato plants, and save seeds from those plants. Repeat this process, and over time, natural cross-pollination and self-pollination stabilizes the tomato varieties’ genetics.
Final Thoughts
The number one thing you should take away from this article is that you can experiment with plant breeding. No matter the results, working with plants and their genetics is a learning lesson like no other. With a little effort and a lot of time, you could create the next best tomato variety in your garden!