Weeds compete with garden plants, reducing their productivity, harboring pests, and sucking up soil nutrients. Some weedy species reproduce rapidly by seed, while others spread via underground rhizomes. Removing weeds is important for robust yields and the health of your garden, but it doesn’t have to be a terrible, backbreaking job, nor does it require chemical herbicides.
These weed removal methods are safe and efficient to save you time, energy, and money without harming your soil or garden crops. Some of them are passive, working while you sleep or spend the winter indoors. Others require hand work but are more ergonomic than hunching over.
Let’s dig into the best weeding methods for busy organic gardeners.
What is the Best Weed Removal Method?
Suppress weeds naturally with hoeing, mulching, and tarping techniques.
The most efficient, natural way to remove weeds from a garden is to use a hoe or lawn mower and then apply mulch or a tarp. Cutting weeds near the base of the soil makes it difficult for them to regrow. Then, you can spread a deep layer of biodegradable mulch that naturally smothers and suppresses weeds. Materials such as straw, leaves, woodchips, newspaper, cardboard (tape removed), or compost enrich the soil while preventing the germination and growth of weedy species. This works best for beds that are already planted.
Weed seeds cannot access sunlight beneath a deep layer of mulch. For extra weedy infestations or establishing garden beds in the grass, you can use a mower on its lower setting and then lay down a heavy-duty silage tarp and weigh it down with sandbags or rocks. The tarp smothers weeds even more quickly than mulch and can be left in place for several weeks to block sunlight from the bed surface. When you pull the tarp up, the ground should be clear, weed-free, and ready to plant. This works best for areas where no crops are currently growing.
7 Most Efficient Weeding Methods
Hand-pulling weeds can be very frustrating and time-consuming, but using a rototiller or plow can be very harsh on the soil. Moreover, some forms of weeding (such as tillage) can actually create more weed issues down the line because they spread seeds and perennial weed rhizomes around your garden.
After more than five years of organic growing on a commercial scale, here are the best weeding methods I’ve discovered for short-term efficiency and long-term prevention.
Tarping
 Effortlessly smother weeds with occultation using heavy-duty silage tarps.
Best For: Starting new beds or passively clearing large unplanted areas
Tarping, or occultation, is the quickest and easiest method for removing weeds from a large area that isn’t planted with crops or ornamentals. A silage tarp is a heavy-duty agricultural tarp designed for this purpose. It works by blocking out all sunlight, thus smothering any plants growing beneath it. This is a very popular method in no-till and no-dig gardening.
Once you put the tarp in place, you can go about your day without any more effort. This method is amazing for fall and winter when you aren’t doing much else in your yard. While you sit by the fire with a hot tea, you are technically getting weeding work done.
For example, if you want to start a new garden bed in a backyard filled with grass and weeds, a tarp would be the most efficient way. This method works best in the autumn, so the tarp can cover the soil over the winter, but you can use it any time of year.
Begin by using a lawn mower on the lowest setting to mow the plants as close to the ground as possible. You don’t have to remove the residues unless there are lots of aggressive perennial weeds like thistles or quack grass. Once you’ve raked away these culprits, unfold your silage tarp and use two people to pull each corner out to the side. Spread the tarp over the entire area and weigh down the edges with sandbags, bricks, or smooth rocks.
If you live in a cold climate, face the black side of your tarp upwards to promote soil warming in the spring. The heating of the soil also helps kill weed seeds. If you live in a hot climate, you can keep the white side up to prevent the soil from overheating and killing beneficial microorganisms.
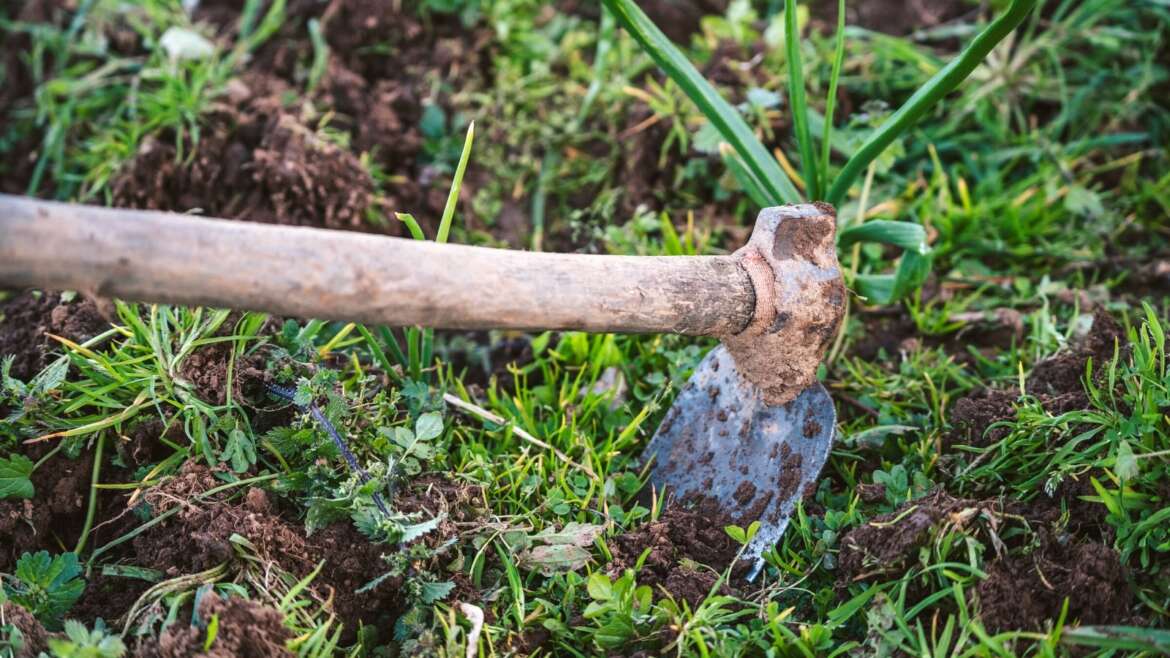
Hoeing
 Efficiently slice through weeds with your favorite type of hoe.
Best For: Removing young weeds from small to medium-sized rows while standing up
There are many types of garden hoes, including stirrup hoes (also called hula hoes), chopping hoes, onion hoes, collinear hoes, and fork hoes. They mostly work with the same premise: a sharp edge cuts weed plants at the base of their stems. Stirrup hoes are my personal favorite because they operate on a hinge that moves back and forth, allowing you to thoroughly chop and remove any weeds growing in your beds.
The long handle of a hoe ensures you can work while standing up, eliminating the backbreaking hunch that makes hand-weeding so difficult. Still, it can take a bit of time. Hoeing works best if you grab the tool and do a quick sweep over your entire garden once or twice a week. If you can catch the weeds at the “bean-thread” stage (when the weed seedlings have thin white stems), your weeding efforts will be wildly successful!
The main downside of hoeing is potential soil disruption. You don’t want to churn the hoe aggressively through the soil. Otherwise, it will have similar impacts to tilling. If the hoe goes too deep or agitates the soil surface with too much force, it can disrupt the soil structure and harm beneficial microbes. It can also bring new weed seeds to the surface or spread perennial weeds. But when used correctly, a hoe causes very little soil damage.
Most people don’t realize that they need to sharpen their hoes. A sharp hoe will slice through weeds quickly so you don’t have to disturb the soil quite as much. You also need to be careful that you don’t get too close to your crops. Otherwise, you may nick the stems of your plants or accidentally remove seedlings that you meant to keep.
Crop Mulching
 Prevent weeds with a layer of organic mulch around plants.
Best For: Vegetable and ornamental beds with crops already growing in them
Spreading mulch around your vegetable crops or ornamental plants is an excellent weeding tactic. However, it only works if you first cut down or remove any weeds that are currently growing in the bed. You can’t just spread mulch over 12” tall weeds and expect it to kill them. But if the weeds are still small, a two to four-inch thick layer of straw or leaves can effectively kill them and suppress future growth.
You can use the same tactic as above before spreading mulch— hand-pull or hoe the weeds, and then mulch. For pathways and larger ornamental beds, mow the area down and then layer on the material with wheelbarrows and rakes. It may take a bit of time upfront, but it will create long-lasting results. You only need to reapply mulch once a year, preferably in the fall.
As opposed to plastic mulch or landscape fabric, organic biodegradable mulches decompose into the soil and enrich it with nutrients and minerals as they decompose. The best organic mulches include:
- Straw: Best for long-season crops like strawberries, squash, and tomatoes
- Chipped Leaves: Great for annual or perennial beds
- Wood Chips: Best for perennial beds and walkways
- Pine Needles: Ideal for blueberries, rhododendrons, and acid-loving plants
When spreading mulch around beds that are already planted, take care not to put the material close to plant stems or tree trunks. You want to leave a two to six inch ring of space around the base of each plant, depending on its size. This prevents moisture and rot-causing pathogens from growing near the plant stem.
Sheet Mulching
 Harness the power of sheet mulching to suppress weeds naturally.
Best For: Starting a new garden bed or establishing pathways
If you have access to a bunch of newspaper or cardboard, sheet mulching is an amazing way to smother weeds while building soil, conserving moisture, and promoting soil life like worms and beneficial fungi.
Paper pulp products are, after all, made from trees and contain many of the same compounds as wood chips. Most newspapers and cardboard labels are printed with soy-based inks that are biodegradable. As long as there is no tape or high-gloss pages, the material will naturally decompose over time.
Simply mow the desired area and begin layering the sheets on top. Overlap the edges so nothing can go through. Use a hose to wet the paper as you go so none of it blows away. You can also layer on compost, topsoil, or one of the mulch options listed above. This will ensure the sheets are thoroughly weighted down and the weeds are extra buried.
This method is awesome for establishing a new plot over grass or weedy ground. It would be particularly beneficial if you used the tarping method over winter and then sheet-mulched the entire area in the spring before building your garden beds. Sheet mulching literally creates a sheet of weed protection over the soil surface. Weeds cannot photosynthesize or germinate beneath the thick paper.
Sheet mulching also works great for pathways. When it comes to weed removal, many people neglect the paths between beds. But pathways are often the place where weeds go to seed and grasses get out of hand, ultimately allowing more weeds to creep into your growing beds.
Remember to remove all tape from the cardboard before applying it!
Flame Weeding
 Control weeds effortlessly with targeted flame-weeding techniques.
Best For: Small, young weeds (under four inches) and stale seedbeds like carrots
Torch weeding, or flame-weeding, involves using a propane torch to burn lots of tiny weeds before they take hold. It is an easy weed removal method for areas with bare soil that you don’t want to disturb. In the organic farming world, it is often used to create a “stale seed bed” for crops such as carrots that take a long time to germinate.
The stale seedbed technique allows a crop to germinate into the “cleanest” weed-free soil as possible. For example, a bed is cleared and seeded with carrots. You sow a radish seed at the end of the row. When the radish germinates, you can bring out the torch and flame weed the entire soil surface, killing any newly germinated weeds before the carrots sprout. This clever technique ensures that your carrots have the highest chance of survival.
Contrary to popular belief, flame-weeding does not mean lighting a big field of weeds on fire. This method is only effective on small weeds that have just germinated or are about to germinate. Do not attempt flame weeding on plans larger than 4” tall.
Flame-weeding is a more advanced weed removal technique that is only necessary for serious gardeners. Save yourself the propane and risks if you have a small area. You can easily weed by hand or with a tool. Do not use flame-weeding in dry areas with burn bans or fire risks. Avoid torching any garden areas close to tall grasses or dry, flammable materials.
Hand Pulling
 Precision and care define the art of hand-pulling weeds.
Best For: Taproot weeds, weeding near young plants, or pulling weeds that are growing close to your crops
Hand-pulling is the least popular but most intricate form of weeding. No tool, tarp, mulch, or torch can selectively choose the right plants to pull as human eyes can. If you have weeds growing very close to your crops, or the crops are very young, hand-pulling is often the only option to remove weeds without damaging your plants.
This method is also important for perennial weeds with taproots. For example, a perennial weed like bindweed, dock, or dandelion has a deep taproot below the soil with lots of stored energy. If you cut the weed leaves above the soil surface using a hoe or a mower, the weed can easily grow back within a couple of weeks because the taproot is still in place. Hand-pulling is necessary to yank the entire taproot out so it doesn’t keep proliferating.
Make hand-pulling easier by using a trowel or hori hori knife to leverage the roots up from the soil. When pulling weeds from close to a crop or new transplant, use one hand to hold your desired plant in place while gently pulling the undesired plant up from the base. It’s important to support your crops so you don’t accidentally uproot them during your quest to remove nearby weeds.
Rototilling
 Rototilling can spread perennial weeds, harming soil health.
Best For: Annual weeds and large areas
A tiller or plow is the most recognizable form of weeding used by large-scale farmers. Garden-sized rototillers can be useful for clearing large areas at a time, but they do come with many major drawbacks. Tilling is basically churning up the soil, which, of course, kills any weeds growing there. The weeds are chopped and twirled until they decompose back into the ground.
This can be helpful for annual weeds as long as there are no seed heads on them. In general, you don’t want to let any weeds go to seed in your garden. If you rototill a bed full of seeding annuals, every one of those seeds will be spread even further, potentially germinating into a huge weed infestation. Mulching or tarping is a better option for heavily infested areas.
If you have a problem with perennial grasses or weeds such as quackgrass, thistle, dandelion, bindweed, or johnsongrass, I strongly advise against rototilling! Using a rototiller can actually spread these weeds rather than kill them. This is because most perennial weeds spread via underground taproots, runners, and rhizomes. These below-ground structures are capable of sprouting new plants from every little chunk of the roots. A rototiller will chop up all the roots into tiny pieces, spreading the plants by the hundreds or even thousands.
Be aware that tillage is a very harsh weed removal method that is harmful to the soil. Tilling is only a last resort recommendation for areas with lots of annual weeds or a large plot of ground where you need to incorporate a lot of compost. Even so, be aware that rototilling may appear to fluff up the soil initially, but it can cause major issues with compaction later on. Tilling destroys the fragile soil structure and can harm beneficial soil microorganisms.
Tips for Preventing Weeds
 Prevent weeds with proactive measures like mulching and timely intervention.
Like most things in life, prevention is a much better option than treatment. If you can prevent weeds from sprouting and proliferating, you won’t have to worry so much about painstaking weed removal methods. Believe it or not, some gardens have very few weed problems because they have worked so effectively at preventing unwanted plants from growing.
The best ways to prevent weed issues in your garden include:
Layering on organic matter is both a prevention and treatment tactic. It smothers weeds and prevents light from reaching seeds below them.
If you catch weeds while they’re young and thin, you’re far less likely to have problems.
Some weeds can produce 1,000-10,000 seeds from a single plant! Stay on top of your weeds while they’re young so they don’t reproduce. If you notice seedheads, chop them into a bag as soon as possible so the wind doesn’t spread them around.
When you reduce soil disturbance, fewer weed seeds are brought to the surface to germinate, and perennial weeds won’t spread as rapidly via their root structures.
Avoid bringing in weed-infested manure, compost, or straw. You can let new inputs sit in a pile for a few weeks before spreading in your garden. If lots of weeds germinate in the pile, you know it may be problematic.
Final Thoughts
Weeds are really just out-of-place plants that we don’t want to compete with our crops and ornamentals. To keep them at bay, it’s best to catch them while they are as young as possible. A quick 15-minute weeding session in your garden once or twice a week can go a long way in reducing infestations.
You can also use tactics like tarping and sheet mulching to smother weeds and prevent sunlight from reaching them. Don’t forget to control weeds in the pathways and margins, as those seedheads easily blow into your garden beds if they are left unchecked.