Spring – the birds are chirping, daffodils are blooming, and tropical houseplants are getting ready for their favorite season. One of my favorite parts of spring is watching my houseplants transform into the lush, healthy tropical plants they were born to be.
Though houseplants spend the majority of their lives inside, longer daylight hours and rising temperatures signal to plants that spring is near, and they’ll start to flower and push out new growth. That’s why this is an essential time to get your houseplants set up for summer by repotting, cleaning up, pruning, fertilizing, and making a plan to move them outside if you can.
Before you get started, take a general assessment of your plants. Are there any you’d like to part with to make room for new ones?
Pro Tip: Check out local Facebook groups and plant nurseries for upcoming plant swaps. Spring is a popular time for these types of gatherings, which are a great way to score new plants sustainably and cheaply.
Spring is also an important time to determine if any of your houseplants look unhealthy, dried out, leggy, or discolored. The good news is that all of these common issues can be fixed by following these 5 steps for healthy spring houseplants.
Repot if Needed
First order of business – see if your plants are still happy in their pots. Generally speaking, most plants will benefit from being repotted every one or two years, though this will become less frequent as they mature.
As a young plant grows, it can become rootbound and need fresh soil or a larger pot. If your plant’s growth is stunted, the soil dries too quickly, or there are roots emerging from the drainage hole or circling the pot, it’s time to move up a size.
Pot Selection
Give spring houseplants a fresh, healthy start with a clean, slightly larger pot.
The first step on the path to the perfect pot— check for drainage holes. No matter how cute a pot is, very few plants do well without access to adequate drainage. If you fall in love with a pot missing drainage holes (a tragedy too many of us have experienced) and drilling isn’t an option, one of my favorite tricks is to use a plastic grower’s pot and use it to stage in a larger pot. Sometimes, you can find nurseries or botanical gardens giving these away. Just make sure you clean them first (more on that later).
Choose a new pot that’s only slightly larger than your existing one. A good rule of thumb is to stick with a size just one to two sizes bigger. For example, upgrading from a one-gallon to a three-gallon pot would be ideal for a rootbound plant.
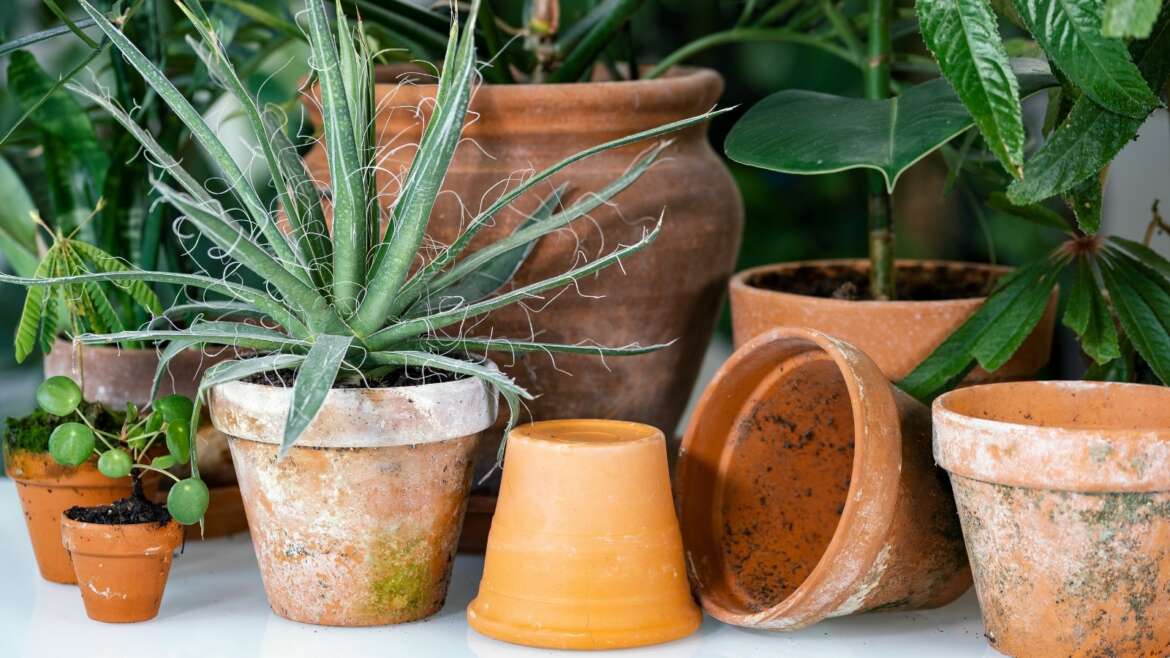
Sanitizing Your Pot
As for the type of pot, there are pros and cons to both clay and plastic. Plastic is impermeable and synthetic, while clay is permeable and natural but breakable. Whichever you choose, make sure to clean any used pots thoroughly. This is an important step because leftover diseased plant material, fungi, insects, or larvae can remain in pots and infect new plants. Thoroughly disinfect pots by soaking them in a bath of 1 part bleach to 9 parts water for 10 minutes. Alternatively, wipe them down individually with 70% isopropyl alcohol before rinsing and leaving them out to dry.
Terracotta pots are prone to collecting white residue on the exterior and inner rim. These are mineral deposits typically caused by fertilizer or hard water. Aesthetics aside, these deposits can dehydrate roots and stunt growth. The good news is that they can easily be scrubbed off with a metal scour or carefully scraped with a knife for stubborn spots.
Soil
 Introduce changes slowly after repotting to minimize stress on your plant.
Spring is also the best time to fertilize and refresh the soil. While generic houseplant soil will work, not every plant will thrive in a one-size-fits-all mix. You can buy premade custom mixes or make your own if you’re feeling adventurous. Mixing your own provides a great opportunity to customize the materials used and incorporate organic slow-release fertilizers right into your mix.
Important Note: Repotting will create stress for your plant, so introduce change slowly. After repotting and disturbing the roots, move your plant to its original place for a few weeks. This allows it to adjust to the new pot and soil before moving on to the next steps.
Spring Clean Your Houseplants
 Remove spent flowers and dead branches to prevent disease and pests.
Healthy spring houseplants require a nice dusting, just like everything else. With your plants freshly repotted, it’s time to help them look their best! First, wipe down leaves with a damp sponge or microfiber cloth to rid leaves of dust and dirt that can clog their stomatal pores and disrupt photosynthesis. This works well for plants with waxy, leafy leaves like pothos (Epipremnum aureum) or fiddle-leaf fig (Ficus lyrata), but succulents, cacti, and African violets prefer to have their leaves cleaned with something smaller like a toothbrush or paintbrush.
If your plant has any spent flowers or dead branches, go ahead and trim them off with clean, sharp shears. While not inherently harmful to the plant, excess dead plant material can be a breeding ground for diseases and pests.
A final, but optional choice is to topdress the soil with vermiculite, gravel, or pebbles. This adds not only a polished look but can also help hold in moisture during the hot summer months and serve as a physical deterrent for pests like chipmunks and fungus gnats— no harsh chemicals needed.
Pruning
 Spring pruning helps maintain healthy houseplants by stimulating growth.
Long winter months often leave houseplants leggy and gangly as they search for sunlight. While this is an incredible survival strategy, surviving doesn’t equate to thriving. Long, stringy stems create stress for a plant’s root system and are a sign your plant definitely needs more light. Spring is the perfect time to find a brighter location to help your houseplants develop healthy new growth.
In addition, spring is the best time to encourage your plant bush out as it enters its growing season by cutting back as much as one-third to one-fourth of the plant’s mass. Use shears to cut right at the node (the intersection of the stem and leaf). Vines like pothos or English Ivy (Hedera helix) are more resilient to a harder prune, and their vines can typically be propagated in a vase of clean water, though stressed-out plants may not root as easily as healthy plants.
If pruning feels like an intimidating task, pinching is a small but impactful technique used to control and encourage fuller growth as opposed to taller growth. As opposed to taking a large portion of plant material in a traditional prune, by pinching, you’ll only remove 1-2 inches of new growth from the tips of branches or vines. Just like regular pruning, pinch or clip just above the node while being cautious of tender growth or buds beneath the node. With each pinch, your plant will push out two new stems below, leading to a fuller look.
Some houseplants, such as Norfolk Island pine (Araucaria heterophylla) should never be pruned. Certain flowering plants such as indoor hydrangeas, most commonly Hydrangea macrophylla shouldn’t be pruned in spring, fall, or winter. If you’re unsure whether or not to prune, it never hurts to research before making the first cut.
Move Indoor Plants Outside
 Gradually adjust houseplants to shaded areas when transitioning them outdoors.
Fast-growing, healthy houseplants usually spend part of their spring and summer outdoors. Once evening lows are well above 50°F (10°C), remind your plants of their tropical roots by placing them outside .
The big move outdoors is a major change for houseplants, so they’ll need to adjust slowly. Most tropical houseplants originate from the shady understories of tropical forests across the world. Replicate this environment by avoiding direct sunlight and placing them in shaded areas like underneath a tree, gazebo, or shade cloth.
Even if your plant receives bright sunlight indoors, you’ll still want to place it in a shady area outdoors initially. It’s OK if the shady area receives more light exposure than most indoor locations. As they acclimate to their new digs, sun-loving plants like the Bird of Paradise (Strelitzia reginae) can be moved to areas with partial shade. Keep an eye out for leaf burn or discoloration. If you see these symptoms, that’s your queue to move your plant to an area with less direct sun exposure.
The second thing to remember is that plants will transpire quicker outside, so they will need to be watered more frequently. However, grouping them will increase humidity and reduce your watering workload. On especially hot days and heat waves, try watering the ground surrounding your tropicals to boost humidity in the area.

Fertilize
 Give houseplants a healthy nutrient boost in spring and again in the summer.
Plants use a tremendous amount of energy when pushing out new growth in the spring. If your soil mix doesn’t have an organic fertilizer, March or April are the best times to fertilize for the first time of the season. After this, fertilize every one to three months until fall. However, this frequency is highly dependent on the individual needs of the species.
While choosing the right fertilizer can be a bit challenging at first, once you know your plant’s needs, it’s much easier to pick the best option. Many indoor gardeners use a balanced 5-5-5 or 10-10-10 fertilizer, but it’s all about what nutrients your specific species needs. There are great organic options, too, like worm castings, fish emulsion, or seaweed fertilizer. I prefer to use these to mitigate the risk of overfeeding with synthetic fertilizers.
Do err on the side of caution with fertilizer application, especially with synthetic fertilizers. It’s much easier for plants to recover from underfeeding than it is to recover from fertilizer burn resulting from overfeeding.
Final Thoughts
Spring is the perfect time to set your houseplants up for healthy growth and summer success. A little extra attention can go a long way. Refresh their soil and pots and give them a dose of fertilizer and a haircut if they’ve grown leggy. Clean up their leaves, and let them soak up the warmth and humidity of the great outdoors. Finally, don’t forget to enjoy the transformative magic of spring yourself!