I’ll admit it—I was confused the first time I grew potatoes. After spending several seasons tucking cucumber seeds and tomato transplants into the ground, I expected to do the same with potatoes. Therefore, I was shocked when the managers at the farm I was working at brought out a bucket of cut potato tubers and told us to get planting.
Of course, they provided a few more instructions, but we were planting tubers nonetheless. While this initially seemed like a waste of a potato, I soon learned that proper planting techniques and care lead each piece to increase tenfold. When you consider this, tucking the tubers in the ground makes a lot more sense.
That said, these impressive yields only occur under the best conditions. If you want to unearth an impressive potato harvest later this year, it’s important to plant the tubers correctly. I’ll share some helpful tips so you can enjoy healthy plants and a bountiful harvest.
Choose the Correct Variety
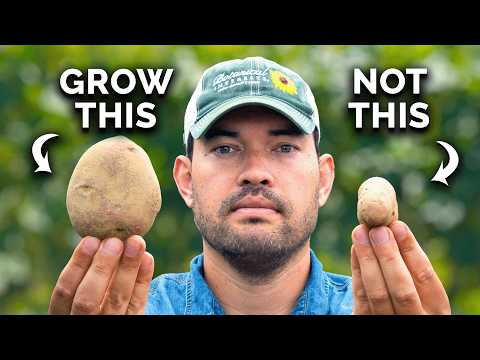
 Choose potato varieties wisely based on size, texture, and resistance.
If you think the only types of potatoes are red and white, think again! These starchy tubers come in various colors, sizes, and textures. I think it’s hard to find a bad potato, but you may be disappointed to end up with rows of red, waxy, fingerling potatoes if you were hoping for large baking types.
Along with looking at the variety’s size and texture, pay attention to disease and insect resistance. If this is your first time growing potatoes, it’s hard to say which problems are common in your area. However, if you had a problem with potato diseases in the past, look for a variety that’s resistant to the disease in question. For example, if potato scab ravaged last year’s crop, look for a scab-resistant variety.
If you’re set on planting a specific variety, order the seed potatoes sooner rather than later. Seed suppliers often sell out of popular varieties before planting season arrives, so gardeners who order ahead come out on top. Most companies allow you to order in the fall or winter, but they won’t ship them until spring. Therefore, you don’t have to worry about storing them at home.
Know the Differences Between Determinate and Indeterminate Potatoes
 Understanding determinate and indeterminate potatoes clarifies growth habits.
If you’re like Kevin and me, you may be a bit confused when you hear the terms determinate and indeterminate applied to potatoes. Sure, we’ve heard of determinate and indeterminate tomatoes…but potatoes?
These two terms also apply to potato plants. Like with tomatoes, they help us understand a potato plant’s growth habits.
There are two different types of determinate potatoes: first early potatoes and second early potatoes. First early potatoes typically take 10-12 weeks to mature and are small in size. That doesn’t mean they’re the size of golf balls, but don’t expect whopping baking potatoes. Second early potatoes are ready to harvest in 13-15 weeks and grow a little larger than first early potatoes.
Indeterminate potatoes are also known as long-season potatoes since they take 15-22 weeks to mature. Based on this time to maturity, mid-season and late-season potato varieties are both indeterminate. These tend to be larger in size, and individual plants produce more. That’s because they produce tubers along the length of their stem rather than on a single layer.
Wait Until the Right Time of the Year
 Plant potatoes when soil temperature stays above 45°F (7°C) consistently.
Planting too early or too late can have devastating consequences on your harvest. If you plant too early, the tubers may rot in cold, damp ground, and the plants may succumb to frost. And if you plant them too late in the year, the plants may not size up before the first frost.
So, when should you plant your potatoes? It depends on where you live!
You should wait to plant until the soil temperature remains consistently at or above 45°F (7°C). Cold soil inhibits seed potatoes from sprouting, so there’s no point in planting them when the soil is still cold. In most areas, the soil will be warm enough for planting at or a few weeks before your last frost date. Depending on where you live, plan to get your potatoes in the ground sometime between late February and early May.
Be Aware of Your Planting Options
 Potatoes thrive in containers, raised beds, or directly in soil.
When you hear of planting potatoes, you may imagine a farmer hilling long rows of bushy green plants. And while you can plant in rows, this isn’t your only option! Potatoes also grow well in containers, grow bags, and raised beds. I’ve also known farmers who utilize no-till methods to plant and grow potatoes in the ground without hilling.
If you want to plant your potatoes directly in your garden, both raised beds and natural soil can work well. The most important thing is that the soil is loose and well-draining.
Those without access to large gardens often choose to grow their potatoes in containers. Not only does this help save valuable space in your garden beds, but it also makes it easy to hill your potatoes. All you have to do is add more soil to the tops of the plants as they grow.
If you choose to grow in a container, make sure to select one with drainage holes. Potatoes sitting in wet soil are susceptible to rot and a host of other fungal diseases.
Choose a Suitable Location
 For healthy potatoes, choose a sunny, well-drained location and rotate crops.
Once you decide whether you plan to grow your potatoes in a raised bed, bucket, grow bag, or directly in the ground, it’s time to look for a suitable environment. Potato plants grow best in full sun, so choose a location that receives at least eight hours of direct light each day. The plants can tolerate a few hours of morning or afternoon shade, but that’s it.
You should also rotate where you plant each season. Diseases like late blight and scab can build up in the soil, but rotating crops can help break up the disease cycle. Since tomatoes, eggplants, and peppers are in the same family as potatoes, you should also avoid planting potatoes in an area that grew these crops the previous year.
If you’re growing in a raised bed or in the ground, choose an area with loose and well-draining soil. You can aerate the soil by inserting a shovel or digging fork into the ground and pulling back on the handle just until the soil cracks. Repeat this process every 8-10 inches until you’ve loosened the whole bed.
Cut Your Seed Potatoes the Right Way
 Cutting seed potatoes before planting promotes healthy growth and yields.
I find that gardeners often hesitate to cut their seed potatoes before planting. What if I cut them too small? What if they don’t grow?!
While these concerns are valid, cutting seed potatoes for planting is a straightforward procedure. You don’t need to cut your spuds before you plant them, but doing so will increase the amount of potatoes you can grow and help you save money on seed.
Before you start cutting your potatoes, become familiar with the eyes. These tiny bumps are where new growth will emerge, so it’s essential that each seed piece has at least one eye. A good rule of thumb is to cut the potatoes so each section has two to three eyes. If one eye fails to sprout, the other eyes give the piece another shot.
Use a sharp and sanitized knife when slicing the potatoes. This will prevent the introduction of diseases and create clean cuts that are more likely to heal well.
While it’s not essential, letting the pieces rest in a cool, dark location after cutting helps them heal. This decreases the chances the potatoes will rot in the ground before they can sprout.
Determine if You Should Chit
 Chitting potatoes before planting boosts early growth for a bountiful harvest.
You’ve heard of boiling, mashing, and frying potatoes, but what about chitting? This process doesn’t explain how you cook your spuds but rather refers to pre-sprouting before planting. Chitting isn’t necessary, but it does make sense in certain instances.
Since chitting helps your potatoes get a jump-start on producing lush, green growth, it’s a helpful process in areas with a short growing season. If you live in zone three or even zone four, getting your potatoes in the ground with a few weeks of growth beneath them can be the difference between a worthwhile and lackluster harvest.
So, what does chitting involve? Wait until a few weeks before you plan to plant your potatoes outside, then gather the potatoes you’re starting with. These can be tubers selected as seed potatoes or organic potatoes you’ve bought from the grocery store. Place the potatoes in a single layer in a warm, dark area—a kitchen cupboard or cardboard box in a bedroom often works well. Within a week or two, you should see sprouts beginning to form. Move the potatoes somewhere with bright light for a few weeks. Once the sprouts are an inch long, you can cut your potatoes and plant them.
If all this sounds like a lot of work, feel free to skip pre-sprouting. In most areas, potatoes will grow well if you plant them straight into the ground.
Plant at the Proper Spacing
 Optimal potato spacing ensures healthy growth and maximum yield.
Like all plants, potatoes grow best when spaced the proper distance apart. Planting them too close together limits each plant’s yield and increases the likelihood of fungal diseases. Spacing potatoes too far apart won’t always negatively impact the plants, but it will increase weed pressure and fail to make the most of your gardening space.
Most potatoes grow best when spaced 12-15 inches apart. This spacing allows each plant to obtain the water and nutrients it needs to grow and also ensures the plants have enough room to produce leaves, underground stolons, and starchy tubers. If you’re planting multiple rows of potatoes, make sure to leave two to three feet between the rows.
If you’re growing your potato in a five-gallon bucket, plant only one seed potato piece per bucket. It’s better to have one healthy plant than two scraggly ones.
Plant Your Potatoes at the Right Depth
 Planting depth varies based on method and potato type.
There isn’t one correct planting depth for potatoes. The ideal depth depends on your planting method, the type of potato you’re planting, and whether or not you plan to hill your potatoes.
You don’t have to plant your potatoes very deep if you’re planting in a grow bag or bucket. That’s because you can easily add more soil on top of your plants as they grow. I recommend filling your bucket or bag halfway with soil and then planting the potatoes one or two inches deep. As the plants grow, adding soil to cover them can encourage them to produce more tubers.
If you’re planting in a raised bed or directly in the ground, you have a few options. You can dig a four to six-inch deep trench and plant your potatoes in the bottom of it. This method works great if you’re not planning on hilling your potatoes or are growing determinate or early-season potatoes.
Another option is to use the Ruth Stout method. Since Ruth is well-known for her “lazy” gardening methods, it’s no surprise her potato planting method is easy on the body. All you have to do is lay your potatoes on top of the ground and cover them with straw or hay. While Ruth planted her potatoes in soil covered with well-composted hay, you can try this method with any soil type.
Closing Thoughts
With so many different potato varieties and growing methods available, there’s not one right way to grow these delicious tubers. However, keeping the following planting tips in mind will help you end up with a bountiful harvest.