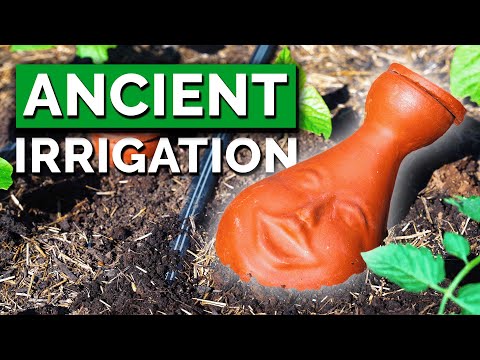
Long before hoses, drip irrigation, sprinklers, or water pumps, ancient farmers had to find a way to keep their crops watered through the driest summers. Ollas (pronounced ohh-yahh) are clay pots that were first used for irrigation over 4,000 years ago in North Africa and China. This traditional irrigation method is low-tech, low-cost, and highly effective. Research shows that subsurface watering from ollas is ten times more efficient than conventional irrigation. They conserve water in drought and help prevent overwatering.
Clay pot irrigation uses the power of earthen clay to moderate soil moisture. The open-topped, unglazed pot is simply buried in the soil and filled with water. The moisture slowly leaches from the walls of the clay pot into the surrounding soil, irrigating the plant roots.
Thanks to their low maintenance and high effectiveness (especially in arid, drought-prone areas), ollas have made a modern comeback. If you’re wondering why and how you should irrigate with an olla clay pot, here is everything you need to know.
What is An Olla?
An olla is an unglazed clay pot with an open top, narrow neck, and wide base. The clay pot is buried beneath the soil surface with only the hole in the top exposed above the soil line. Gardeners can fill ollas by pouring water into the open top. The moisture slowly seeps out through the porous clay walls into the surrounding soil, but the plant roots only draw as much moisture as they need.
Garden Oya Watering Pot

The Garden Oya™ Watering Pot:
- Comes in three different sizes
- Delivers the right amount of water to your plant, at the root level
- Reduces watering needs by 70%
buy at Epic Gardening Shop
Thanks to the “autoregulation” of olla irrigation, overwatering and underwatering are less likely to be problems. The moisture tension around the pot creates suction, so water is only pulled through the clay walls into the soil whenever it is dry. If the soil is wet, water will stay in the pot until the surrounding soil dries out. This creates a consistent soil moisture level to help plants thrive.
Benefits of Watering Your Garden with an Olla
Why water your garden with an olla? Because you’re tired of underwatering or overwatering with high-maintenance irrigation systems that require constant monitoring, timing, and repairs. This clever clay pot design proves that, sometimes, old can be better than new. The benefits of this ancient irrigation method ensure that you won’t have to face problems with drought stress, root rot, or plant diseases.
Low Maintenance
 Effortless moisture management for busy gardeners with olla irrigation!
If you’re the type of gardener who sometimes forges to irrigate, an olla takes care of this problem right away. You don’t have to constantly check the moisture level or run back and forth between irrigation timers.
The clay pot irrigation method is very passive and low maintenance. You can go about your daily life without worrying as much about the moisture level in your garden. Depending on the weather and conditions, you only have to check and refill an olla once every week or two.
High Efficiency
 Conserving water efficiently with direct root-zone delivery.
Research shows that ollas are up to ten times more efficient than regular irrigation, such as sprinklers or drip lines. This is because the clay pot conserves massive amounts of water. It is buried, so there is little to no evaporation from the sun. The water is also delivered straight to the root zones, which ensures zero runoff or water loss from irrigating up above.
Less Risk of Plant Disease
 This irrigation method provides precise root-level watering, minimizing plant disease risks.
Ollas water plants right next to their roots, releasing only the precise amount of water that the plant needs. The clay pot can regulate the moisture release due to the natural phenomenon of soil tension, which we’ll explore more below. This consistent self-regulation of soil moisture reduces the risks of plant diseases like root rot, which are most often caused by overwatering.
Moreover, ollas irrigate water below the soil surface, so you are less likely to encounter problems with powdery mildew or other foliar diseases caused by overhead irrigation that accumulates water on plant leaves.
Low-Tech Simplicity
 With no electronics or moving parts, ollas simplify irrigation.
Water pumps and irrigation systems can be a major headache when something goes wrong. You have to find parts, deal with electronics, and diagnose technology. An olla removes all these complications because it is made of clay and nothing else.
This ancient form of irrigation is remarkably simple yet more efficient than electrical-powered irrigation systems. It doesn’t have any moving parts or technological inputs that have to be replaced. While the modern world offers lots of cool tech advancements, the olla proves that sometimes the traditional, old-time ways are just as effective.
Save Water
 Cutting water usage by half, these devices are crucial in arid regions.
Ollas reduce garden usage by 50-70% by efficiently delivering water to the plant roots only when they need it. If you live in an extremely arid region like the Southwest, these clever irrigation devices can massively improve plant health and reduce your water bill. They allow you to grow more water-hungry plants like tomatoes or squash without wasting this precious resource.
Prevents Overwatering
 Ollas prevent overwatering by releasing water only when needed.
Overwatering is one of the biggest mistakes made by beginner gardeners. It can lead to major issues like root rot and soil compaction. Ollas prevent overwatering because they only release water into dry soil.
If the surrounding soil is wet, water will remain inside the container because of the moisture tension phenomenon. Water only seeps through the clay pores whenever the plants need it. If you sometimes give your plants too much water, this tool will ensure that you don’t overdo it in the future.
Deep Watering for Drought Resilience
 Deep watering with an olla promotes resilient plants in drought.
As summer droughts become increasingly common, inefficient irrigation methods like sprinklers just won’t cut it. Water that only penetrates the upper inch of soil doesn’t provide long-lasting support for plants growing in extreme heat. The lower layers remain dry and brittle, while the upper layers dehydrate quickly. Shallow watering promotes shallow root zones, which makes plants more susceptible to drought stress. Moreover, a lot of water evaporates from un-mulched soil if the sun’s rays are beating down on your garden bed.
Deep watering into the lower 6-12” of soil ensures long-lasting moisture and encourages roots to dig deeper toward the groundwater. An olla ensures that moisture reaches deeper layers so your plants won’t get excessively thirsty if you forget to water for a day or two. When combined with compost amendments and deep mulching, an olla can profoundly improve your garden’s resilience in even the driest, hottest summer months.
Consistent Moisture (Less Fluctuations)
 Clay pot irrigation ensures stable soil moisture for thriving crops.
Huge fluctuations in soil moisture are problematic for crops like tomatoes and beets. The shift from extreme wetness to extreme dryness causes a lot of plant stress. Once again, clay pot irrigation comes to the rescue!
The soil moisture remains more balanced and consistent because the pot releases water quickly when the soil is dry yet holds the water when it is wet. Plants won’t go through intense cycles of drought or waterlogging, so their roots, leaves, and fruits can develop with an even, consistent supply of water.
No Clogging
 With ollas, no more hassle with clogged irrigation systems.
Lastly, you don’t have to worry about replacing water filters or dealing with drip emitters that get clogged by insects or animals. Anyone who has found a dead bug or mouse inside an irrigation line knows how yucky it can be to clean up.
Ollas are very unlikely to get infested by bugs or animals. Although a clay pot can get clogged after 3-4 seasons, it is easy to clean.
How to Use an Olla
Once you get the hang of it, clay pot watering is crazy simple. But you don’t want to skimp on a few key steps that will set you up for years of irrigation success.
Choose the Right Size and Shape
 Choose the right olla size to suit your garden needs.
All ollas are made of unglazed clay, but much like terracotta planters and pots, they come in many different shapes and sizes. Not all of them perform the same because there are different types of fill holes, necks, and volumes.
From raised beds to medium containers to small patio planters, you can use clay pot irrigation in any type of garden as long as you find an olla that comfortably fits in the available space.
Follow these general guidelines for olla sizing:
- A 1-quart pot can irrigate plants that take up about 1 square foot of space
- A 3-quart pot works best for plants with a 1.5-foot radius
- A large 7-quart pot provides water for plants within a 2-foot radius
The Garden Oya watering pot is the best brand on the market because it is made of quality terracotta that is extra porous. It comes in three different sizes for specific uses:
- Small: This 5” x 7” holds 1 liter (1.1 quarts) of water and is best for container gardens or grow bags.
- Medium: This 7” x 10” olla holds 3 liters (3.2 quarts) and works in narrow garden beds or planter boxes.
- Large: The 10 x 13” pot holds 6.5 liters (6.8 quarts) of water and works great in large beds and spaces.
The Garden Oya has a perfectly tapered neck to make refilling from the soil surface easy without digging up the pot. The snug-fitting silicone lid ensures you don’t lose water to evaporation, and bugs or rodents can’t crawl inside the container. This is what Epic founder Kevin uses in his garden, and the pots are proven to last for years to come.
Dig a Hole
 Simply dig, place, and shimmy for effortless olla installation.
Installing an olla is far easier than building a drip irrigation system or running hoses to your garden. All you need to do is dig a hole that is slightly larger than the clay pot. Place the olla inside the hole and shimmy it down into the soil to ensure it’s snug in place.
Leave the Upper Neck Exposed
 Expose just a few inches of the neck for easy refilling.
Keep only the top few inches of the neck exposed above the soil line. This will make it quick and easy to remove the silicone cap and refill the container. However, you want to be sure that the bulbous bottom of the container is deep enough to directly water the plant roots.
Pack the Soil
 Ensure soil firmly surrounds the olla to optimize function.
Once the olla is “planted” in place, it’s very important to pack soil around the clay. If the soil is not fully touching the exterior of the clay, the olla won’t function properly. Remember that this simple irrigation method relies on a phenomenon called soil moisture tension.
Capillary forces affect how water molecules are attracted to electrically charged clay particles. This creates a pressure difference between the two surfaces, which allows soil to suck water from the clay pot when it is dry.
Fortunately, you don’t need to understand any complex science to see this concept in action. All you need to do is pack the soil around the olla to ensure there are no air pockets in the space surrounding the clay. Press and pack the dirt close against the pot, thoroughly backfilling any leftover space from digging the hole.
Space Plants 1-2 Feet from the Olla
 Plant seedlings within reach of olla’s moisture radius for efficiency.
Depending on the size of your olla, it will be able to moisten the soil within a 1-2 foot radius of the clay pot. If you are transplanting into a new bed, keep this in mind as you plant your seedlings.
You don’t want the roots to be right on top of the olla, but you don’t want them to be so far away that they can’t reach the radius of moisture emitted from the pot.
Fill the Olla with Water
 Fill the olla to the brim for prolonged watering efficiency.
Remove the lid and use a watering can or hose to fill the container with water. Fill it all the way up so the olla can work its magic for as long as possible.
Put the Lid On
 Secure the brightly colored lid post-filling to prevent evaporation.
Don’t forget to replace the lid after filling. This prevents evaporation and ensures that nothing crawls inside the pot. It also prevents any runoff from flowing into the container. The lid should be brightly colored so you can easily remember where you buried the olla.
If you want to “fertigate” your plants by providing nutrients with water, you can combine a water-soluble liquid fertilizer in the water. However, beware that this can clog the pores of the terracotta material, so it will require more cleaning.
Check Ollas Every 1-2 Weeks
 Regularly check the olla’s water levels for optimal hydration.
The rate of water release from a buried clay pot will vary widely across soil types, crops, climates, and humidity levels. If your soil is super rich in organic matter or high in clay, your olla may not need to be refilled for several weeks because the soil holds onto a lot of moisture. But if you live in a very dry, hot climate with sandier soils, you should check the olla at least once a week to ensure it is full.
Mulching around the base of your plants and ollas makes this irrigation method even more effective. Mulch reduces the temperature of the soil and prevents evaporation from sunlight touching the surface. Shredded leaves or mulch are ideal because they conserve even more water and slowly decompose over time.
Refill When the Water Level is 50% or Less
 Top up the olla when it’s halfway empty.
This irrigation method works best when the container is close to full. Any time you notice that it has dwindled to less than half its water, refill the pot. The rate of evaporation and water usage depends on the water demands of the plant and the moisture retention of the soil.
Add Multiple Ollas
 Space ollas apart for optimal water distribution in the garden.
To use multiple ollas in one garden bed, space medium pots 2-3 feet apart and large ones 3-4 feet apart. It is unnecessary to squeeze multiple ollas in a small space because they each provide water to the radius of plants around them.
Check for Cracks and Seal Them
 Repair terracotta cracks with waterproof epoxy for lasting results.
The main problem you can have with terracotta is cracking. Dropping the container or exposing it to freeze/thaw cycles can cause it to crack. Strong roots can also grow into the porous clay. Small cracks may not require any attention, but a larger crack or root hole should be sealed.
Waterproof non-toxic epoxy is the best option because it thoroughly seals the area and won’t release chemicals into the soil. If there is a large crack in the bottom of the container, you can also use a piece of tile to stabilize it without impeding the flow of moisture along the sides.
Silicon sealant or putty is another option, but it is best for small cracks. Once again, you don’t want to fill too many pores of the pottery. It is unglazed for a reason! If the terracotta becomes covered in epoxy or silicone, it no longer has the porosity required to release moisture into the surrounding soil.
Clean the Pots
 Periodically clean your olla to maintain its efficiency.
If your water is “hard” (mineral-rich) or unfiltered, you will need to clean the clay pottery semi-regularly to ensure the pores stay open. Some gardeners can get away with cleaning the olla once per season or once per year. Dig it up and rinse with a hose to remove any dirt. Then, use a soft-bristled dish brush to scrub the clay surface. Be sure to use a longer-handled scrubber to gently clean the interior as well.
No soap is needed, but a thorough rinsing is required to remove any residues. If your olla was buried in bed with plant disease issues, you can sanitize it with a diluted solution of 1 part bleach to 10 parts water. Let the diluted bleach soak for a while, and then soak the container in a bucket full of water for a few hours to allow excess bleach to leach out.
Pay Close Attention to Seedlings
 Ollas may not suffice for newly planted seedlings’ needs.
While ollas are great for large plants like tomatoes, squash, cucumbers, and kale, they don’t always meet the water needs of newly established seedlings. Seed starting is problematic with an olla because the pot releases water deep in the soil, but the seeds are sown close to the surface.
You will still need to use a watering can, hose, or sprinkler to properly germinate seedlings. You can wean them off of surface watering once the plants are 6-12” tall and you are certain that their roots can access the radius of soil moisture provided by the clay pot.
Final Thoughts
The main reason to use an olla is to water more efficiently. This ancient, low-tech tool provides more moisture with less effort on your part. It dramatically reduces water loss and consistently regulates soil moisture so plants aren’t exposed to huge fluctuations from dry to wet.
As opposed to surface watering, clay pot irrigation delivers water deeper, directly to the root zone. Best of all, ollas last for many years as long as you clean them once per season and ensure they don’t crack.