There’s nothing quite like eating veggies you’ve nurtured from seed to harvest. Whether you’re interested in reaping the nutritional benefits of homegrown vegetables or want to teach your kids about where their food comes from, gardening is always a great route to go!
However, if you live in zone 4, you’re dealing with the added challenge of cold winters and short growing seasons. While these conditions can be difficult, they don’t have to prevent you from starting a veggie garden.
I’ve been growing in zone 4 for 10+ years now, and I’m excited to share all of my best tips for you!
Lay Out Your Growing Area
Plan your garden layout before planting for better results and organization.
Before you start placing seeds and plants in the ground, sketch out the area you’d like to plant. This is a great activity to do during our long winters when there’s not much else going on!
If you’re just getting started with vegetable gardening, start small. While it’s easy to become excited about filling your entire yard with neat rows of carrots and sprawling winter squash, remember that you have to care for whatever you plant! Keeping things small allows you to focus on your plants and gain a sense of satisfaction from a successful growing season. Of course, if you want to grow a larger garden, go for it!
Regardless of how large of a garden you’d like to grow, spend some time laying out your garden and surveying your space. Do you want to use raised beds or an in-ground garden? An in-ground garden will provide more flexibility and efficient use of space, but raised beds warm up faster in the spring – a plus in cold climates!
Along with noting the size of your future garden, make sure to pay attention to the environmental characteristics of your space, like sun exposure, soil type, and winds. Since most plants prefer full sun, choose a sunny location if possible. Try to avoid steep slopes, north-facing hills, or areas that are particularly rocky or have dense roots from nearby trees.
Prepare the Soil
 Testing and amending soil is essential for successful gardening.
While it would be great if your native soil was rich, well-draining, and ready to produce award-worthy vegetables, this is rarely the case. That’s why it’s worth testing your soil and amending it as necessary.
If you’re planning to use an in-ground garden, collect a few soil samples throughout your garden area. Each sample should contain the top six inches of soil, so trowels and shovels are helpful tools for the sampling process. Once you’ve collected your samples, mix them all together for a cohesive sample, and then send a small portion of the soil to a soil testing lab. Most states have local extension offices that provide soil testing services, but you can also utilize a private lab.
You should receive your test results within a few weeks. At this point, you can use the results to amend your soil as necessary. Most test results will supply fertilizer recommendations that you can follow. Depending on your results, you may need to apply lime to raise the soil pH or sulfur to lower the pH. And you’ll probably need to apply fertilizers that contain nutrients like nitrogen, phosphorus, and potassium.
The best time to do a soil test is in the fall. That way, your amendments have time to incorporate into your soil before planting the following spring. The second best time is in the early spring, as soon as the soil is workable enough to snag a sample.
Along with adding fertilizers, consider adding some finished compost to your garden beds. Not only will this add a boost of beneficial microbes, but it will also help improve soil drainage and aeration. If your soil is compacted, loosen it up with a digging fork, broad fork, or shovel. I’m a big fan of no-till methods for established gardens, but if you’re starting from scratch with a compacted lawn, a tiller may be necessary to at least get it started.
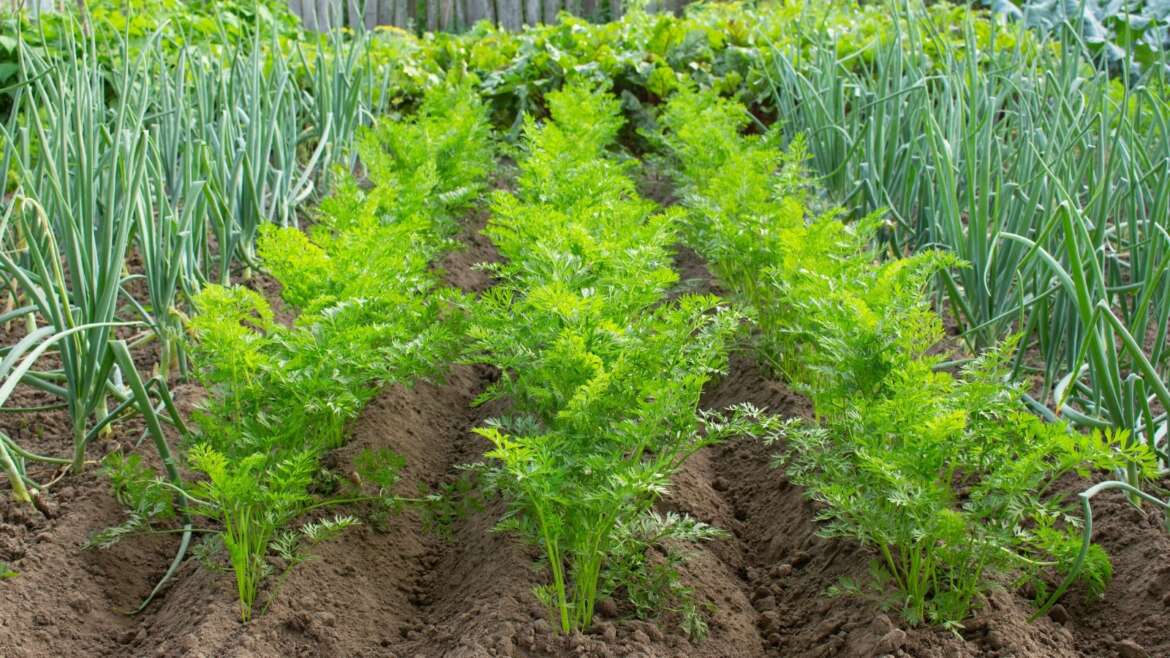
Figure Out What You’d Like to Grow
 Consider your favorite vegetables and experiment with new ones to maximize your garden’s potential.
Now, the fun part begins! Since we have LONG winters in zone 4, you’ll have plenty of time to think about what you’d like to grow. Growing what you love is the best place to start, but you can also mix in some fun new things to try as well. After all, growing veggies you can’t find in stores is one of the fun parts of having a garden!
Keep your garden size in mind when you’re making your list of what you’d like to grow. Some veggies like radishes and lettuce require only a little bit of space to grow. However, crops like pumpkins and zucchini will take up a large portion of your garden.
Along with considering what you want to eat, think about which crops will thrive in a short, cool climate. In zone 4, warm-weather crops like okra and hot peppers have difficulty reaching maturity before the first fall frost arrives. However, cool-weather crops like kale, turnips, carrots, and cabbage will thrive!
Here are some beginner-friendly crops to try growing in zone 4:
- Arugula
- Beets
- Bok choy
- Bush beans
- Cucumbers
- Green onions
- Kale
- Kohlrabi
- Lettuce
- Radishes
- Spinach
- Turnips
- Zucchini
Determine When to Plant
 Determining planting times based on your last frost date is essential.
Once you’ve made your list of the veggies that you’d like to plant, it’s time to determine when you should start the seeds indoors, transplant the seedlings into your garden, or direct sow seeds in your garden. Knowing the last spring frost date in your area is crucial for determining these dates. If you live in zone 4, expect the last frost to occur sometime in May.
With your predicted last frost date in hand, look at your seed packets or head online to look up the crops you’d like to grow. Most seed companies will supply important growing information regarding when to plant your seeds. For example, your seed packet may recommend starting kale seeds indoors 4-6 weeks before your last frost date and direct sowing beets outdoors 2-4 weeks before your last frost.
Making a calendar of when you need to plant each seed and transplant can help you stay on track when the business of spring and summer arrives.
Figure Out an Irrigation System
 Efficient irrigation methods like drip systems save time and water.
All plants need water to grow, and it’s your job to make sure your veggies have the moisture they need to thrive! Irrigating your plants can be as simple as hand watering them with a watering can or as complex as setting up an automated drip irrigation system.
There’s nothing wrong with irrigating with a watering can or hand-held hose, but irrigating a large garden by hand can take multiple hours each week. If it becomes a time-intensive chore, it’ll likely get missed more often than not.
To speed up the irrigation process, a drip irrigation system or sprinkler system can be an awesome time-saver. Drip irrigation sends water directly into the ground, so it’s a good option if you want to conserve water or prevent the fungal diseases that can occur on wet leaves. Sprinkler systems send water across your garden, so they’re a good option if you are growing lots of direct-sown crops or want a simpler watering system.
Regardless of the method you choose, make sure you have a way to water your plants before you place them in the ground!
Plant Your Veggies
 Consider the vegetable’s preferred method of cultivation when planting it.
When it (finally) warms up, it’s time to add your veggies to the garden! Root crops like carrots, beets, and turnips prefer to be direct-sown, while veggies like kale, broccoli, and tomatoes grow well from transplants.
Remember to ensure each plant has the space it needs to expand as it grows. While a cucumber plant starts as a tiny seed, it can eventually take over half your garden as it grows!
After you plant your seeds or transplants, remember to keep them well-watered as they germinate and establish strong root systems. The soil shouldn’t be sopping wet nor bone dry, but rather lightly moist.
If a sudden cold snap arrives after your plants are in the ground, protect them from the cold. If they are small enough, I like to use upside-down planting pots. Floating row covers are also great – they trap heat but let in light and water, so they’re an excellent investment if you’re serious about gardening. However, a simple sheet draped over your plants will also work in a pinch!
Keep an Eye Out for Weeds and Pests
 Regularly monitor your garden for weeds and pests to prevent serious infestations.
As your plants grow, watch out for pesky weeds and pests. It’s easy to wait until weeds start encroaching before jumping to action, but smaller weeds are much easier to remove! Believe me! Spend some time each week going through your garden to snag them while they are small.
You should also keep an eye out for pests! Remember, you’re not the only one who thinks that your veggies are tasty. Removing a few pests is much easier than removing a serious infestation, so spend a few minutes each week checking your plants for undesirable critters like aphids, flea beetles, and cabbage worms.
The best way to remove pests depends on the critter you’re dealing with. If you spot an unknown insect, take time to research what it is before you act. While you may be tempted to squash any bug you see, many bugs benefit the garden! Bees and butterflies pollinate flowers, while ladybugs and parasitic wasps kill off pests.
If you’re sure an unknown insect is a pest, remove it ASAP. Many pests rapidly multiply, so catching pests as soon as they emerge will help keep them in check. It’s also helpful to be proactive and look under leaves to spot eggs and remove them before they hatch. Again, be sure to identify what insect it is before acting!
Continue Planting
 Succession planting involves planting quick-growing crops in multiple rounds.
Many beginner gardeners stick plants in the ground in the spring and then call it quits when it comes to planting. However, many crops have a quick turnaround time and are ready to harvest in one to two months, so planting multiple rounds of these veggies allows you to enjoy a continuous harvest. This practice of planting numerous rounds of a single crop is known as succession planting.
Let’s say you plant a row of radish seeds in mid-May. Since they will be ready to harvest in about a month, you’ll have an empty spot in your garden by the end of June. Rather than leaving this spot vacant, you can fill it with another crop. You could plant radishes again, but planting the same crop in the same area over and over can lead to pest and disease issues. Instead, consider planting bush beans, lettuce, or another crop outside of the radish family.
Since our first fall frost arrives early in zone 4 (late September for most of us!), consider planting cold-tolerant crops like kale, broccoli, and spinach sometime in mid to late summer for a fall harvest. Your goal is to ensure that the plants have enough time to mature before the first frost arrives. While these crops can survive a frost, their growth will slow as the days become shorter.

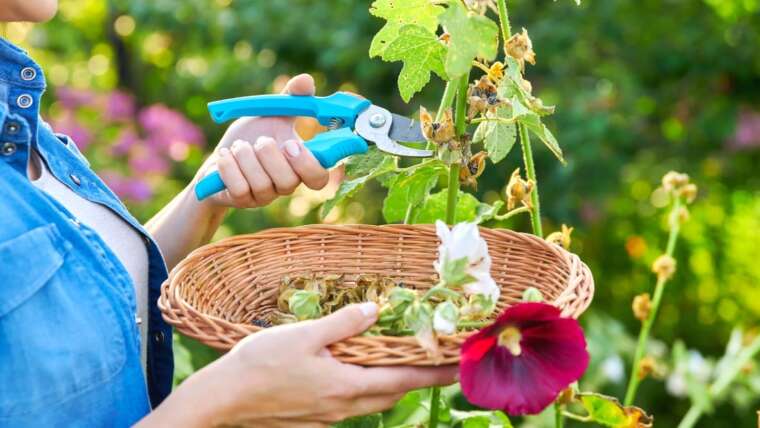
Enjoy Your Harvest
 Regularly monitoring your garden ensures optimal harvesting times for various crops.
After months of planning and hard work, it’s time to enjoy your garden’s harvest! Since crops mature at different rates, not all your plants will be ready to harvest at once. Walking through your garden every few days will not only help you keep an eye out for weeds and pests, but it will also let you harvest your veggies at their peak.
Crops like beets and cabbage offer a one-and-done harvest, but you can make multiple harvests from greens like kale and arugula, as well as fruiting crops like cucumbers and tomatoes. If you end up with a harvest that’s larger than what you can eat, consider preserving your veggies by canning, freezing, or dehydrating.
Final Thoughts
By following these steps, you’ll be well on your way to creating a veggie garden of your own. Since each garden and gardener is different, don’t be afraid to lean into your land’s unique characteristics and your own gardening goals. With a bit of patience, hard work, and enthusiasm, you’ll be eating homegrown veggies before you know it.