You don’t have to wait until winter’s snow, cold, and rain pass to get your hands in the soil. Many of us have been curled up inside with seed catalogs and garden planners, counting down the days until our estimated last frost date. While the weather might not be warm enough yet, you can still get a head start on your veggies, fruits, and flowers. Let’s dig into 5 simple ways to start gardening a month earlier than usual!
Start Seeds Indoors
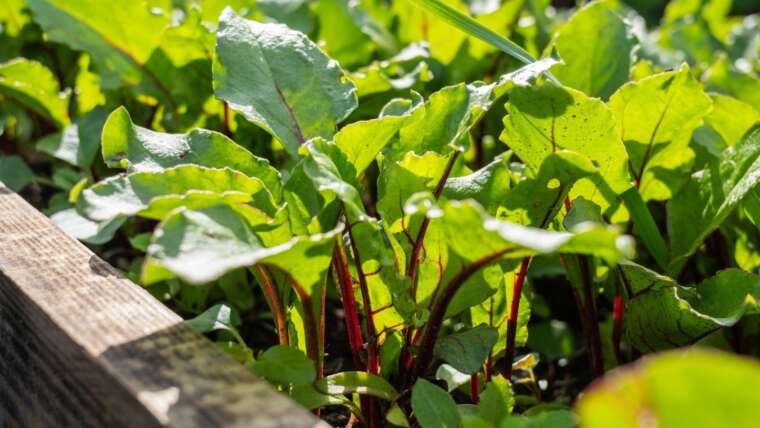
Starting seeds indoors accelerates growth, yielding earlier harvests for gardeners.
The classic way to start gardening earlier is to start seeds indoors. Whether you use a south-facing window, indoor grow lights, or a mini greenhouse as your propagation area, you can start seeds in containers to transplant in your garden.
Compared to seeds that are sown directly in the garden, transplanted seedlings have several weeks of growth on their side, so they will yield earlier in the season. Seeds that are sown indoors tend to have robust root systems ready to take off growing as soon as the weather warms. This means earlier harvests of nutritious spring greens and juicy summer tomatoes!
There are three things to keep in mind when starting seeds indoors:
- Soil Blend
- Timing
- Lighting
Soil Blend
 Ensure success with indoor seed starting by using fine soil and suitable containers with drainage holes.
The most important ingredient to indoor seed starting success is the soil blend you use to start seeds. Potting soil or a homemade blend of compost, peat moss, and perlite are great options. Be sure it is a fine material without any large chunks. Use a piece of mesh to sieve the soil if you notice any pieces that you think might impede germination.
From Epic 6-Cell Trays to grow bags to upcycled pots, you can use practically any container as long as it has a drainage hole and a quality soil mix inside. When filling a tray with soil, be sure to smooth and pack the soil into the container so it is easier to pop the seedling out when it is ready to be transplanted.
After filling the tray, lift it up and tap it down on the table surface to let the soil settle, then fill it to the top once again. Seeds tend to germinate better when they are closely cradled by the soil. In the farming world, we call this “seed-to-soil contact.” However, don’t press the soil in so hard that it compacts like clay. Seedlings still need some pore space to establish their tender new roots.
Timing
 Start seeds indoors 1-2 months before the last frost, ensuring proper growth and labeling.
It’s best to start seeds 1-2 months in advance. Timing is essential because sowing seeds too soon could result in plants that become oversized and rootbound in their containers. This is especially problematic for crops like tomatoes, which can grow “leggy” or even start flowering before you have time to get them in the ground.
On the other hand, starting too late can be risky for gardeners in cold northern climates with short growing seasons. You want to be sure your seedlings have sufficient time to mature and produce a worthwhile yield before the brief northern summer is over.
Best plants to start indoors 6-8 weeks before last spring frost:
You can also transplant more veggies than you think you can! Here are some unique crops to sow indoors that people traditionally direct sow:
Pro Tip: Always label your seed trays with the variety and the date of sowing! This is the Achilles heel of most gardeners. Starting seeds indoors is supposed to make your season easier, but it’s difficult to sort through a bunch of seedlings without names on them. A sharpie and popsicle stick will do, or use another waterproof label. It’s helpful to add a special note about the location where you’re going to plant the crop or any other reminders about the seeds.
Lighting
 Start seeds indoors in darker areas initially, then move to bright light.
Contrary to popular belief, you don’t have to immediately put a freshly sown seed tray in bright light. In fact, seeds benefit from a darker area as they emerge. Once the seedling germinates and sprouts its two cotyledons (initial leaves), then it’s time to move your trays into bright sunshine or supplemental light.
To start seeds in a windowsill, be sure it’s a bright south-facing window without anything shading it. If your region doesn’t get much sunshine in the early spring, add an artificial grow light for the healthiest seedlings. When using a grow light, it’s very important to bring the light as close as possible to the seedling trays without burning them. About 6” above the soil surface is great. Then, move the light upwards as they grow.
Pro Tip: Use a germination heat mat underneath your trays to help improve germination and give your indoor seedlings the boost they need. In early spring, many homes and greenhouses are not warm enough to get warm-weather crops like tomatoes and peppers to germinate. Even cool-weather crops like cabbage and lettuce appreciate warmer soils to help them germinate more evenly and get established quickly.
Ultimately, starting seeds indoors in the spring offers you a nice opportunity to tend baby plants without going outside. It’s like a mini garden to keep you excited and busy while you wait for spring weather. When the frost lets up, it’s easy to transplant those babies in the garden and watch them take off!
Use a Cold Frame
 Cold frames provide early protection for plants with hinged clear tops, ideal for cold-hardy greens.
For hundreds of years before plastic greenhouses, gardeners have used miniature protective covers to keep plants safe when starting earlier in spring. A cold frame is a small wooden box with a hinged clear top that can be placed over a bed to create a concentrated area of warmth. The top can be made from plexiglass, hard plastic, or an upcycled window. Cold frames have an angled front to capture as much winter sun as possible, so it’s important to place them in a south-facing orientation.
Use a cold frame to get plants outside in your garden beds up to 1-2 months before the weather warms. Simply put the cold frame over the bed, plant the seedlings inside, and pay attention to the moisture and temperature beneath the glass.
People even use cold frames to grow lettuce, kale, and cold-hardy greens like mâche while there is still snow on the ground! The method works best in a raised metal garden bed because the above-ground soil thaws and warms more quickly than in-ground beds.
Ventilating a Cold Frame
 Cold frames protect seedlings but require monitoring to prevent overheating.
One of the best benefits of a cold frame is its simple ability to ventilate. The small area can heat up seedlings very quickly, but the hinged lid allows you to open up the frame on warmer days to let your baby plants breathe. If you accidentally leave a cold frame closed on a sunny day in early spring, you may accidentally “bake” your plants.
The wood is quite insulating, and the glass magnifies sun rays straight to the young seedlings inside. So don’t forget to prop open the lid with a stick in the daytime and close cold frames in the late afternoon to conserve all the warmth they collected throughout the day.
We have 20 DIY Cold Frame Plans on our blog, but if you don’t feel like building anything, you can use this simple hack with our Epic Critter Cage plant protectors:
Critter Cage Hack for Small Space Cold Frames
 A Critter Cage doubles as a single-plant cold frame, offering protection from critters and frost.
Our Critter Cage is a metal mesh plant protector that keeps hungry rodents and deer away from your young seedlings, but you can also use it like a single-plant cold frame to start gardening earlier! These unique tools are shaped like small, upside-down trash cans. They’re made of galvanized metal that lasts for many seasons without flaking off or releasing wasteful microplastics into your soil.
Wait a second, you may be wondering: How can something with mesh holes keep my plants safe from freezing? The key is to cover the structure with a piece of row cover or frost blanket. You can cut some from a roll of row cover, or you can use our Critter Cover Frost Blanket, which fits perfectly around the critter cage mesh.
This mini frost blanket provides up to 10° of warmth! The woven material still allows sunlight and rain through the fabric. So, if it were 30°F (-1°C), the cover would keep your newly transplanted seedling at around 40°F (4°C). That means you can get frost-tender plants in the ground up to a month before you usually can.
All you need to do is:
- Transplant an established seedling in the soil.
- Place a critter cage over the seedling (it needs to be shorter than 8”).
- Gently pull the Critter Cover over the cage.
- Place landscape staples through the Critter Cover’s attached loops to anchor it in place.
- Optionally, mulch or hill up soil around the base to seal the perimeter and protect from cold winds.
This method works best with:
- Young tomatoes, peppers, eggplants
- Head lettuce
- Kale, broccoli, and cabbage
- Squash, melons
- Flowers
- Small herbs
- Newly established cuttings
This critter cage hack is very versatile for containers, grow bags, and patio gardens, especially if you don’t have the time or space to build a cold frame.
Winter Sow Seeds in a Jug
 Sowing outdoors in winter mimics nature’s dormancy cycles. Use upcycled containers for protection.
This method allows you to start gardening much earlier, even in January, if you’d like! If you live in a cold northern climate and don’t have an indoor seed starting setup, you can also sow seeds outside!
An upcycled jug acts like a miniature greenhouse container to protect seeds until the weather warms. You can recycle old plastic containers to save money and waste. As a bonus, you won’t have to harden off your seedlings!
Temperate plants typically ripen their fruit and drop their seeds in late fall. Then, the seeds lay asleep in the soil until spring’s warm weather signals for them to germinate. Winter sowing simulates this same process, allowing your seeds to “wake up” when the weather tells them to while still enjoying a bit of protection from a clear container.
The only materials you need are:
- A semi-opaque jug (a milk jug, gallon vinegar container, or a water jug with a fairly deep bottom, preferably with a narrow top)
- Sharp scissors or knife
- Seeds (spinach, lettuce, kale, cauliflower, broccoli, or other early spring varieties)
- Tape
- Popsicle sticks
To prepare a winter sowing jug:
- First, use your knife to cut 4-6 drainage holes in the bottom of the jug.
- Use a knife or scissors to cut the container almost in half right below the handle.
- Leave a small “hinge” by the handle so the upper half of the jug remains attached.
- Fill the bottom with soil or well-drained potting mix blend.
- Sprinkle seeds over the soil surface. You can over-sow more than usual since the seedlings will be transplanted out later.
- Lightly cover the seeds so they are about twice as deep as their largest dimension.
- Write the seed variety and date on a popsicle stick and put the label inside.
- Close the top of the jug and tape around the base. You will remove this later in the spring.
- Remove the container lid to allow rain and air to enter the jug.
Place the winter-sown jugs along a south-facing wall to maximize sun exposure and protect them from the wind. Even if there is still snow on the ground, place your seedling jugs right on top of it. This is a hands-off method, so you don’t need to keep the seedlings warm or regularly water them the way you would with indoor trays. Simply check on them periodically and allow the seeds to follow nature’s cycles.
Transplant winter-sown seedlings 2-4 weeks earlier than you would be able to if you’d sown them indoors. This is because they are already adjusted to the outdoor weather! As a general rule, as long as the seedlings have 2-3 sets of true leaves and your ground can be worked, it is safe to transplant!
Use an Affordable DIY Plastic Tunnel
 Build a plastic growing tunnel for affordable winter gardening.
If you thought you’d need thousands of dollars and fancy building equipment to install a greenhouse that lets you start gardening earlier in the season, you’re in for a surprise! An affordable DIY plastic growing tunnel allows you to grow plants in super cold weather without the expensive investment in a glass greenhouse.
It keeps the interior temperature at least 20° warmer than it is outside. It also lets you grow crops in the soil throughout winter and spring.
The main supplies you’ll need are:
- Rebar stakes
- Long pieces of baseboard wood
- 3-4 cattle panels, depending on tunnel size
- Greenhouse plastic sheeting
- Tarp clips or clamps
- Row cover
- Hammer in rebar stakes around the four corners where you’d like your tunnel to be.
- Lean long wood baseboards up against the rebar along the desired length of the tunnel.
- Bend the cattle panel into place, using the wood as leverage.
- If you push the cattle panel into the ground and use the tension against the wood, there is no need for additional power tools.
- Pull a piece of greenhouse plastic over the top.
- Use heavy-duty tarp clips to hold the plastic cover in place.
- At the end of the fall, prune off about two-thirds of the top of the pepper plant’s growth.
- Dig the plants out of the ground.
- Transplant the peppers into small pots like the Epic 5” Cube Pot.
- Prune off all the leaves to signal for them to go into dormancy.
- Place them in a warm, dry place that won’t freeze, like a garage or basement.
- Water once a month throughout winter.
- Pull the peppers out from storage in early spring and let them adjust in a greenhouse or south-facing window.
- Transplant in the garden around the last frost date (or sooner if you use a protection strategy described above)
- Repeat at the end of every year as your peppers get older and more established.
Once the tunnel is in place, the secret to ultra-cozy winter plants hides on the inside! Massachusetts zone 6b gardener Dagny (@thecottagepeach) uses this method to grow greens even when it’s 0°F (-18°C) outside! You can form in-ground or raised beds as desired, but then you will need a layer of lightweight row cover to drape over the top.
The partially translucent row cover adds additional insulation while allowing sunshine and water to pass through. The fabric traps an extra 5-10° of warmth right above the crop surface to prevent the soil from freezing.
Overwinter Your Peppers
 Overwinter pepper plants to gain a year ahead, ensuring early harvests and abundant growth.
Is it possible to get up to a year ahead of your pepper planting? If you have pepper varieties that you absolutely love growing every single year, you don’t have to keep reseeding them. Start gardening earlier this year by overwintering your peppers! Instead of ripping out your peppers at the end of autumn and restarting next year, you can roll over your pepper planting from one season to the next. This works because peppers actually grow as tender perennial plants in their native tropical climates, but they don’t mind going dormant over the winter.
While you can’t do this as an early spring strategy, keep it in mind for this season’s peppers, so you are off to a major head start next spring. Epic Gardening founder Kevin has honed in on this epic strategy for overwintering peppers so you can harvest peppers before anyone else in your growing zone. The method works by digging up plants, hard pruning them, and keeping them dormant.
To successfully overwinter peppers for ultra-early harvests:
When you put an overwintered pepper in the ground in spring, it’s going to grow like a transplant on steroids (but without any added chemicals, of course!). The plant is already established, so it will rapidly take off growing and produce a greater abundance of peppers every year. You can even end up with a six-year-old pepper plant with a fat trunk and hefty stems. It will produce so many jalapenos that you only need to grow one plant!
Final Thoughts
If you’re eager to get in the garden ASAP but the weather is still cold, you still have lots of options for starting gardening a month (or even more) earlier! These five methods have one thing in common— they all protect plants from cold weather using simple, low-tech solutions.
If you start seeds indoors, the baby plants enjoy a nursery-like environment. But if you want your seeds to “wake up” naturally with the season, you can winter sow them outdoors in upcycled jugs.
To plant crops earlier, build miniature structures like a cold frame, critter cage cover, or a DIY high tunnel that adds 10-20° of protection underneath.
Lastly, if you want to get a mega boost in pepper yields, dig them up at the end of the season, prune them back, and transplant them into pots so you can overwinter the dormant plants and start next spring with mega-boosted pepper growth.
No matter what you choose, remember to provide adequate light and ventilation for plants to get established in the late winter and early spring.