If you want to simplify watering your garden, consider installing a DIY drip irrigation system. These systems slowly drip water into the soil, making watering your plants easy. This type of irrigation also helps conserve water and prevent common plant diseases that occur with wet foliage.
Installing an irrigation system may seem intimidating, but it’s quite simple! As long as you know the necessary materials and take the time to design a plan, installation is a breeze.
In this article, I’ll cover how to install a DIY drip irrigation system and share some tips.
The Benefits
Installing a DIY drip irrigation system saves water by reducing evaporation and minimizes plant diseases and weeds.
Before we dive into how to install a DIY drip system, let’s explain why this method is effective.
First, drip irrigation helps conserve water. When you water with a sprinkler or hose, lots of water evaporates. Drip irrigation sends water directly into the ground, limiting the amount lost to the air. The result is less wasted water and a lower water bill.
Since drip irrigation sends water directly into the ground, it doesn’t wet plant leaves. Therefore, it decreases plants’ chances of developing fungal diseases like downy mildew. And since drip irrigation waters a small area rather than the whole garden, it results in less weed pressure.
Step 1: Determine Your Garden’s Water Needs
 Before installing a drip irrigation system, assess your garden’s water needs based on plant types and size.
Before designing and installing drip irrigation, determine how much water your garden needs. The plant type, number, and size will all impact your garden’s water needs. Other factors like humidity, temperature, rainfall, and sunlight will also affect how much you should irrigate.
Fortunately, you don’t need to determine exactly how much water your plants need. That’s because you can alter how much water is emitted by adjusting the system’s run time.
However, you must ensure that your plant’s roots can reach the supplied water. Since small and young plants have small root systems, you’ll need to supply the water within a few inches of the plants. However, mature vegetable plants, shrubs, and trees have expansive root systems that can reach water a few feet away from the base of the plant.
Don’t worry if you don’t have a super detailed irrigation plan. However, create a quick sketch to help you choose a suitable system and develop a list of materials. For example, a quarter-acre vegetable garden filled with small seedlings requires a more expansive system than a front garden with a few shrubs and perennial flowers.
Step 2: Choose Your Irrigation System
All types of drip irrigation release water directly into the ground rather than sending it into the air. Compared to sprinkler systems, drip irrigation applies water more precisely. This means they’re great for watering established crops but not the best for covering large, open areas like freshly seeded lawns. If you have just one small raised bed, you may prefer the ease of an olla.
You can choose between multiple systems if you decide to use drip irrigation. The three most common types are drip tape, drip emitters, and soaker hoses.
Drip Tape
 Choose tape based on thickness, slit spacing, soil type, and plant size for effective irrigation.
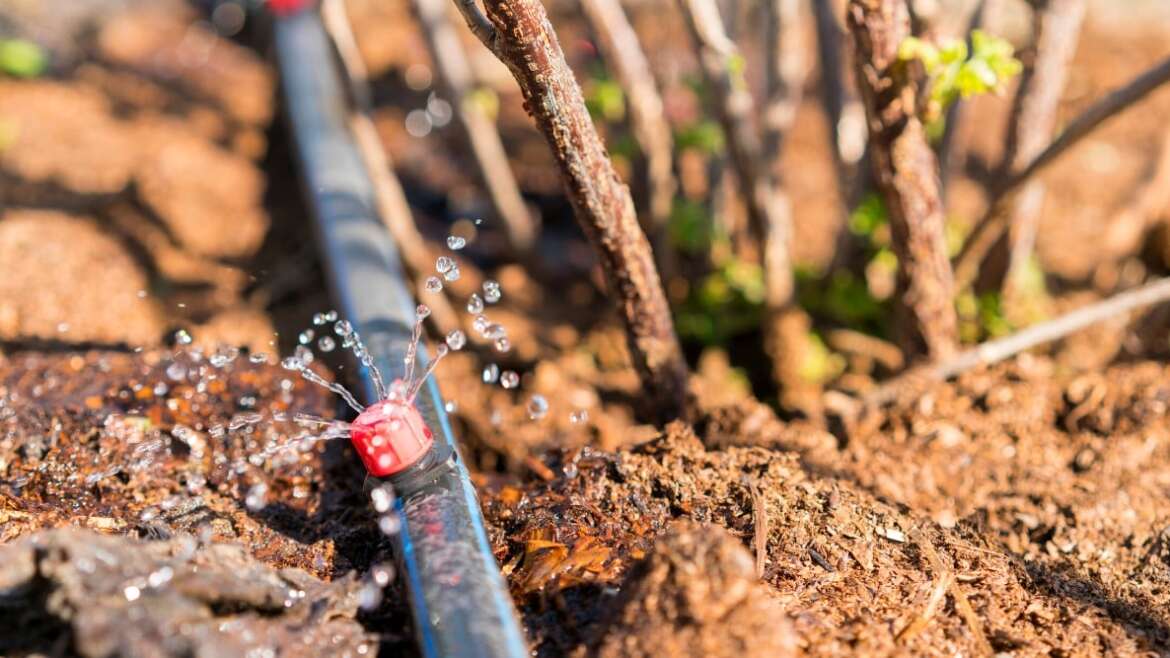
Drip tape is a thin, pliable tape with small slits along its length. As it fills with water, the pressure forces the water to drip out of the slits. This water eventually spreads throughout the soil, where plant roots can absorb it.
It is available in a variety of wall thicknesses and slit spacings. Thicker tape lasts longer, but it is also more expensive. Closer slit spacings will release more water over a set period. For example, tape with slits every four inches will release more water over 20 minutes than tape with slits every 16 inches.
When determining which type to purchase, you should consider the soil type and plant growth form. Sandy soil doesn’t transport water as well as soil that’s high in clay. Therefore, if your garden is sandy, you should choose a type with slits that are four to six inches apart. But if you’re dealing with soil high in clay or organic matter, you can get away with tape with slits every 10 or 12 inches.
Large plants with expansive root systems will typically be fine with tape that emits water every 10 or 12 inches. However, small seedlings and root crops like carrots and beets will benefit from tape that releases water every four inches.
No matter what type you choose, you can cut it to fit your garden. However, since it runs in a straight line, this method works best for rows of crops growing in the ground or for plants in raised beds. I like using it on my farm to water rows of crops like tomatoes, head lettuce, and turnips.
Soaker Hose
 Soaker hoses release water along their length, lasting longer but are less customizable and suitable for small gardens.
A soaker hose is similar to drip tape, but it releases water along the length of the hose rather than at specific slits. Soaker hoses are also thicker, which means they last longer and cost more.
You can connect a soaker hose directly to a faucet or hose, which makes it easy to move throughout your garden. Since the hose is pliable, you can use it to water a row of vegetables or a few newly planted shrubs.
Since soaker hoses are a bit expensive and less customizable than tape, they’re best for small and simple gardens. If you have a large garden, buy a few soaker hoses or constantly move a single hose around your garden.
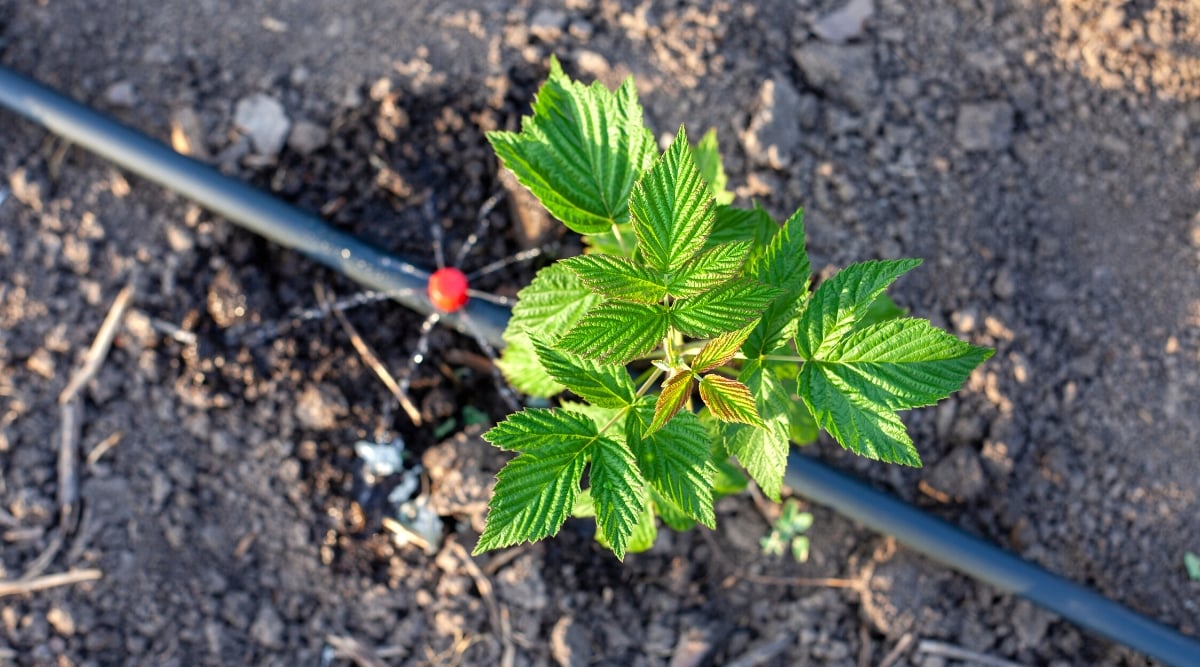
Drip Emitters
 Single drip emitters release water at specific points, ideal for potted plants and unevenly spaced gardens.
Single drip emitters release water at a specific point rather than along the length of a line. You may have seen these emitters sitting inside hanging baskets in nursery centers or potted plants at botanical gardens.
Drip emitters come in various flow rates that allow you to control the amount of water certain plants receive. Since you can use this type of drip irrigation to release water at irregular, single points, it’s a good option for potted plants, unevenly spaced shrubs, and gardens that lack plants growing in rows.
Step 3: Gather Your Materials
 Get materials for drip irrigation: half-inch poly tubing, pressure regulator, landscape staples, tubing punch, fittings, and tape.
With your garden’s water needs in mind, it’s time to purchase your materials. The following materials will allow you to install a drip irrigation system easily.
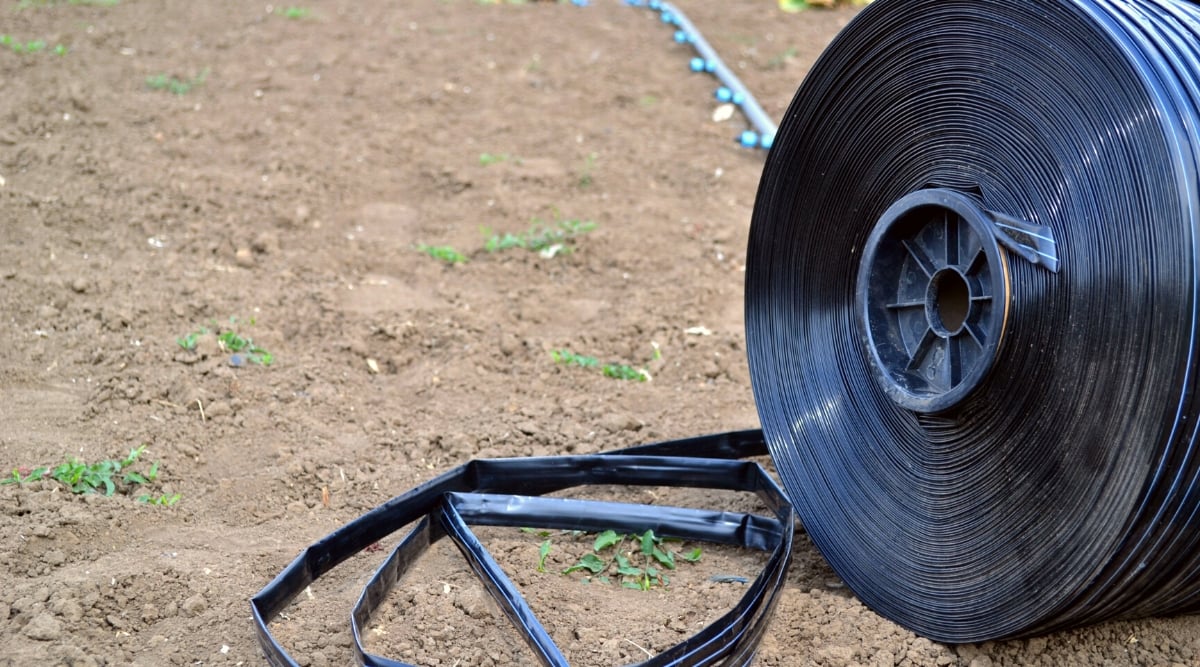
- Drip tape: It comes in rolls; choose the emitter spacing based on your soil type and plant water requirements
- Half-inch poly tubing: this tubing will act as an irrigation header for your crops, so purchase enough material to cover the width of all your garden beds
- Pressure regulator: helps reduce water pressure to a level appropriate for drip irrigation systems.
- Landscape staples: great for holding tape and tubing in place
- Tubing punch: helps create
- Drip tape fittings: connects tape to header tubing and repairs leaks; fittings come in various widths and types
- Tubing fittings: connect heading tubing to hoses and repair broken headers
 Install a header using half-inch tubing by laying, cutting, and securing it with staples.
If you use tape or single drip emitters, the first step is installing a header. A header is a piece of semi-rigid plastic tubing that connects to a water source like a spigot or water pump. Half-inch tubing works great as a header.
Start by unrolling the tubing and laying it across the top of your garden bed. Once it’s in place, cut it with a knife or scissors. Use landscape staples to secure the tubing to the ground. If you’re growing in raised beds, put a header at the top of each bed.
After you secure your header, plug one end and connect the other end to your water source. We’ll explain how to do that below.
 Connect headers to the water source using a garden hose, ensuring a secure, leak-free connection.
After you’ve laid out your headers, it’s time to connect them to your water source. An easy way to do this is to run a garden hose from your spigot to the header. Look for a fitting with a 1/2-barb and 3/4 female hose thread to connect the tubing to the hose. If you have multiple headers throughout your property, you can link them with more tubing or garden hoses.
I like using plumber’s tape on threaded connections to create a water-tight seal and prevent leaks. Simply wrap a few layers of the tape around the male end of the connection following the direction of the threads. Once the tape is secure, screw on the female end of the connection.
When it comes time to connect the hose to the spigot, keep water pressure in mind. Sending too much water through your system will lead to burst tape or loose fittings. Trust me, I’ve been there, and it’s not fun!
Fortunately, there’s an easy way to regulate the amount of water flowing through the system: a pressure regulator. Most systems work well at a water pressure of 20 PSI, but many home spigots send water out at a pressure twice that amount. Adding a pressure regulator between the spigot and your hose will slow the water flow to an amount your irrigation system can handle.
If you’re using water from a pond, stream, or other source with small particles, install a filter after the pressure regulator. This filter will capture any sediment that can clog the drip lines. It doesn’t hurt to install a filter for municipal or well water, but it typically isn’t necessary.
Step 6: Lay Out the Drip Tape
 Determine tape lines based on crop needs, unroll onto beds, secure, and ensure proper orientation.
After you set the headers at the top of each bed, determine how many lines of tape your garden needs. Remember that smaller crops can only absorb water near where they are growing, but larger crops have root systems that can access water further away. And don’t forget that water can travel further in clay soil than in sandy soil.
I like to install a row or two for each row of crops. At my farm, I work with 30-inch beds. These beds may contain one row of tomatoes, three rows of beets, or five rows of radishes. The row of tomatoes would have two lines of tape, the beets would have three, and the radishes would have four. These setups ensure that each row of crops receives the water they need to grow.
Once you know how many lines of tape you need, unroll it onto the top of your garden beds. While you can use fittings to block the end of the tape opposite the header, I just tie a tight double knot in the tape to stop the water flow. Once the end of the tape is blocked, fasten the tape to the ground with a landscape staple.
Follow the tape up to the header, untwisting it as you go. Also, ensure the slits are facing up. If you place the slits downward, they are more likely to become clogged with dirt. Finally, cut the drip tape so the end of the tape is flush with the header.
 Attach tape to the header using fittings with valves for better control over water pressure.
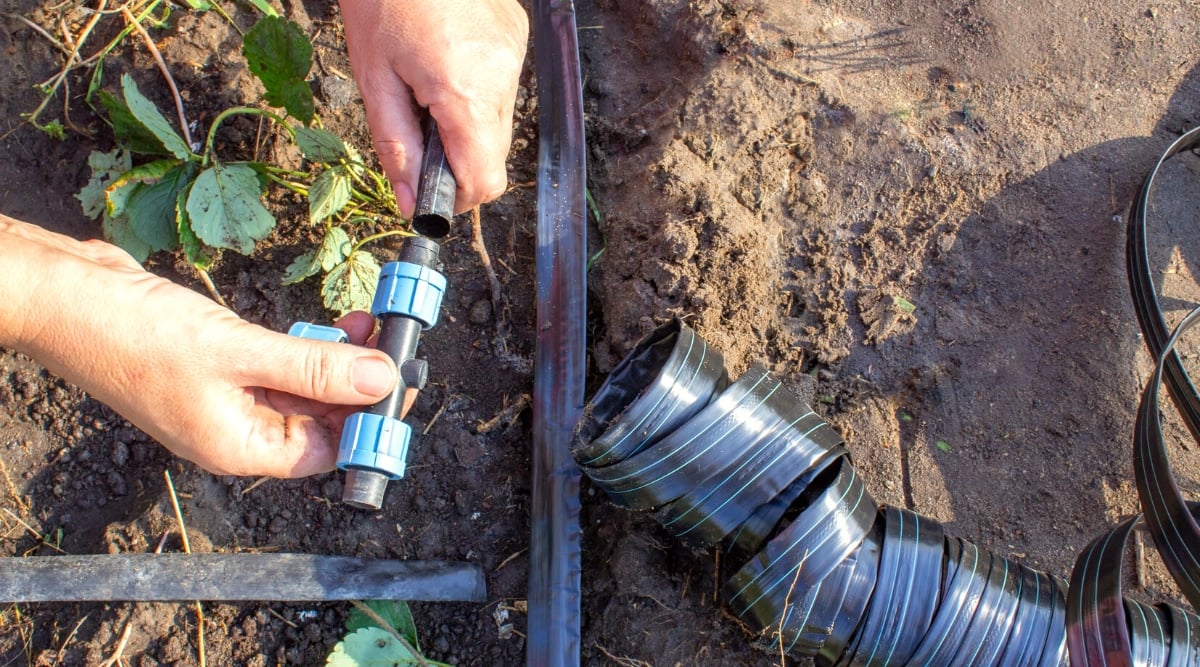
Once you’re happy with the placement of the tape, attach it to the header tubing. This step will allow water to flow from the water source to the header to the tape.
You can use various fittings to attach to the header. However, I like to use fittings with valves that allow you to turn each piece of tape on and off. This flexibility allows you to manage the system’s water pressure and makes it easier to water some crops than others. These fittings are slightly more expensive than other options, but I think they’re worth the investment. You need one fitting for each line of tape.
Now comes the tricky part: punching holes in the header tubing and inserting the fittings. While this process may be intimidating, a proper hole punch makes it much easier. I’ve tried using screwdrivers and knives to punch holes for the fittings, and I can tell you a designated punch is worth the money. Just make sure you buy a punch that matches the size of the barb since both the barbs and punches come in various sizes.
Use the punch to poke a hole in the header where you’d like to attach the tape. All the holes should be on the same side of the header. Next, insert the barb end of the fitting into the hole. This process can take some wiggling and finesse, so don’t give up if it doesn’t go in on the first try.
Once the fitting is attached to the header, it’s time to insert the tape into the fitting. First, unscrew the locking ring so it’s as close to the header as possible. Next, insert the drip tape onto the barb fitting and then screw the locking ring over the tape to secure it. Gently tug the tape to ensure it’s secure.
Step 8: Test Your System
 Test the system by opening valves and checking for steady drip flow.
Once you’ve set up your system, it’s time to test it. Open all the valves connecting your header and tape, then turn the water on. The lines will take a minute or two to pressurize, so don’t worry if the water doesn’t immediately flow.
After the system fills with water, you should see the water slowly but steadily flowing out. If water isn’t dripping, there are two possible causes.
First, the water pressure may be too low to pressurize the entire irrigation system fully. If that’s the case, close a few line fittings to increase the pressure in the open lines.
It’s also possible there’s a leak in your irrigation system. Walk the length of the system from the water source to the hose to the header to check for leaks. I find that it’s often easier to hear leaks than to see them, so listen closely.
If you notice a leak, turn off the water source and repair the leak. You can repair leaks in headers, tape, and hoses with coupler fittings. Simply cut out the section with the leak and splice the two ends together with the coupler. If any fittings are leaking, tighten them until they’re secure.
Step 9: Monitor for Leaks and Problems
 Regularly inspect the drip system for leaks, check fittings, and ensure proper water delivery to your plants.
Even if your drip irrigation system is running smoothly, give the whole system a thorough examination at least once a month. This will help you discover leaks, check the pressure is at the right level, and ensure your plants receive the necessary water.
First, turn the water on and check the tape for leaks. Small critters like voles and moles regularly chew it, causing leaks. You can also accidentally pierce the tape when harvesting your veggies or prepping the ground. Once you spot a leak, turn the water off and repair it using a coupler.
Another best practice is to check the system’s fittings. Connections often loosen over time, leading to small but impactful leaks. Tighten any loose fitting connections and replace any broken fittings.
Drip tape can last for one to three seasons, depending on its thickness. If you want to use the same tape for multiple growing seasons, roll it up and store it in a shed, garage, or other protected area during the winter. When you notice the tape is covered with holes or failing to provide your plants with the proper water, replace it.
Final Thoughts
Designing and installing a DIY drip irrigation system allows you to water your plants easily. You can have your system ready with some planning and a few hours of installation work. Just turn on the spigot, step back, and watch as water flows directly to your plants.