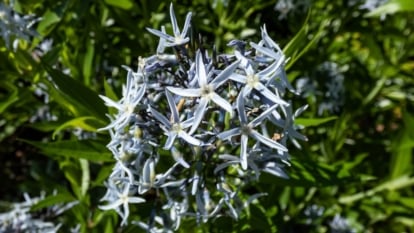
Transplanting any garden plant can be a delicate process. Perennials such as flowering shrubs and fruit trees may face many issues like yellowing, leaf drop, and stunting. Transplant shock describes the acute stress some plants face after being moved. It can be caused by root disturbance, poor weather, water stress, improper site preparation, or improper hardening off.
This shock period can make the plant vulnerable to other issues like stunted growth, pest infestations, and diseases. While a little bit of shock is normal, there are many ways we can ensure our plants have a comfortable transition from one place (or pot) to another. Let’s dig into 11 ways to prevent transplant shock.
What is Transplant Shock?
 Transplant shock is plant stress after moving due to many causes, causing wilting and distress.
Transplant shock is the initial stress a tree or shrub may face after being moved to a new location. A poorly developed or damaged root system is often the underlying cause for a recently relocated and unhappy plant, but there are other potential causes as well. The plant may look sad, wilted, or even close to death.
Symptoms include:
- Yellow chlorotic leaves
- Leaf scorch (leaves appear sunburnt)
- Wilting and drooping of the entire plant
- Leaf drop
- Delayed growth (stunting or failure to take off)
- Poor root development
- Root rot
- Dying branches or stems
- In extreme cases, whole plant death
What Causes Transplant Shock?
 Shock results from stress during plant relocation, leading to short-term wilting or long-term growth problems.
Transplant shock is caused by the acute stress and root disturbance of moving a plant to a new site. Improper hardening, water stress, sunburn, extreme weather, or poor soil preparation can all cause transplant shock.
Improper transplanting can cause short-term stress (like a wilted and yellowing plant) or have long-term consequences like extremely stunted growth and a failure to become established in the landscape.
The main causes of transplant shock include:
- Root Disturbance: Uprooting, dividing, and moving a perennial temporarily disrupts its ability to uptake water and nutrients, but this problem is exacerbated if the roots dry out or get damaged during the transplant process. Some plants have extremely sensitive roots and don’t transplant well at all.
- Poor Site Preparation: You can’t just toss a plant into a hole the same size as its root ball and expect it to proliferate. If the surrounding soil is super hard or compacted, the roots will have trouble expanding into the new area, leading to shock and stunting.
- Water Stress: As if uprooting a plant isn’t enough, leaving it thirsty during its vulnerable transition phase can dramatically reduce its vigor and overall health. Perennials need more water than usual after transplanting.
- Sunburn: If a plant moves from a protected area like a house or nursery into the garden, it needs time to adjust its leaves to more intense light. Leaves often become sun-scorched after transplanting, especially if they weren’t hardened off in advance.
- Extreme Weather: Nobody wants to pack a moving truck during a snowstorm! If you move a plant right before intense cold or heat, it becomes extra susceptible to the stress of transplant shock.
How to Prevent Transplant Shock in Perennial Plants
 While potentially stressful, transplanting plants can be made smoother by following a few basic tips.
Uprooting any living thing from its home and changing its environment naturally requires an adjustment period. A small amount of stress is inevitable when moving any plant in the garden, especially if it has been growing in a certain pot or location for a long period.
However, there are many proven ways to reduce and prevent intense transplant shock by properly preparing and supporting your plant through its transition. Here are 11 science-backed tips to ensure a seamless move for your perennials.
1. Harden Off Before Planting
 Gradual hardening off acclimates plants from sheltered environments to exposed ones.
Hardening off is gardener jargon for helping a plant toughen up. This step is most important when moving a perennial from a protected location to an exposed one.
For example, if you purchased an herb or shrub at your local garden nursery, the plant is accustomed to a nice, cozy greenhouse. It has spent most of its life receiving regular watering and plenty of protection from extreme light, heat, or cold. If you toss it out to fend for itself, it may face extreme shock.
Hardening off is simply an acclimation period. It makes this change more gradual. Place your plant in a semi-protected area, like a covered porch, for a week or so. You can also set the potted plant near its new planting location to adjust for a few days while still protected in its container. And if the weather’s still a bit chilly, take a little longer in doing this process, gradually extending the time that plants are left outdoors until they have acclimated.
What Happens If I Don’t Harden Off Plants?
Adapting to weather conditions prevents transplant shock, ensuring they don’t wilt or struggle.
Without proper hardening, plants are extra fragile and prone to varying levels of transplant shock. They may wilt, turn yellow, lose leaves, become stunted, or take a long time to recover after planting. Imagine if a child from a protected environment was suddenly sent out into a bustling city to fend for themselves. The dramatic shift of transplanting can be just as intense for a young plant transitioning from a greenhouse.
Even if the plant is full-grown, it may have been protected in its pot at the nursery. Similarly, many adults get sick or stressed out when they move from drastically different locations, like from a warm climate to a cold one or from a rural area to an urban one.
What is the moral of the story? Ease the transition as much as possible.
Some Plants Should Be Transplanted Right Away
 Some species should be planted promptly due to transport stress.
There is a caveat here! While most potted and nursery plants should be properly hardened off before planting, some species should be transplanted ASAP. They have already faced enough stress during transport, so getting them into the ground immediately is better. Then, you can use more tips described below (like nice soil preparation, diluted kelp solution, or row cover) to help them acclimate.
Transplant these perennials right away:
- Newly divided perennials (if you just divided a plant in your garden, transplant on the same day)
- Bare root berries
- Bare root fruit trees
- Asparagus crowns
- Balled and burlapped trees (they can technically sit for 1-3 weeks if kept moist, but it’s best to get them in the ground ASAP)
- Any plant material that was packaged and shipped
Poor weather is the main reason you must wait to transplant these perennials. Fortunately, most nurseries and seed companies time their shipments to correlate with regional planting dates.
2. Keep the Rootball Moist
 Smoothly transplanting perennials requires minimizing drought stress.
A consistently moist root ball before, during, and after transplanting is the key to quick establishment. Thoroughly hydrate your plant one or two days before planting. Well-hydrated plants are far more equipped to handle the stress of transplantation. The plant can enter its new home with plenty of water reserves and perky foliage.
With bare-root plants, most nurseries recommend soaking the plant for an hour or two before planting. This allows the exposed roots to get a good drink after their long and stressful journey.
While many perennials are drought-tolerant after establishment, they cannot handle drought right after transplanting. This is the most “needy” your plants will ever be, so act accordingly.
Water In Thoroughly
 Water deeply after planting, but avoid over-saturation.
Immediately after planting, give your perennial a nice long drink. Let the water thoroughly saturate the planting hole, but don’t water so much that it pools or drowns the roots.
Check the soil moisture daily and water directly at the base of the plant and slightly beyond it. To encourage your plants to root outward, ensure the water reaches a nice 6-12” circumference around the entire root area.
Monitor Moisture for 3-6 Weeks or More
 Keep the root zone consistently moist for the first 3-6 weeks after planting, especially for young perennials.
The job is still not done once the moistened roots are in the ground. You should never let the root zone dry out within the first few weeks or months of transplanting! This rule applies to every planting scenario, especially young or tender perennials.
The newly relocated plants need a continuous water supply to help them dig their roots in the new location. They may not be ready to start reaching deep water stores in the soil, so you must provide them with some TLC. If there isn’t any major rainfall, regular supplemental watering is required for the first 3-6 weeks until the plant can get its roots thoroughly anchored in the new ground.
Avoid Overwatering
 Check soil moisture by feeling the soil at the root level; it should feel like a wrung-out sponge.
At the same time, the roots should never be soggy or dripping wet. Overwatering can create conditions for root rot or other soil-borne pathogens to take hold of the vulnerable transplant.
Always check the soil before irrigating. Dig down and stick your finger 4-6” under the soil’s surface near the base of a larger plant. For smaller potted plants, try to feel at least halfway down into the pot. There should not be any pooled-up or mushy, brownie-batter-like areas of dirt. Instead, imagine the soil as a perfectly wrung-out sponge, moist to the touch but not waterlogged.
3. Avoid and Fix Rootbound Plants
 Tangled roots can hinder water and nutrient absorption, worsening transplant shock.
When moving a perennial from a pot into the garden, pay attention to the roots. Rootbinding happens when a plant is left in its pot too long, and the roots outgrow the container.
The roots form a tight coil around the root ball, making it difficult for the plant to absorb water and nutrients from the soil. A pot-bound plant is extra susceptible to long periods of transplant shock because the roots are tangled up and less likely to expand into the new ground.
Check for Signs of Rootbinding Before Transplanting
 Root-bound plants hinder growth as tangled roots spiral in containers.
The first signs of a rootbound plant are often roots poking out of the bottom drainage hole. When you lift the plant from the pot, the roots appear to wind and spiral around in the shape of the container. They look overcrowded, tangled, and tightly woven together.
Often, this issue coincides with root rot because the overgrowth of root tissue creates an extra moist environment for fungi. The soil and roots can’t “breathe” amidst all that entanglement.
If you put a rootbound plant in the ground, it can be difficult to take off because the roots have been “trained” to go around in a circle rather than outward. The best thing to do is avoid rootbound plants in the first place and either transplant or up-pot plants when they outgrow their container.
Before buying any potted nursery stock, check for these signs:
| Rootbound Plants | Healthy Roots |
| Brown or tan roots (if rotten) | White in color |
| Root ball is shaped like the container | Soil loosely holds roots together |
| Tightly tangled or congested roots | Robust individual roots with airflow between them |
| Winding around in a circle | Pointing down or outward |
However, avoiding rootbound plants isn’t always possible if the spring is delayed by late frosts or if your local nursery only has a given amount of planting stock. Your next best solution is to loosen the roots.
Loosen the Roots
 Loosen rootbound plants to prevent transplant shock.
Never transplant a rootbound plant before loosening the roots! It will face severe transplant shock and may even die. You need to detangle and loosen the roots so they will grow outward into the surrounding new soil. You may also need to prune away any rotten or diseased roots.
To fix a rootbound plant:
- Carefully remove the plant from its container by lifting it from the base.
- Place it on a table or tarp.
- Notice how very little soil falls from the root ball. It may stay entirely self-contained.
- Use your fingers to start detangling roots from the bottom portion first.
- If they’re extremely tight, use a kitchen fork to loosen them.
- Use sharp, sanitized pruners to cut away any rotten portions.
- Keep using your fingers to tease the roots apart as you move upward.
- If they still aren’t loosening, you may need to dunk the root ball in water.
- Tease upward until the roots are pointing outward and down.
- Soil will probably fall. This is OK.
Once you have thoroughly loosened the roots, plant immediately in the desired soil blend. Be sure you have properly prepared the site (more on this below) so the planting hole is loose and aerated.
This will make it much easier for the stressed roots to take hold in the new space. The plant will probably still face some signs of shock, but it should recover quickly with plenty of water and a little protection from the elements.
If you have very severely coiling roots at the very bottom of the pot, it can often be worthwhile to slice off those coiled roots entirely if enough roots are higher in the pot to support the plant. This can cause some shock initially, but it may be the right move for the plant’s health if you don’t think you can untangle them without damaging the roots.
4. Transplant in the Right Season
 Spring and fall are ideal for moving perennials.
Spring and fall are prime times for planting, moving, or dividing perennials because the weather is mild. Summer tends to be too hot, and many perennials flower in their peak season. Winter tends to be too intense, and the cold temperatures may harm tender new root growth and cause more issues with shock.
As a general rule of thumb, the best time for dividing and transplanting perennials depends on their flowering time:
- Spring and early summer bloomers are best transplanted in fall.
- Late summer and fall bloomers should be moved in the spring.
- Bare root herbaceous perennials, shrubs, and trees are best transplanted while dormant after the risk of frost has passed.
If transplanting in the fall, be sure to do it early enough for the plant to establish before the risk of frost. Generally, there is a 4-8 week window before the expected first fall frost date when transplanting is best. However, you should always double-check the specifications for your particular plant species and cultivar.
5. Don’t Transplant When In Bloom
 Don’t transplant perennials that are flowering.
Many landscapers and gardeners want to install flowering perennials for an instantly beautiful display. While this sometimes works fine, it’s not the best idea for a long-lasting, well-established plant. Transplanting a perennial while in bloom means it has energy directed toward reproductive growth. This common mistake can cause major issues with shock.
As a rule of thumb: Avoid moving a plant while it’s in bloom, and don’t transplant while it’s fruiting.
Like a pregnant mother, flowering plants expend lots of energy to produce flowers. They are using almost all the water and nutrients available to funnel toward reproduction. If you transplant perennials while they bloom, they will likely face transplant shock because they don’t have any extra energy to put toward root establishment.
It’s best to wait to transplant until the plant is done flowering and returns its focus to vegetative growth. The vegetative growth stage is when a plant channels its energy toward new roots, shoots, and leaves.
For spring-blooming species that produce flowers on bare branches (like forsythia or some magnolias), vegetative growth isn’t a priority until after the plant drops its flowers. Then, it focuses on leaf and root growth throughout summer and fall.
Late summer and fall-blooming species, like coneflowers or sedums, usually spend all spring on vegetative growth. This is why it’s best to transplant them in the spring before they flower.
Remove Premature Flowers
 To prioritize root growth when transplanting, prune off any flowering stems with sharp, sanitized shears.
If your plant has flowers on it and you have no other option but to get it in the ground, it’s best to prune the flowers off. Some plants stress-flower while in containers, making cutting them back extra important.
Use sharp, sanitized shears to cut back all flowering stems. This sends a message to the plant that it’s time to refocus on building strong roots.
You want perennials to create a solid foundation for future growth in their new home. This may mean sacrificing a season or two of flowers to prioritize root growth. Don’t worry; you’ll be rewarded with abundant floral displays once the plant is healthy and established!
6. Properly Prepare the Planting Hole
 Prepare the planting hole properly by researching your plant’s needs to prevent transplant shock.
One of the biggest problems in tree planting is neglecting to prepare the planting hole properly. Don’t be lazy about your soil preparation; you may regret it later! If you transplant a perennial into a hole barely larger than its existing root ball, it will have trouble expanding into the surrounding soil.
This is especially problematic if you have compacted, rocky, or heavy clay soil. Those new baby roots are trying to push into the soil as hard as concrete, and guess what? They probably won’t be able to. If the new hole isn’t properly aerated and fluffed up with compost or organic matter, the transplant will likely manifest symptoms of shock like wilting and stunting.
To thoroughly prepare your planting hole:
- Research the species’ soil needs in advance.
- If it needs extra well-drained soil, aerate and blend the soil with sand or peat moss.
- If it needs loamy soil, generously add lots of compost.
- Mix the amendments into the soil 6-18” beyond the “walls” of the planting hole.
- The planting area should be loosened at least twice the width and depth of the root ball.
- In ultra-compacted soils, double dig or broad fork to ensure maximum aeration.
The looser the soil at planting, the quicker your plant can take off! This often overlooked step can be a major remedy and prevention of shock. When in doubt, widen the planting hole preparation. You still plant the perennial at the same depth and soil level, but the surrounding soil is looser and easier for roots to colonize.
Don’t Compact the Soil
 Avoid heavy soil compaction when planting for proper growth.
It is a common mistake to press the soil down around a newly transplanted crown heavily. While it’s important to “tuck” the plant into its new home, heavily patting or stomping the soil can cause compaction that sets back its establishment.
Instead, lightly backfill so all the roots are covered and only press down at the central trunk or stem of the plant. This solidifies the plant in its new home without compacting the planting hole that you just did all that work to prepare.
7. Transplant at the Right Time of Day
 Plant in the morning or evening to minimize the shock to transplanted plants.
Whether transplanting perennials or annuals, big or small, in the north or south, spring or fall, this rule always remains true: Plant in the morning or evening! For most perennial plants, evening is best. Overcast or cloudy days are especially beneficial.
No plant wants to be uprooted and tossed into a new place during the heat and intense sunlight of mid-afternoon. This is especially important in the summer when the temperature and light can be very harsh on a newly relocated plant.
Cooler times of day allow for more water retention and less wilting as the plant adjusts to a new location. The roots can also stay moist more easily. Dry roots are a major risk factor for transplant shock!
If you are digging up a plant to divide or move it, the reduced sunlight in the morning or evening is useful. Plants keep their roots underground for a reason; they do not enjoy harsh UV rays blasting the root zone.
Keep the Roots in the Dark
 When transplanting, protect roots from direct sunlight and wind exposure to prevent damage to sensitive root hairs.
Some gardeners mistakenly dig up a shrub and wheelbarrow it to the other side of the garden, only to have the roots exposed for an hour while preparing the new planting site. The sunlight blasting over the vulnerable root ball negatively impacts the roots.
Root hairs, in particular, are extra sensitive. The fine roots begin to die back within just a few minutes of exposure to direct sun and wind. Research shows that root light exposure reduces the roots’ ability to accumulate essential minerals and can even cause cell death. Protecting the roots is key in preventing transplant shock, so always keep them out of direct sunlight and transplant them in the morning or evening.
If you absolutely must transplant midday, keep all roots covered and protect them from drying out. Large plants benefit from being wrapped in moistened burlap or towels, while smaller bare-root plants can sit with their roots submerged in shallow water or wrapped in wet paper towels.
A Night of Adjustment
 Plant roots are particularly vulnerable to sun and wind exposure during transplanting.
Planting in the evening is not only advantageous because of the temperature. It also provides your perennials an entire night to settle into their new location. Rather than immediately facing the bright sunshine of an entire day, the plant can adjust to the sunset, darkness, and sunrise.
This may prevent the leaf scorch and sunburn symptoms of transplant shock. Of course, you can also intervene with shade cloth or row fabric that helps protect them from the harsh sun.
Imagine you just spent an entire winter indoors and then went out on the beach for an entire day. You’d probably get sunburnt, too! Remember that plants need time to acclimate, just like we do. They use chlorophyll, carotenoids, and other pigments as built-in sunscreen, but they need time to adjust the production of these molecules after a transition properly. An overcast day or a cool evening is the perfect opportunity to start acclimatization.
8. Minimize Root Disturbance
 Treat roots gently to prevent root disturbance during transplanting.
Roots are extremely fragile, and you should always carefully handle the root ball. The goal is to keep the root ball and its tiny root hairs intact. While many woody plants appear tough on the outside, treating your perennials like fragile baby birds is best. The more careful you are, the less likely you are to shock them.
Proper moisture is key for minimizing disturbance because water aggregates soil together. This means the soil will stay clumped around the roots like a protective blanket. Moreover, carefully cradling the root ball during transport (with gloves, a tarp, or a wheelbarrow) keeps the entire structure in one piece.
Avoid carrying a transplant by its stem (causing all the soil to fall from the root ball). Don’t shake, toss, drop, or roughly handle your plant in any way.
9. Choose Smaller Plants
 Older and larger trees or shrubs take longer to establish in new locations.
When transplanting large trees or shrubs, it’s usually best to pick smaller plants. Older and larger woody ornamentals usually take longer to establish in a new location.
As they say, it’s hard to teach an old dog new tricks. These large specimens get very comfortable in their pots or nursery grounds. When these massive root balls are dug up, shipped to a nursery, and transported to your home, they undergo much stress. Balled and burlapped trees are particularly vulnerable due to the excavation process that uprooted them from their original location.
Smaller Stock, Less Shock
 Young plants adapt more easily to new environments and will face less shock.
In general, the larger the planting stock, the more vulnerable to shock. Montana State University says small stock is less susceptible to transplant shock. Think of smaller perennial nursery plants as children moving to a new country versus the larger trees that are more like elderly people.
The minds of young kids are much more malleable and quick to adapt, which is why so many people try to teach their kids languages or instruments while they are young. An elderly person may have more trouble adjusting to a drastic location change. Trees and perennial plants are the same way; they have an easier time acclimating while they’re young.
Small Plants Can Catch Up Quickly
 Smaller perennials adapt faster, are less likely to become stunted, and establish more quickly than larger specimens.
When shopping at the nursery, consider choosing smaller perennials. They’re cheaper, easier to transport, and more prepared to adjust to your planting garden. Sometimes, a smaller plant can take off in its new home and grow more rapidly than a larger specimen transplanted simultaneously. The younger roots and reduced stress help prevent stunting.
You can often see a similar phenomenon with direct-seeded squash versus transplanted squash. Even though the transplanted squash seedling got a head start several weeks before, the direct-sown plant catches up to its growth simply because it doesn’t have to endure the shock of transplanting.
While we may not always direct-sow perennial plants, this observation helps us better understand how plants react to changing environments. It may be nice to enjoy the instant gratification of a giant tree or shrub added to your landscape. The 1-2 years of establishment and shock can severely reduce its growth. If you have poor soil or live in an extreme climate, smaller-sized planting stock is usually best for quicker establishment.
10. Apply Diluted Kelp or Seaweed
 Kelp or seaweed fertilizers are scientifically proven to reduce transplant shock and boost root and shoot growth.
Now for the best-kept secret in the farming and nursery industry: kelp or seaweed! These marine-based mineral-rich fertilizers are scientifically proven to reduce transplant shock by increasing shoot and root growth in trees. Moreover, they are commonly used as biostimulants to reduce shock and improve resistance to stress in many different plants.
Of the 15+ very successful organic farms I’ve worked on, almost all used diluted kelp fertilizer immediately after planting to alleviate transplant shock. You can mix a small amount (per the package instructions) into your watering can during watering-in. There is no need to apply kelp or seaweed in a super-concentrated amount. The diluted minerals are enough to give your plant the boost it needs to avoid shock in its new home.
11. Use Row Cover Fabric
 Row fabric or shade cloth shield transplants against weather extremes and promotes adjustment.
The final and most notable tip for preventing shock is super simple: cover your plants with row fabric (or shade cloth in a hot climate)! Row fabric is truly the most underrated garden tool. This woven agricultural textile creates a safe haven for your newly moved plant and buffers it against weather extremes.
Different thicknesses can be used for frost, wind, and some sun protection. The fabric dilutes the amount of UV rays that reach the plant, thus protecting it from sunburn. More importantly, the row cover creates a cozy blanket of warmth and moisture to allow the plant time to adjust to its new environment.
Float (drape) the row cover directly over stout plants and secure with sandbags or smooth rocks. Alternatively, create a mini low-tunnel with hoops or wrap the canopy with a light row cover and tie it with twine. This fabric is not only for frost protection; it keeps newly transplanted perennials safe and protected from extremes during the first few weeks of establishment.
Keep row covers on for 1-3 weeks after planting and monitor regularly. As an added benefit, pests won’t be able to access your perennials during their fragile establishment time.
Final Thoughts
Ultimately, the key to preventing transplant shock is protecting those roots at all costs! Try to ease the plant’s transition into its new home by buffering against extremes.
Most importantly, be patient! Plants take time to recover. If your perennial shows signs of shock, panicking or uprooting it again is unnecessary. All it needs is time and gentle care to adjust to its new home. Some perennials can establish in their new home within a few weeks, while larger shrubs and trees could take several seasons until they are fully adjusted.
If a plant is struggling or taking a long time to start growing, remove any flowers so it can continue focusing on vegetative growth. Keep monitoring and protecting the plant; your efforts will soon be rewarded with beautiful flowers or tasty fruits!