Overwintering your frost-tender bulbs doesn’t have to be stressful, but it can be important. By storing them during the winter months, it is possible to not only grow warm-weather plants in a cold climate but also to save those bulbs and plant the same ones year after year.
Bulb preservation during the winter can be a major money saver. They can be expensive, and buying new ones every year can start to feel wasteful. Fortunately, it is easy to preserve most bulbs and save them from freezing over the winter.
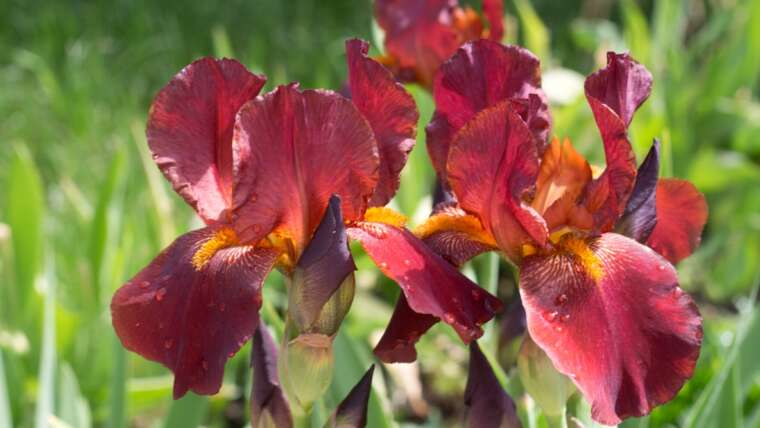
Unlike bulbs that need to have a period of cold weather to wake them from dormancy, others like cannas, ginger, dahlias, and gladiolus must be kept above a certain temperature, or they will die. Read on for tips on successfully storing your frost-tender bulbs for maximum survival.
Timing
 Dig bulbs up after the foliage dies back, although timing varies by climate.
The first step to preserving your bulbs is digging them up at the right time. The sweet spot for most plants falls between the first frost and the first hard freeze. The idea is to expose the plants to cold weather, which induces dormancy. However, digging them up before the ground freezes is very important, as that will kill them.
The first frost typically kills off the plant’s foliage above the soil’s surface. The leaves and stems, in other words. This lets the plant know that it is time to enter dormancy, to conserve water and nutrients until the weather is more conducive to growth.
The tricky thing is knowing which bulbs benefit from wintering outdoors and when the ideal time to dig sensitive types happens in your specific climate. In colder climates, there can be a very small window between the first frost and the first hard freeze. If you experience cold winters, dig as soon as the foliage of the plant wilts, as this signifies dormancy. You will likely have to wait until after a hard frost in warmer climates.
No matter where you are located, the key is to allow the foliage to die back before digging them up. If you harvest too early, you risk preventing the plant from storing sufficient nutrients to produce new growth in the spring.
Waiting until the plant has gone dormant also ensures the greatest amount of time for the plant to produce new bulbs. You want them to be as mature as possible, so they produce the best new plants in the spring.
Harvesting
 Be sure to remove bulbs with care and precision.
When it comes time to dig, it is important to be deliberate and careful in removing bulbs from their respective locations. Bulbs multiply over their growing seasons, which is how these plants reproduce. You want to make sure not to cause any damage in the process.
Before you begin digging, cut the dead stalks down to about an inch or two above the soil level. This makes them easier to work with. Use a garden fork or shovel to dig around the plant. It’s good to leave some space as a buffer to prevent damage.
By giving yourself about a one-foot radius, you should be able to avoid slicing through your cluster of bulbs or rhizomes. Using your tool of choice, gently work to loosen the soil. Once you’ve determined where the bulbs are located, you can use a shovel to loosen them from underneath.
At this point, it is best to use your hands to remove them from the ground. You want to disrupt them as little as possible and keep them intact. Loosen them from the soil and lift them out of the ground.
Once they are out of the ground, allow them to dry for several hours. Bulbs, especially rhizomes like the ones that dahlias grow from, are delicate, and allowing them to dry a bit will toughen them up and make them easier to handle.
Preparation
Properly clean and divide for storage to prevent rot and maintain bulb health.
Once you have removed them from the garden, it is time to prep for storage. Cleaning your bulbs before storage is a good idea, as soil can contain pathogens that can cause damage while in storage. Any soil fungus left on them can lead to rot, ruining your harvest.
Work the soil off and out from between your bulbs. You can do this with your hands or a brush, but there is a good chance you will also need to use some water. Be very careful when washing, as they become softer and easier to damage when wet.
An alternative to working with clusters is to divide them before you clean and store them. While this method can be successful, waiting until the spring to divide is recommended. Bulbs may continue to mature and form eyes while they are in storage. When you divide them, use a clean, sharp tool to avoid introducing any diseases.
Whichever method you prefer, cleaning as much as possible before storage will give them the best chance of making it through the winter. If you wait until spring to divide, you can use a small stiff paintbrush to remove dirt in hard-to-reach places.
Curing
 Curing is essential to prevent rot and protect them during storage.
Once clean, allowing them time to cure before packing them away is imperative. Curing is another word for allowing bulbs to dry out a bit so that they don’t rot after you pack them away. Most need only one to three days of curing time, while others, like canna lilies, may need to cure for a week or longer.
Cure in a warm, dry space with a temperature between 65°-70°F. There should be good ventilation in the space, and it should have low humidity. A humid room will significantly delay the curing process.
I like to set my bulbs on a screen and elevate the screen so that air can circulate on all sides. This expedites the process a little bit. Check on them each day until they reach the appropriate level of curing.
For dahlias and other tuberous plants, you want them to cure until the outer skin begins to wrinkle a bit. For others, it is best to cure for a recommended amount of time, depending on their species. Curing allows the skin to toughen up, protecting the bulb’s inside from pathogens in the packing materials.
Curing is important for protection from fungal rot. If you store them with too much moisture in a cool, dark place, there is a strong chance you could have rotten bulbs on your hands in the spring.
Storing
 Store in paper or nylon bags with peat moss to maintain moisture and prevent rot.
There are several methods and materials that gardeners use for winter storage. The main objective during this period is to keep the bulbs dormant and free of damaging pathogens.
Storage in Bags
For an easy storage solution, wrap them in paper and place them in paper bags. The paper will help maintain the moisture level, preventing them from rotting and drying out. Too dry is not good either, as a dried-out bulb is a dead bulb.
Another solution is to place them in nylon bags or old stockings. Add some peat moss or vermiculite, ensuring that some of this material is in between bulbs. It is important to keep them from touching while stored to avoid cross-contamination.
Storage in Boxes
Another storage method uses shallow cardboard boxes and a clean potting material like peat moss or vermiculite. Spread a thin layer of the potting medium on the bottom of the boxes, and then lay your tubers on top. Then, prevent them from touching with more potting medium above, below, and around them.
This method requires the most space and preparation, but it makes it very easy to label and identify your bulbs and keep them well-protected and at the right moisture level. Make sure to label during the storage process. Unless you only store one type of bulb, this will make your job come spring much easier.
After packing bulbs away, move them to a cool and dark location. A garage wall shared with the home can be a good place if the temperature doesn’t drop below freezing. A temperature of around 50°F is just right for storing most frost-tender types.
Check On Your Bulbs
 Regularly check your bulbs for moisture and fungal problems.
Once your bulbs are stored for the winter, you can sit back and relax for a while. However, it is important to take a look from time to time to ensure no moisture or fungal issues.
Once a month, inspect them for issues such as rot or dehydration. Any that are dried out and empty should be removed, as well as any with signs of decay. Removing rotting bulbs will help prevent the others from being affected.
The other issue to check on, moisture level, is equally important in preserving the greatest number. If they dry out too much, they will die. If they appear too dry and shriveled, lightly mist the peat moss or perlite with water to add some moisture.
Final Thoughts
By storing your frost-tender bulbs for the winter, you can continue growing your warm-weather plants year after year without the added expense of replacing them yearly. On the contrary, they will multiply, giving you more and more of your favorite plants every year. Storage doesn’t need to be labor intensive, but doing it correctly will ensure that a greater number of your bulbs survive the winter.