All plants (even those we grow indoors) aren’t naturally inclined to grow in containers. Some respond to it better than others, but you certainly won’t find any potted plants in the wild. Because we create these conditions, it’s also up to us to control them to keep our plants alive.
Accustomed to growing unhindered, plant roots desire to spread continuously, fuelling growth above the soil. Once those roots have no space, they will wrap around each other and grow in weird and wonderful directions, looking for gaps. If there aren’t any, the plant will stop growing altogether.
Root health is essential to a happy houseplant, so they can’t live like this forever. When they run out of space and stop growing, you must repot to keep your plants alive.
Even if your plants don’t outgrow their containers, it doesn’t mean you can skip repotting altogether. The soil in containers will eventually break down without any organic matter to replenish it and boost its structure. You may be able to keep the plant in the same container, but you’ll still need to repot to replace the soil.
Repotting is a messy chore, but unfortunately, it’s not one you can skip. Plus, it can give unhappy houseplants a wonderful boost that brings them back to life within a few weeks.
Which Houseplants Need Repotting?
Houseplants, regardless of their type or size, will eventually require repotting, typically every one to four years.
Frustratingly, the answer to which houseplants need repotting is all of them. They may need repotting at different times and for different reasons, but any plants you keep in containers will need repotting at some point.
Most houseplants benefit from repotting every year or two in the early stages of growth or every three or four years for large and mature plants that just need new soil.
Some can be repotted sooner. For example, African violet growers often recommend repotting every six months or so to keep them looking their best. But for most houseplants, it’s best to wait until your houseplants need repotting before putting them through the processes.
You may think older and established plants, such as indoor trees, don’t really need repotting. However, even if planted in a massive container, replacing the soil every four years or so is vital if you want them to live long-term.
It can be a tricky process (it took me quite a while to figure out how to repot my ceiling-high Fiddle Leaf), but since it’s required so infrequently, it’s not something to skip.
When To Repot Houseplants
 Repot houseplants when they exhibit signs of needing it to minimize stress and transplant shock.
On a macro scale, the best time to repot your houseplants is only when they really need it. We’ve all brought a new houseplant home and wanted to move it to a brand new pot immediately, but waiting until the right time when your plant is not already stressed will help limit risk.
The risk involved is further stress and transplant shock. Houseplants don’t like having their roots exposed to the air and handled unnaturally. They also don’t like changes in environments, including things like new soil conditions. Although repotting does improve growth in the long term, it also results in short-term stress that you don’t want to induce regularly.
There are signs you should look out for to indicate when it’s time to repot, which we’ll look at next. But even if you don’t notice these signs at once, you should still consider repotting every four years or so if you haven’t repotted in a while.
On a micro-scale, the best season to repot is usually spring. Most houseplants start creating new growth at this time, and the warmer temperatures will aid in quick recovery after repotting. You can repot whenever it’s warm, although you’ll need to watch your watering if repotting when temperatures are high.
While it’s not ideal to repot in fall or winter, it won’t do any serious damage if your indoor temperatures are still relatively warm. They’ll take a bit longer to bounce back, so don’t worry if you don’t spot any improved growth for a few weeks.
If you’re repotting due to problems with growth, such as root rot, don’t wait until the weather warms. Repot immediately, no matter the season, to remove the damage and prevent spread.
Signs Your Houseplant Needs Repotting
Repotting on a schedule (such as one per year in spring) can help you avoid forgetting this essential task. However, it doesn’t consider the plant’s real needs. Instead, look out for these classic signs that your houseplants need a new home.
Roots Growing Through Drainage Holes
 When roots grow through drainage holes and circle the pot, it’s a clear sign your houseplant needs repotting.
The first sign is one of the easiest indicators that your houseplant may be struggling: roots growing through drainage holes.
Due to the constrained space in containers, the plant’s roots will eventually hit the edge of the pot. From here, they will start circling around the container or growing back into the soil. But when there is no space left at the bottom of the pot, sprawling roots will reach for room by growing through the holes in the bottom.
This usually happens when your houseplant is in a pot cover or on a drip tray. The roots reach downwards towards the moisture, growing out of the drainage holes. Not only does this mean the roots are seriously lacking space, but this can also block the drainage holes, risking waterlogging and rot.
If you lift the plant out of its container, you will likely see roots packed at the bottom, taking the shape of the container. The roots will wrap around each other, struggling to absorb moisture or nutrients. In these cases, it’s best to repot as soon as possible, no matter the season.
Roots Circling The Top Soil
 Roots emerging at the soil surface are a sign of restricted space, possibly due to shallow watering.
Similarly, you may notice roots peeking through the topsoil, possibly before they pop out the bottom of the container. Growing upwards is certainly not a common practice for roots and tells you they have no more room at the bottom of the container, looking for room at the top instead.
Circling roots at the top can also cause a phenomenon known as girdling. In girdling, the plant strangles its own mainstem by encircling it with roots. Needless to say, this isn’t ideal!
This can also be caused by shallow watering; in other words, watering only the top layer of soil without saturating it completely. If you only add small amounts of water at a time, this may be the culprit rather than a lack of space. Make sure you water thoroughly until moisture runs through the drainage holes to ensure you’re watering sufficiently.
Dry Soil
 Recurring dry soil signals potential poor soil structure, impacting root health and growth.
Dry soil is usually a sign that your houseplant is lacking water. Noticing the dry soil, you probably decide to water, perhaps bottom watering, to fully saturate the soil without moisture running down the sides. But what happens if the soil is unusually dry again just a few days later?
This is a sign of poor soil structure. The soil in containers disintegrates over time, losing its ability to hold onto moisture and nutrients. This negatively impacts root health and growth above the soil, leading to wilting and discoloration.
Underwatering is the first concern to address. But if that’s not the issue, it may be time for a soil refresh.
Stunted Growth
 When roots are constricted, it can be challenging to diagnose without extracting the plant from its pot.
When roots start wrapping around each other with nowhere else to go, it makes sense that you won’t spot any new leaf or stem growth either. The roots support growth above the soil, so if they’re stuck, the rest of the plant will be too.
Stunted growth is difficult to diagnose. For one, your plant won’t always rapidly produce new leaves and stems. Some plants grow slower than others, making stunted growth difficult to identify.
Lack of growth also has many causes – not just lack of space. Inadequate lighting, sudden changes in environment, cold temperatures, or inconsistent watering are some of the most common reasons for stunted growth.
Lifting your plant out of its pot is the easiest way to tell if it’s constricted. This is tricky for larger houseplants, but it is the best way to look closely at the roots. If they are crowded and overgrown, repot. If not, look for other potential causes first to avoid compounding the stress.
Discoloration
 Repotting should be considered when problems like pests or root rot are detected.
Browning and yellowing leaves are another sign that your plant is struggling. These could be caused by incorrect conditions or care but can also indicate when your plant needs more room or better soil. Start by pruning these off, then check the roots to decide whether it’s time to repot or not.
If pests or diseases are causing the discoloration, repotting may still be the answer, even if the plant doesn’t need more space. Many houseplant pests can hide in the soil, where they reproduce and spread to other plants. Conditions like root rot must also be resolved by repotting to remove the problematic fungus.
Detective work will help you find the root cause. Like stunted growth, you don’t want to repot and increase stress if there is a different cause.
How To Repot Houseplants
 Repotting is ideally done outdoors for easy clean-up.
Once you’ve determined it’s time to repot, you can follow these easy steps to get it right. Although it may seem like a tedious task compared to things like watering, it can be quite therapeutic. Consider it a time to bond with your houseplants and improve their health rather than a chore.
My first recommendation is always to repot outside if you can. Even if you try to contain the soil as much as possible, repotting is messy. If you don’t have any outdoor space, lay down some newspaper to catch the soil, making clean-up painless.
Choose A New Container
 When repotting, select a container only one or two sizes larger than the current one.
Before you touch any of your houseplants, you’ll need to find their new container. Although design and material always play a role, size is the most important consideration when repotting. Unfortunately, it is also something gardeners often get wrong.
If you assume choosing a much larger pot will help your houseplants grow quicker, I’m here to dispel that myth. Containers that are too large actually inhibit growth and can even lead to fungal growth thanks to the extra soil (and therefore extra moisture) around the roots.
For most houseplants, choose a container around one or two sizes up. This can be adjusted based on the growth stage – for example, a smaller Monstera can grow quite large in a few months in the right conditions, possibly requiring a slightly larger container. But generally, go two sizes up at most to avoid stunting growth.
If you’re only repotting to replenish the soil and your plant hasn’t grown much, you can remove the old soil and replant in the same container. You may also want to trim the roots to reinvigorate them before planting in the new soil.
Prepare Your Soil Mix
 Choose a soil mix tailored to your houseplant’s specific needs.
Speaking of soil, the next thing to consider is soil mix. Houseplants are quite particular about the soil they grow in and don’t appreciate changes in conditions. You can’t just gather any soil from the garden and hope for the best.
Tropical houseplants generally require a light and airy houseplant mixture to prevent chances of rot. My standard mix is two parts potting soil, one part coconut coir, and one part perlite, but you can adjust the ratios as needed.
Succulent plants have slightly different requirements. To match the dry and gritty conditions in their native habitats, look for a specialized succulent and cacti mix that drains quickly.
Orchids also have different preferences, growing best in orchid bark to suit their typically epiphytic roots. They need extremely good drainage, and the damp orchid bark is often enough to satisfy them.
Research the needs of your houseplants before deciding on a soil mix. You can also look at the existing soil mix to decide on the ideal components, limiting potential issues with transplant shock.
Remove The Plant
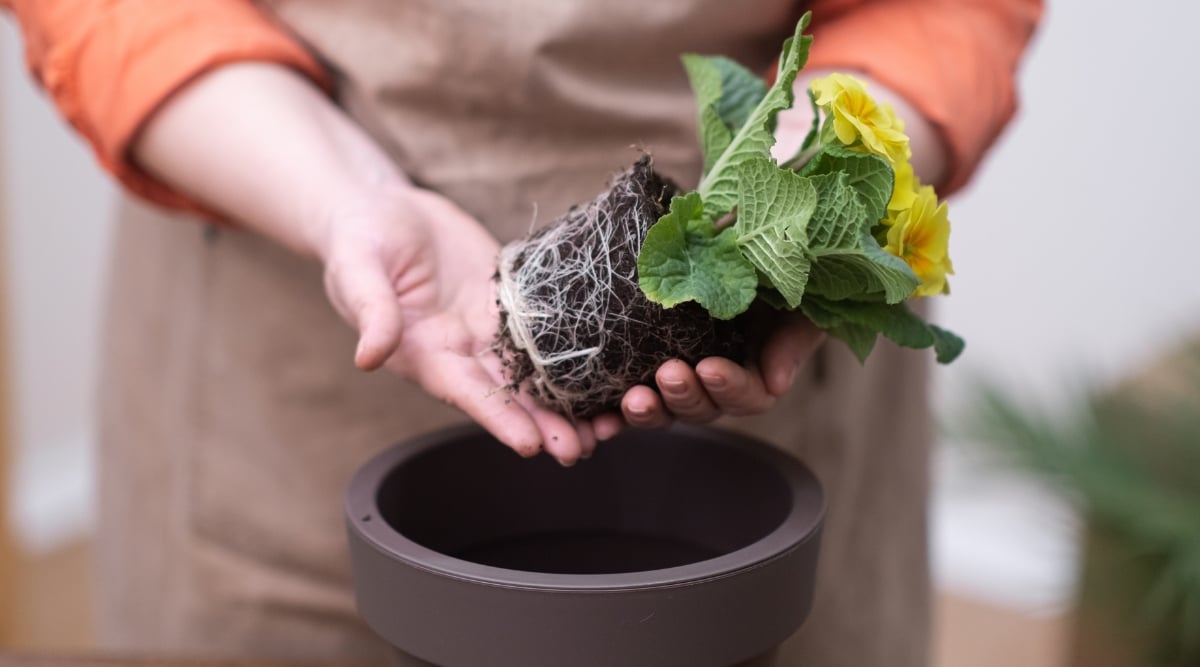 To remove the plant from its current container, gently shake it out by turning the pot on its side.
With the preparation out of the way, you can finally get into the nitty gritty of repotting. This starts with the simplest task – removing the plant from its current container.
If your houseplants are quite overgrown, they’ll usually pop right out of the container without any issues. Make sure you lift from the base, avoiding grabbing the stems and leaves. The less damage you do when repotting, the quicker the plant will recover.
Houseplants may get stuck in their containers, making them tougher to remove. I find this happens often with terracotta pots, rather than plastic, where the plant slips right out. If this is the case, you can run a knife along the edge of the pot to release the roots or gently squeeze the sides if the pot is malleable.
If there is resistance, don’t pull from the top. The last thing you want to do is separate the stems from the root system by pulling too hard. Instead, turn the pot on its side and gently shake the plant out without pulling.
Tease The Roots
 Remove old soil and trim damaged roots to promote new, healthy growth.
The next step is crucial, especially if the roots are wrapped around each other.
Pull the roots apart with your fingers, using a gentle raking motion to loosen them. This will help them grow downwards and outwards into the new soil rather than staying stuck where they are. Also, tease the roots on the side – you want these to grow outwards too.
While you’re teasing the roots, remove some of the old soil around the roots. This makes way for fresh and high-quality potting soil while giving you a closer look at the root system.
Take the opportunity to inspect the roots for signs of damage. Trim any dead or mushy roots, removing damage and helping the plant produce new and healthy roots to fuel growth.
Transplant
 When transplanting, fill gaps with soil and gently press around the plant to settle without compacting.
When you’re ready to pot up, fill the bottom of the container with a bit of soil, ensuring the base of the plant will sit just below the rim of the pot. To stop soil from spilling out the bottom, cover the drainage holes with coffee filters. This allows excess moisture to drain through but prevents the soil from dropping out.
Lower the plant inside the pot and fill in the surrounding gaps with more soil mix. You want to fill up to the same soil line the plant was previously. Covering the stems and leaves or leaving them more exposed will lead to problems with growth.
Fill the pot up to just below the rim of the container. You don’t want to fill it to the very top as this will cause soil to spill out when you water for the first time. Leave a little breathing room to avoid unnecessary mess.
Once you’ve filled the container, press gently around the base of the plant to settle it in place. This removes any large air pockets and lets you know if you need to add more soil. Don’t push too hard – you don’t want to compact the soil.
Water Immediately
 Water newly repotted plants thoroughly to settle the roots.
When you’re done repotting, it’s important to water your plants to saturate the soil and settle the roots. Since they don’t like being exposed to the air, watering will help them establish in the new soil, boosting new growth.
You can wait a few days before watering succulent plants like Echeveria or Aloe, as they prefer dry soil conditions. However, in these cases, the potting soil should be slightly damp before planting so they aren’t left completely without moisture.
Replace The Plant
 Returning your plant to its original location after repotting promotes faster recovery.
Once you’ve finished repotting (and cleaned up the mess), move your plant back to where it was originally. The fewer changes in conditions the plant experiences after repotting, the faster it will bounce back.
Final Thoughts
Repotting is a houseplant care task that can’t be skipped, no matter what you’re growing. But if you understand your plant’s needs and follow these easy steps, you won’t have any trouble getting it right.