One of the most familiar flowering vines for home gardeners is the clematis. These climbing plants are justifiably popular because they are readily available, prolific bloomers, tolerant of various growing conditions, and quite hardy. Luckily, it’s also very easy to propagate clematis by cutting, so you can multiply your plants cheaply.
While this vine can be propagated from seed, the offspring produced will be unlikely to look like the parent plant. Many hybrids do not breed true, and cross-pollination creates new variations. If you have a clematis vine and want to propagate it, growing new plants from cuttings is a simple and reliable method.
About Clematis
Clematis is a large group of plants with many beautiful cultivars. There are over 250 species, with many hybrids and cultivars. Depending on the variety, showy flowers bloom in many colors from spring through fall.
These vines climb freely on a trellis, fence, wall, arbor, or other support structure. Most varieties are deciduous and lose their leaves each fall, but a few species are evergreen, staying green throughout the winter. However, these vigorous vines can also be invasive in some regions, such as the Pacific Northwest.
Clematis plants are members of the Buttercup family. This is a widespread genus with species native to North America, Asia, and Europe. As it has gained popularity as a garden plant, it is primarily used and appreciated for its annual showy flower display. As an ornamental vine, it is very worthy of consideration in a home landscape, flower garden, or as a vining accent plant.
How to Propagate Clematis by Cuttings
Late spring to early summer is the ideal time to propagate clematis.
The best time of year to propagate clematis by cuttings is late spring to early summer. This is a time of year when your plants grow with the most vigor, and you will have a great chance to take quality softwood cuttings. Try to time your cuttings until after the plant has started producing fresh new growth, but shortly before it begins to bloom.
The hardest thing to do is wait patiently for your cuttings to grow roots. It’s important to note that not every cutting will take root, so you should plan to take more cuts than you need.
Carefully read through these instructions in advance so you have time to prepare everything you will need. Plan to take your cuttings and plant them quickly to increase your chances of success. Have your supplies ready, including:
- Clean, sanitized cutting tools (we love these Felco pruners)
- Rooting hormone
- Several small pots filled with soil
Step 1: Choose Your Vines
 When propagating a clematis plant, choose strong and healthy stems.
The first thing you will want to do is choose a strong and healthy plant to propagate. Select a variety that you like and want to make more of. If you have friends or neighbors who grow clematis, you could arrange a “cutting swap” so everyone gets some new varieties to grow and enjoy.
Do not propagate the invasive sweet autumn clematis, Clematis ternifolia, as it has a very aggressive growth habit. It is considered invasive in many southern or southeastern states and borderline invasive in even more.
Choose an established vine at least 2 years old. Identify a few vine sections that are half green. You don’t want the freshest greenest tips, nor do you want brown and woody stems. You are looking for something in between. They should look fresh, healthy, and mostly green. Do not choose sections of the vine with well-developed flower buds or actively blooming flowers. You want a length of healthy stem with leaves.
Step 2: Take and Prepare Several Cuttings
 Choose small sections from healthy, vigorous stems when cutting a clematis plant.
Using sharp scissors or sharp pruners, remove a 2-3 foot section of vine just above a leaf node or joint. After a cut, immediately put the freshly cut stem into a cup of water or wrap it in a moist paper towel to keep it moist and minimize shock. Take at least two different vine cuttings, more than you think you will need, because it’s likely that some will die without taking root.
Bring your cuttings inside. Lay your length of stem on a flat work surface. Don’t use the greenest tips of the vine sections you selected, as they will be too young to sprout and grow roots. Look instead at the lower, older ends of the vines, towards the end where you made the cut. You will now choose several small sections to grow.
The part that you will actually plant is just a short section. This section should include one leaf node with leaves attached. Cut off the rest of the vine 1 inch above the leaf node and 2-3 inches below the leaf node.
If you started with a 2 to 3-foot section of vine, you should be able to select several cutting starts from this one vine section. Again, prepare more cuttings than you think you will need because some of them will probably not develop roots.
Step 3: Apply Rooting Hormones
 Using rooting hormone on cuttings increases the likelihood of successful root growth.
Place a small amount of powdered rooting hormone on a small dish or tray. Don’t dip the cuttings directly into the original rooting hormone container to avoid contamination. Dampen the end of the cutting with a little water to help the powder adhere, then dip or rub the powder on the lower 2 inches of the stem of each section that you want to grow.
While cuttings can sprout without using rooting hormone, it will help increase your chances of rooting success. Rooting hormone powder is designed to stimulate root growth. There’s no guarantee that all cuttings will succeed, but rooting hormones help.
Step 4: Plant the Cuttings
 To propagate clematis cuttings successfully, use a high-quality potting mix.
The best way to root these cuttings is in the soil, specifically in a high-quality potting mix. Although rooting vine tip cuttings in water is possible, it is less ideal. Prepare your pot or pots in advance to ensure they are ready to use when you take the cuttings.
You need a small 3-4-inch pot for each cutting. Use a pot with good drainage holes because you never want your clematis to sit in soggy soil. Fill the small pot (or pots) with high-quality potting soil. Soil should be loose, light, and well-drained.
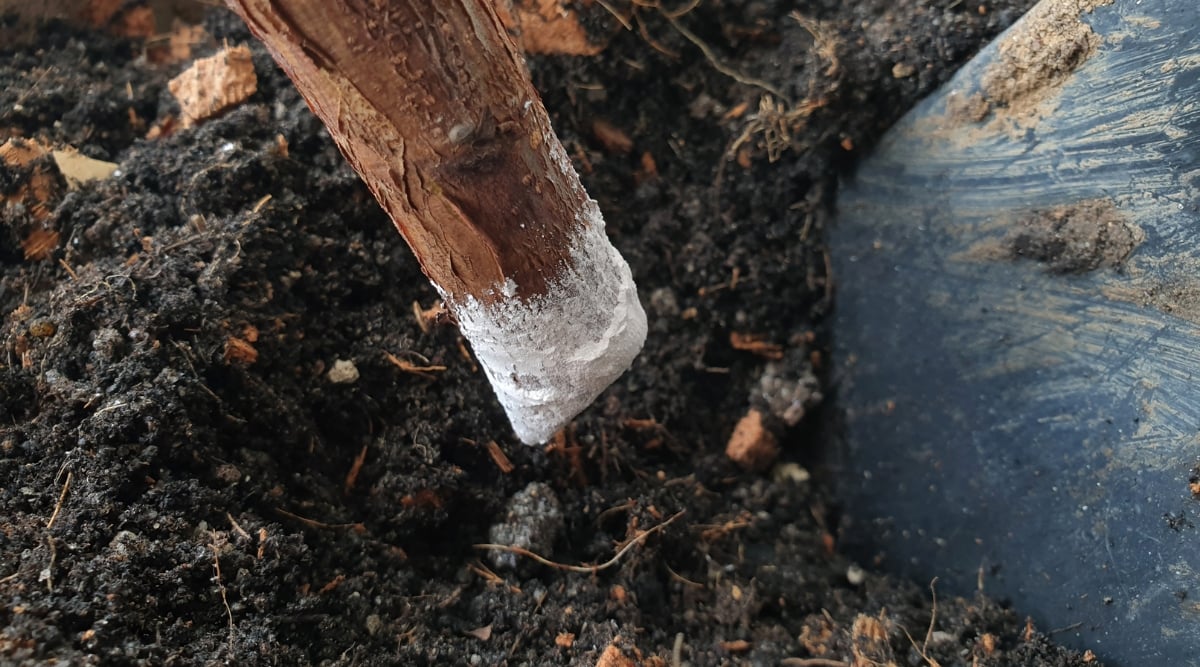
Water the soil with just enough water to make the soil uniformly moist but not wet. Use a dibbler tool (or a chopstick, thin towel rod, or pencil) to make a narrow hole approximately 2 inches deep.
When your stem cuttings are prepared and dusted with rooting hormone powder, carefully insert the stem sections into the prepared holes. Insert the cuttings up to the leaf joint, but not past the joint, and cover the base of the stem with potting soil so the section with the rooting hormone is planted and covered with soil.
You can place multiple stems per pot at least 1-2 inches apart. They only need enough space to be in the soil and have a chance to start growing roots. Later, you will transplant the successful cuttings into separate pots where they will have more individual space to grow.
Step 5: Keep The Soil Moist
 The stems must remain consistently moist throughout the process.
Using room temperature water, water the soil in the pot until it is thoroughly and uniformly moist but not fully saturated and wet. The stems need to stay moist the entire time they are rooting. If they are allowed to dry out, they will not have a chance to root.
You can create little greenhouses if you think the soil will dry too quickly in your small rooting pots. Place the potted cuttings in a mini propagation dome, clear bag, or transparent container.
While it isn’t necessary to create greenhouses, if the air is dry and you are afraid the soil will dry too quickly, mini greenhouses are very effective in helping retain moisture. Avoid letting the plastic directly contact the cutting’s leaves; it should surround it but not rest directly on top of the cutting.
Step 6: Wait For Roots To Develop
 Check your cutting pots daily, keeping them in a warm, well-lit place but not in direct sunlight.
Keep the cuttings in a warm spot. Put them in a location with some light, but not in direct sunlight. Check your cutting pots every day. You must keep them moist and don’t allow them to dry out.
If you made mini-greenhouses, open the bags or containers daily to allow for some air circulation. Also, make sure the leaves aren’t pressing against the sides of your greenhouse containers, or they may stay too wet and start to rot.
If you accidentally water too much and the soil gets soggy, leave the greenhouse open until some extra moisture evaporates. Ensure that the enclosed plants aren’t in direct sunlight, which can heat them too much.
New roots should form within 4-5 weeks if the cutting succeeds. You can expect to wait at least a month or two for your cuttings to grow some decent roots.
As long as the cuttings still look green and healthy, continue waiting and keep them moist until about 6-8 weeks after planting the initial cuttings. Any cutting sections that turn brown should be removed promptly.
Step 7: Transplanting
 After approximately 6-8 weeks, your cuttings should develop roots and be ready for transplantation.
Hopefully, after about 6-8 weeks, some of your cuttings will have sprouted roots and are ready to be transplanted. Obviously, you won’t be able to see new roots forming below the soil’s surface, so you’ll have to check for rooting in other ways.
Check the bottom of the pot and see if any roots are trying to grow out of the drainage holes. You can also try giving a very gentle tug on each cutting after about 6 weeks and see if there is any resistance. If there is, that’s a good sign that your cutting is growing roots. Don’t tug too hard; you don’t want to pull them out and risk damaging any delicate, newly-grown roots.
If any of the stems are still completely smooth after 6-8 weeks, they are probably unlikely to grow new roots. Discard any specimens with smooth stems or brown coloration with no roots. Any cuttings that did form roots are now ready to be transplanted.
When you’ve determined which cuttings have sprouted new roots, you can now carefully transplant these into individual pots. Use pots that are 4-6 inches across with good drainage holes. Again, use good quality potting soil and keep the roots moist but not wet. Put them in a bright spot but not in direct sunlight and allow them to continue growing, developing a strong root system, and getting stronger.
Congratulations! You have now successfully propagated your clematis!
Next Steps
 Choose a sunny spot with well-drained soil for young plants.
Give your young clematis plants time to get established in their new individual pots. You can keep them growing in these pots until the following spring when they will be fully ready to be transplanted outside in their new homes. Protect them during their first winter by placing them in a greenhouse or cold frame, if possible.
As you select a permanent home for your young clematis, choose a sunny location with rich, well-drained soil. Put them where you can keep an eye on the soil and ensure they get regular watering, as clematis don’t like to dry out too much. Also, give them a trellis or other structure to grow on because these vines like to climb!
Final Thoughts
Clematis is a beautiful and hardy vine to grow in your home landscape. With a little care and some regular maintenance, they will thrive and bloom prolifically. Whether you want to propagate your plants for personal use or to share with friends, growing new plants from cuttings is relatively simple and inexpensive. It can be quite enjoyable to start new plants in this way and watch them grow.
Just remember these basic steps:
- Choose healthy, actively growing vine segments in spring or early summer
- Prepare several cuttings for a higher success rate
- Use rooting hormones to boost root growth
- Plant in good potting soil
- Keep soil moist at all times
- Wait patiently for roots to sprout
- Transplant cuttings that have successfully rooted
When your new clematis seedlings are successfully growing in their pots, give them a year to get established before planting them out in a sunny spot with a trellis or other growing support. Then enjoy your bounty of new flowers!