Unfortunately, I was not blessed with the virtue of patience. Learning to be patient is one of the greatest lessons I've learned from gardening. As a gardener in Zone 5b, however, my patience is constantly being tested.
When we moved to Illinois, I joked with my husband that winter starts in October and ends in April. After living here for a few years, I can testify that eternal winter is not a joke! Not only is winter sowing in my part of the world a way for me to get my gardening in order sooner, but I think there is a real need to extend my growing season.
Many gardeners around the world have learned about the winter sowing method and would like to pass on their knowledge. I strongly recommend joining the Winter Seeding Communities online (e.g. on Facebook) where you can ask specific questions about the local climate and specific plants. Many members have even put together extensive tables showing what works and what doesn't. This is an invaluable resource for the entire community. There are even funny memes circulating that get us through our winter blues.
Good products to prepare for winter sowing:
What is winter seed?
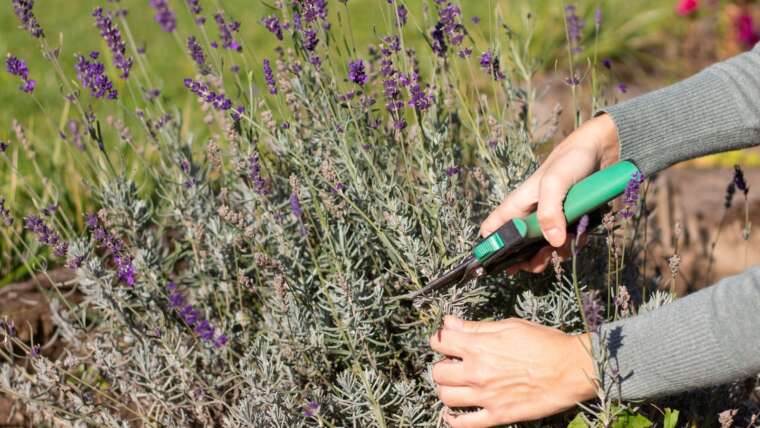
 The winter sowing starts your garden year early. Source: Huan Song
As the name suggests, winter sowing sows seeds in winter. If your winters are as long as mine, it could mean that you will start seeding in January. The special thing about winter sowing compared to direct sowing is that you do not place your seeds in the final growing space like a raised bed or a container, but rather sow them in a mini greenhouse before transplanting them in spring.
Winter sowing is a season extension option for gardeners living in colder climates where the soil can be frozen for many months. You may not need to sow in winter if you already live in a warm climate that allows you to grow plants outdoors all year round.
Advantages of winter sowing
Winter sowing offers a number of major advantages. I live in a rented townhouse that has no room inside to grow lights. However, I have a small patio that I can place these mini greenhouses for the winter so they don't clutter the interior of my home. I also don't have to worry about buying shelves or playing for extra power to power my grow lights. I have also seen this space-saving tip online from master gardeners who may have to keep a lot of seedlings ready for outreach events in the spring and cannot keep up with this demand without winter seeding.
The upfront cost of launching seeds outdoors is close to zero. When I mentioned miniature greenhouses, I used recycled clear or translucent plastic bottles to create a tiny outdoor microclimate that is more conducive to germination. The bottom inside can heat up faster and the enclosed sides of these bottles offer some protection against the elements. Most people who sow in winter will upcycle plastic bottles or jugs. Your typical 1 gallon milk jug or distilled water jug is the perfect material.
Finally, seeds started outdoors by the winter sowing method tend to be harder than seeds started indoors. They don't have to go through the curing process and can be immediately transplanted in their permanent location as they are used to being outdoors.
Choosing the right plants
Not every plant is suitable for this type of sowing. If we look at Nature's method, we can see that many perennials and self-sowing annuals don't need any extra help from us gardeners to get back on their feet after winter. These plants are perfect candidates for winter sowing.
Check your seed package for information on a particular plant and look out for clues such as “frost tolerant”, “perennial”, “hardy” or “self-sowing” as indicators that this plant can be sown in winter. Native species from your area are also good choices as they are well adapted to your climate. Varieties with winter-related words in their names, such as Giants of Winter Spinach, are also likely to thrive using this method.
Another tip is to look for plants with seeds that need scarification. In scarification, the outer seed coat is broken open so that the seeds can germinate. When you use the winter seed sowing method, freezing and thawing your soil will naturally damage the seeds for you so you don't have to do this manually.
Choose the right time to start winter sowing
Although I have difficulty being patient with gardening, I will withhold winter sowing until January, even though my growing season ends in October of the previous year. This is because there can be some unusually warm weeks from October to December where my seeds can germinate prematurely and then kill them when the real cold sets in. The coldest month in winter for me is late winter in February. We only recently received over a meter of snow and had temperatures around 20 degrees Fahrenheit consistently.
Another personal consideration for me is the time it will take to gather my supplies. I usually only use recycled milk jugs or 2 liter soda bottles and just don't go through them fast enough. I will be postponing my winter sowing every couple of weeks from mid-January to March so that I have enough time to gather my materials.
How to sow seeds in winter
 You will need some basic supplies to get started. Source: Huan Song
Step 1. Gather your materials
You will need the following materials:
- Clear or translucent plastic bottles. Gallon milk jugs or soda bottles are great. You can even use larger containers like translucent cat litter jars if these are available for you.
- Soap and a bottle brush to wash out your jugs.
- Adhesive tape or packaging tapes that are really sturdy.
- A ruler that you can use to measure the amount of soil you need to put in your pitcher (4 inches).
- Plastic plant tags. I've upcycled some made from household plastics like yogurt containers. You need plastic labels so that they do not rot or mold over time in the jugs sown in winter.
- A sharpie or other permanent writing tool so you can remember what you planted and when you planted it.
- Scissors or a really sharp knife to cut open the bottles and add drainage holes.
- Potting soil
- Plant seeds
- Vermiculite (optional). I am testing this method this year and using vermiculite on some of my pitchers to aid in moisture control.
- Coffee filter (optional). Coffee filters can be used to line the bottom of the jugs to prevent your potting soil from falling out of the jugs and allowing potential snails to enter in the spring.
Step 2. Prepare your pitchers
 Pierce the bottom for drainage. Source: Huan Song
If you use jugs that have previously contained a liquid such as milk or soda, be sure to wash them thoroughly! Some winter seeders suggest talking to friends who might be using CPAP machines that need distilled water or going to dentists who use distilled water to get bottles that don't need this step. For me, I washed my bottles thoroughly with hot water and soap and cleaned everything thoroughly with a bottle brush. I recommend washing the bottles before you cut them open and then again afterwards.
Use scissors, a sharp knife, or a soldering tool to create some drainage holes in the bottle of your jug. I find this step a lot easier before you cut the pitcher.
 Cut off the milk container but leave it attached to one side. Source: Huan Song
Use a ruler and measure four inches up from the bottom of the jug. If you are using a milk jug, it should come right under the handle. Make a mark and cut all the way around the jug, leaving a small tab connecting the bottom and top. I found that using scissors gives me good control during this process. I'll go back with more soap, hot water, and my bottle brush to clean it all up again.
Step 3. Sow your seeds
 Once soil is added, sow your seeds in the container. Source: Huan Song
This process is very similar to the regulation of sowing. Line the bottom of your pitcher with an unbleached coffee filter if you are concerned about creating a mess indoors or if you are concerned about possible problems with snails in the spring. Fill your pitcher almost to the opening with moistened potting soil and sprinkle your seeds inside. There is some debate about how densely you should sow. I wouldn't sow as densely as microgreens, but I want to get as many seedlings out of my pitcher as possible. During this step, paste your plastic plant label into the pitcher.
Cover the surface with a thin layer of soil and an optional layer of vermiculite to aid in moisture control.
Write the date of sowing and the variety on the tape that runs around the jug. This way you can reuse your pitcher the following year without confusing the labels on the plastic. Seal the jug all around.
Step 4. Place outdoors and wait
 Cover the container with tape and mark the plant on the tape. Source: Huan Song
This is the hardest part of winter sowing! I put my bottles outside next to my raised bed. As you can see in the previous photo, I use a combination of different juice, soda and milk jugs. Don't put the caps back on the bottles as this top opening will ventilate your mini greenhouse and allow rain and snow to water the seedlings. You may need to check your bottles and water them as needed in case you don't get a lot of rainfall. The seeds will take some time to germinate. For the seeds that I sown in mid-January, I assume they will germinate in mid-to-late March.
Winter sowing is a great way to do a bit of gardening, even if we can't really work outside. This is an easy and inexpensive way to start some seedlings. Combined with other methods of extending the season such as growing under non-woven fabric, hoop houses, or low tunnels, this can really help cold climates gardeners get the most out of our year.
frequently asked Questions
Q: Where can I collect pitchers for winter sowing?
A: Collecting pitchers can definitely be a challenge! Talk to your neighbors, friends, or family about how to get their bottles. You can try talking to local cafes about their milk jugs or dentists' offices about distilled water jugs. Alternatively, in the run-up to winter sowing, you can save your own household bottles ahead of time. Remember this is an upfront investment as these bottles can be reused for years to come.
Q: Can flowers be sown in winter?
A: Yes! Many flowers and vegetables can be sown in winter. Check out Winter Sow's Facebook group for inspiration and success stories based on your local climate and zone.
Q: Do I have to water my pitchers?
A: It depends on your local climate. Take care of your pitchers to make sure they have a constant level of moisture. Water the jugs as needed if you think they might dry out.
The green fingers behind this article: